In this blog, we will be learning about ‘All the Healing tools in Photoshop‘, ‘Clone stamp tool in photoshop’ and ‘Pattern Stamp tool in photoshop’. I am Lalit Adhikari and we are at LTY. Let’s begin.
Table of Contents
Introduction to Healing Tools
Firstly giving credit to the image used in cover artwork. The girl’s image has been downloaded from Freepik by me.
Few of the most important tools in Adobe Photoshop are Healing tools and probably the most used one in the whole software.
Healing tools in the Adobe Photoshop software is used by different industries for various purposes, starting from retouching the raw images of products like dress and shoes, up to the images of most appetizing cuisines that we’ve ever seen.
These tools are frequently and efficiently used by huge fashion magazines like Marie Claire, Vogue, Harper Bazaar and much more to retouch the raw images of their fashion photo-shoots.
The images of airbrushed models we see on magazine, billboards, and banners are highly manipulated before using it for further advertisements and marketing. These tools are mainly used for retouching purposes i.e., applying the finishing touch-ups.
Now-a-days, it has become quite important to retouch images of the products which are going to be launched in the market as it creates an impression of high quality and value.
Related Topics:
- How to use Gradient Tool in Photoshop
- Burn, Dodge & Sponge Tool in Photoshop
- Blur, Sharpen & Smudge Tool in Photoshop
There are mainly five types of healing tools in Adobe Photoshop:
- Spot Healing brush tool
- Healing brush tool
- Patch tool
- Content-Aware Move Tool
- Red Eye tool

And two other additional tools are:
- Clone Stamp Tool
- Pattern Stamp Tool

Related Topics:
Spot Healing Brush Tool
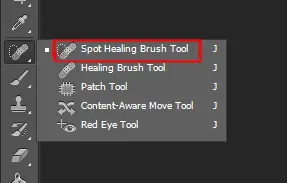
It is the first tool in the fly-out menu of healing tools which is also set as a default healing tool. This tool is generally used to blend the pixels of the image with the target or selected area form the sampled area or the rest of the image.
Whenever we apply the healing brush tool to the image, the texture of the image gets blended with lighting and color of the image. This tool is mainly used to remove blemishes and unknown spots.
This tool doesn’t work properly when painted over larger areas in one go. To make it work efficiently, we have to apply it to smaller areas at a time.
- This tool removes the defective pixels. So to use this tool we only have to click on that blemish that we want to remove. This mode is often called “proximity match mode”. As it analyses the data where we are painting and recognizes the most suitable area from which the texture will be sampled.
- Another mode of using the spot healing brush tool is “create texture”. In this mode the healing tool analyses the data surrounding the particular area that we are trying to repair. After it reads the data, the tool automatically generates a texture that is created from the sampled data.
- The third mode of using the spot healing brush tool is Content-Aware fill mode and it is the default option in mode panel. In this option, there are different blend modes which we can work on. For example, in “normal” blend mode this tool scatters the edge of the “defective area” very smoothly with the surrounding. In another mode called “replace”, this tool starts to behave like the clone stamp tool, so the hardness of the brush should be very low. There are also other modes like multiply, screen, darken, lighten, color and luminosity. But these are very rarely used.
Related Topics:
Healing Brush Tool
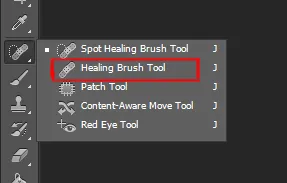
This tool is the second option in the list of healing tools. It works in the same way as spot healing brush tool.
This brush tool works by sampling the texture of the source and blending it with the pixels of sampled texture while maintaining the color and luminosity that surrounds the point where it is working on.
By analyzing the pixels outside the source point, this tool determines the transition of lighting and color within the area that is being painted. There is no necessity of using a feathered brush in the healing brush tool.
We can get our desired results by using only the hard edge brush because this tool works on the pixels with a feathered radius that is approximately 15% outside the area of healing brush cursor.
Why Healing Brush fails sometimes
There are sometimes when healing brush doesn’t work as it should. When there is an end of an image or a sudden shift of lighting, this tool tries to create a blend that is considered outside the target area.
So, to avoid this problem we can create a selection where we need to retouch and then can start working on it.
How the Healing Brush Tool works
It works in the same way as spot healing brush. The only difference is that this tool needs a source point to work from. To capture a source point we press the Alt button on the keyboard and then can start applying brush strokes.
Related Topics:
Patch Tool
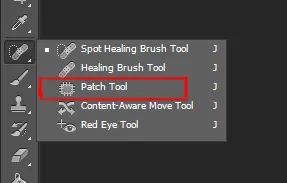
Patch tool is the third option in the list of healing tools. This particular tool removes those elements which we consider unwanted in the image. This tool works by creating a blending of the image very smoothly with its surrounding contents.
This tool has a special advantage, as it provides flexibility to choose our source area. But in patch tool instead of using a brush tip, it uses proper selection defined areas.
This tool is very preferable when it is used to remove spots and blemishes from a larger area. Therefore, it can very quickly retouch images in a small amount of time.
How to use Patch Tool
To use patch tool we can loosely make a selection of the area we want to “patch”. Now, the patch tool can be used as a lasso tool to make the desired selection. Then we can drag the selection over the area with which we want to patch.
As we drag the selection it will simultaneously create another second selection, where we can see the live preview of the original patch selection. This process will only happen if we do this without releasing the hold of the mouse.
There are some other options for the patch tool
- Destination: We use this option for patching whenever we need to replace the selection with the destination area.
- Source: We use this option for patching when we want to replicate the pixels of the source area.
- Transparency: If we use this option for patching, it will only preserve the lighting or luminosity of the selected area.
Related Topics:
Content-Aware Move Tool

This tool is the fourth option in the list of healing tools in Adobe Photoshop. This tool works in a similar way as the Patch Tool. It can manipulate the selected area to make the object look shorter, thinner or even move it to the desired place.
Therefore, it allows us to manually reshape the sample image.
How to Use the Content-Aware Move Tool
Like Patch tool, this will only work if we click and drag the mouse. Draw a rough outline around an object in an image by selecting “sample all layer” at the option bar and create a new empty layer to carry out this process further.
Then our editing will be non-destructive means our original image will not get manipulated.
There are many adaptations in which we can carry out our editing like very strict, strict, medium, loose and very loose. Among which medium is set as the default option, we can access into this adaptation method according to our editing.
There are two different modes for using content aware move tool
- Move: This is a default mode and it is generally used when we have to place the object or selected area in a different location without disturbing the background.
- Extend: In this mode, we can move the areas that we’ve selected and blended it with the original image. As we create a new blend, it automatically creates a content aware fill on the selected area with its surroundings.
Related Topics:
Red Eye Tool
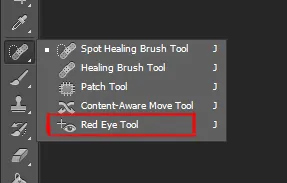
It is the last option in the list of healing tools that are available in Adobe Photoshop.
What is the Red Eye?
Sometimes, when we click anyone’s picture in the darkroom, their pupils might appear red rather than being its natural color. And the red eye tool is the best option to fix these kinds of problems.
- When a photo is clicked in dim light using flash, the light from the camera hits the pupil of the subject. And as the light penetrates through the blood vessels, it gets reflected through the camera lens thus giving the pupil a reddish glow.
- By red-eye tool, we can quickly remove this glow and give the eye its natural black color.
How to use the Red Eye Tool
To use this tool we can simply click on the red pupil and it will automatically fix the problem. Adobe Photoshop auto selects the affected area and fixes that. Depending on the color of the photo and intensity of redness, we might have to click the red-eye more than one time.
There are two options inside this tool:
- Pupil Size: – This is a slider which adjusts the area where the tool will be applied.
- Darken Amount: – This is also, a slider which adjusts the lightness or darkness of the result.
Related Topics:
Clone Stamp Tool
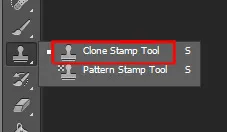
This tool has the ability to replicate any part of the sample image. The principle of this tool is that it requires a source point which will be taken as a reference to create a newly cloned area.
Like the patch tool and healing brush tool, we need to set a source of this image by holding “alt” key on the keyboard. Then it will automatically start replicating the cloned area over the target or destination.
Thus, pixels of the source will get transferred to the destination. We can use any brush settings in the clone stamp tool to apply the cloning effect.
options bar under the sample menu
- Current Layer: – When we select the current layer option, the tool ignores the pixels and its information that is presented in other layers.
- Current layer and below: – When we select this option the tool selects all the layers along with other layers for sampling the pixels.
- All Layers: – In this option the tool analyses every visible pixel of the document irrespective of any layers for further sampling.
Related Topics:
- How to Create Rain Effect in Photoshop
- How to Add Falling Snow in Photoshop
- Step by Step guide for Retro 3D Movie Effect in Photoshop
Pattern Stamp Tool
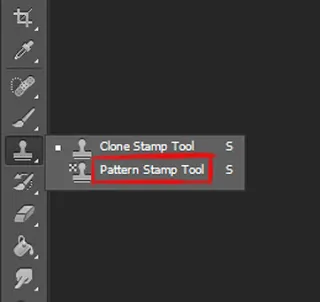
Pattern stamp tool is generally used to make texture and design in backgrounds of our images.
Using this tool we can make our own pattern and fill it in our own image.
To apply this tool we can choose any brush setting that we want to create our own desired design.
Related Topics:
Healing & Coloring Ranch House in Photoshop
Healing of the Ranch House in Adobe Photoshop, is a Screen Recorded Video of a Professional Graphic Designer, healing and then retouching it in Adobe Photoshop.
You can read the description of all the healing tools in Adobe Photoshop above.
Related Topics:
- Fade Command in Edit menu in Photoshop
- Search in Photoshop
- Check Spelling in Photoshop
- Find and Replace Text in Photoshop
- Fill in Photoshop
- Stroke in Photoshop
- Content-Aware Fill in Photoshop
- Content-Aware Scale in Photoshop
- Puppet Warp in Photoshop
- Perspective Warp in Photoshop




Thank you for such a comprehensive tutorial, this is super helpful for someone who’s getting into image editing!
Making a clone is an easy task in Photoshop since we got clone stamp tool. This post is useful and giving informative insights related to clone stamp tool.
Now I love these tools!
I always use Patch tool to remove unnecessary areas from the image. Thanks for explaining more about it.
Healing made simple! Thank you.
Thank you! Great Info!
Thank you. It had helped a lot with my assignment!
This is a great help sir! Thank you.
Thanks, it is a great help!
Thanks
Thanks! Nice read.
Thank you…