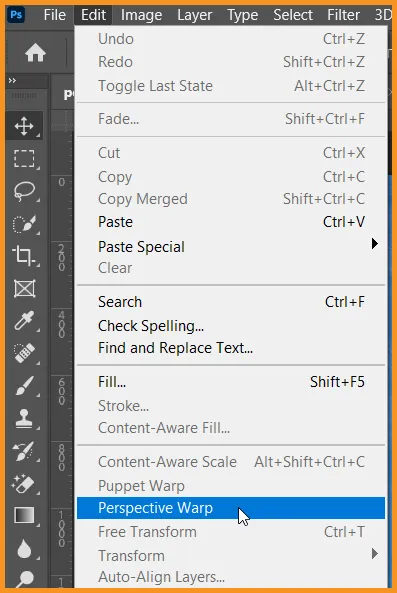
In this Photoshop Lesson, we’ll learn about ‘Perspective Warp in Photoshop‘. Perspective Warp command is found under Edit menu in Photoshop.
My name is Lalit Adhikari and we are at LTY. Let’s begin!
Table of Contents
What is Perspective Warp
Perspective Warp in Photoshop, let us easily adjust the perspective of our images. This is particularly useful for images having straight lines or flat surfaces.
For Example: Architectural images or images of buildings.
We can also use it to composite objects having different perspectives in a single image.
Understanding Perspective Change
Any object will look different in an image from how that object appears in real life. This mismatch of reality and image is due to perspective distortion.
Images of a same object, when captured from different camera angles of view and distances, will exhibit different perspective distortion.
Related Topics:
Why Perspective Warp isn’t working
Perspective Warp in Photoshop requires at least 512 MB of video RAM (VRAM) to run the perspective warp feature on 16-bit and 32-bit documents.
Before proceeding, we should ensure that our Graphics Processor is enabled in our Photoshop’s Preferences.
- Go to Edit > Preferences > Performance
- In the Graphics Processor Settings area, select Use Graphics Processor
- Click Advanced Settings. Ensure that Use Graphics Processor To Accelerate Computation is selected.
- Click OK

How to use Perspective Warp in Photoshop
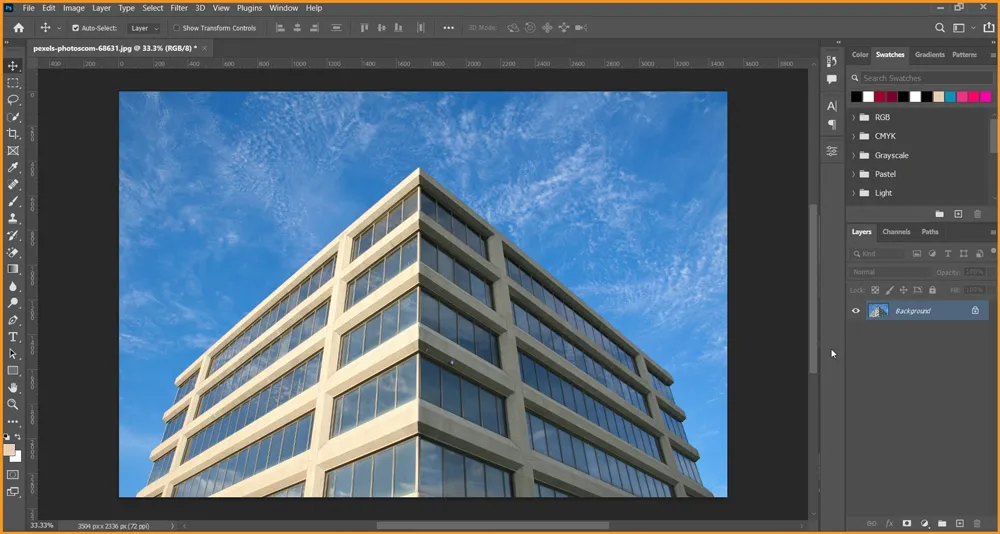
To apply Perspective Warp in Photoshop, we need to open our image in Photoshop. I’ve chosen the following image for this tutorial.
- Open image in Photoshop.
Related Topics:
- Unlock the Background Layer.
- Convert the layer to Smart Object.
- Go to Edit > Perspective Warp and close the Tool tip.
- Draw the plane for one side of the building by clicking and dragging.
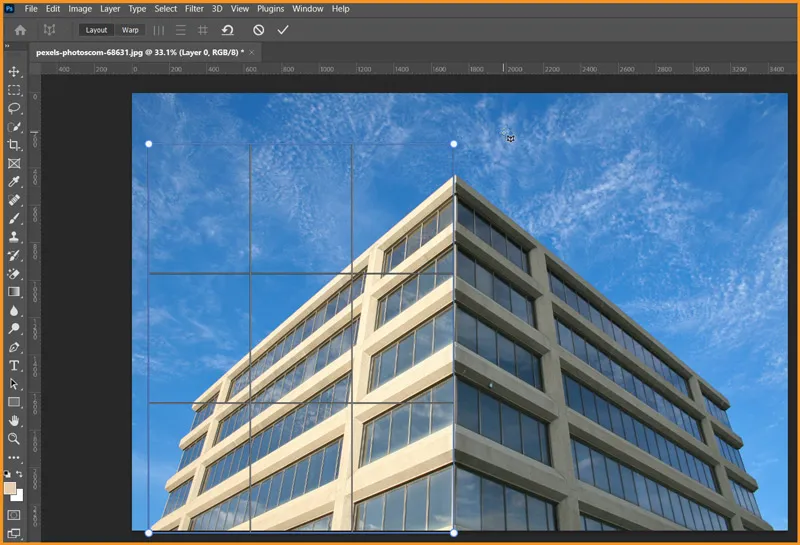
- Adjust the plane according to the buildings perspective. To adjust the plane we need to:
- Click on anchor points, denoted with white circles here, and move them along with the straight edge of the building.
- After aligning them, we have to stretch the plane a little outside the building by holding Shift and dragging the plane out from center of top and left edges.
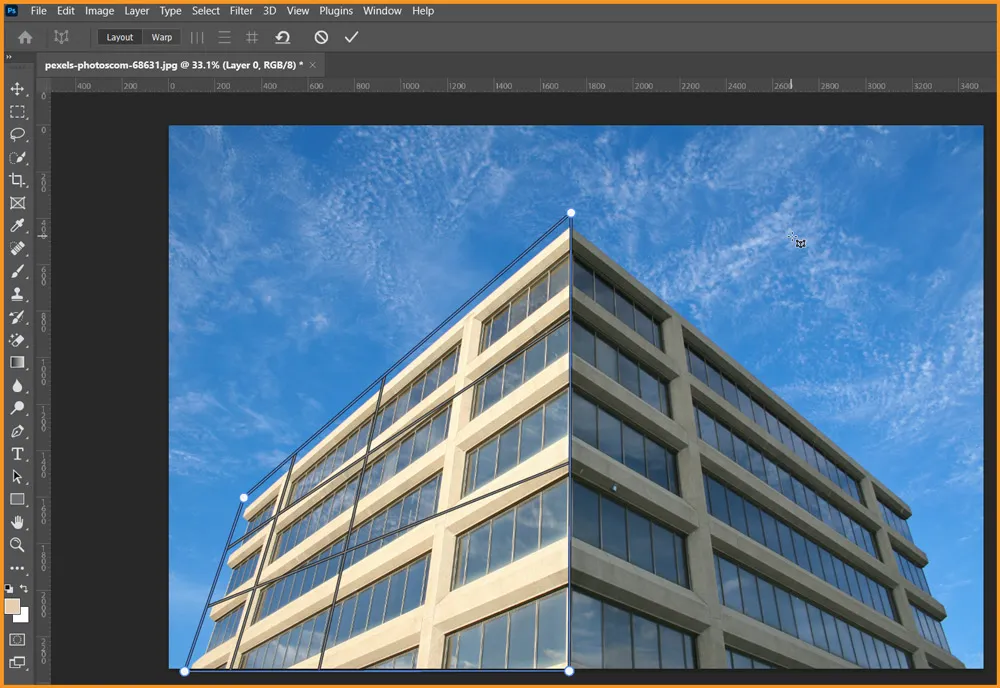
- Now, we need to create another plane for the next half of the building.
- Make sure to connect both planes at center.
- While drawing next plane, when we’ll bring the left edge close to the right edge of our previous plane. They both will get highlighted. After dropping the click, they will connect.
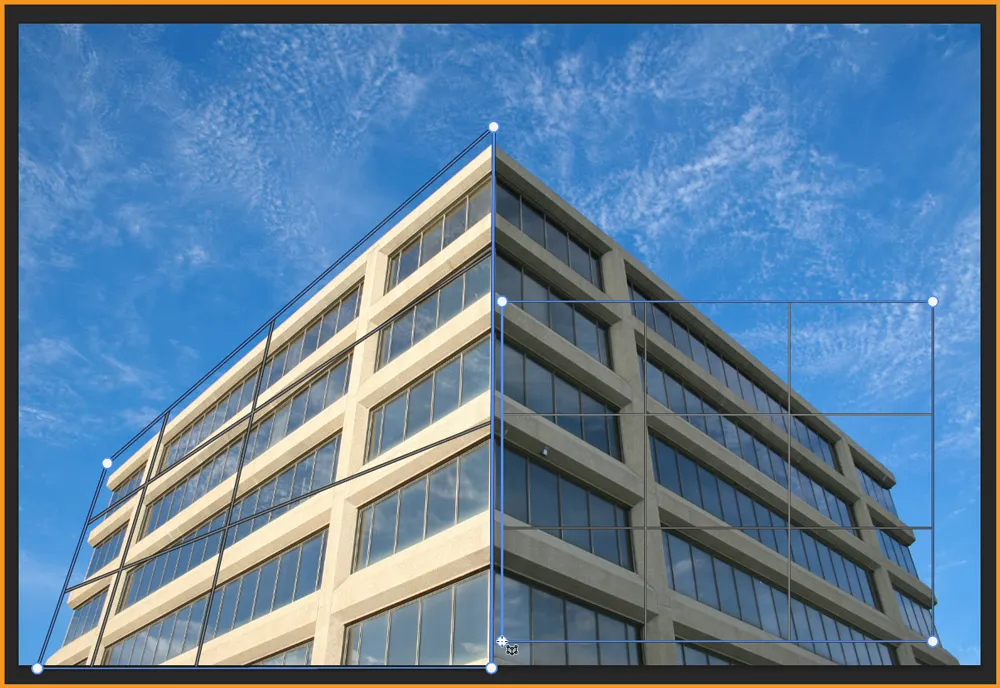
Then adjust the anchor points after conjoined planes have been created.
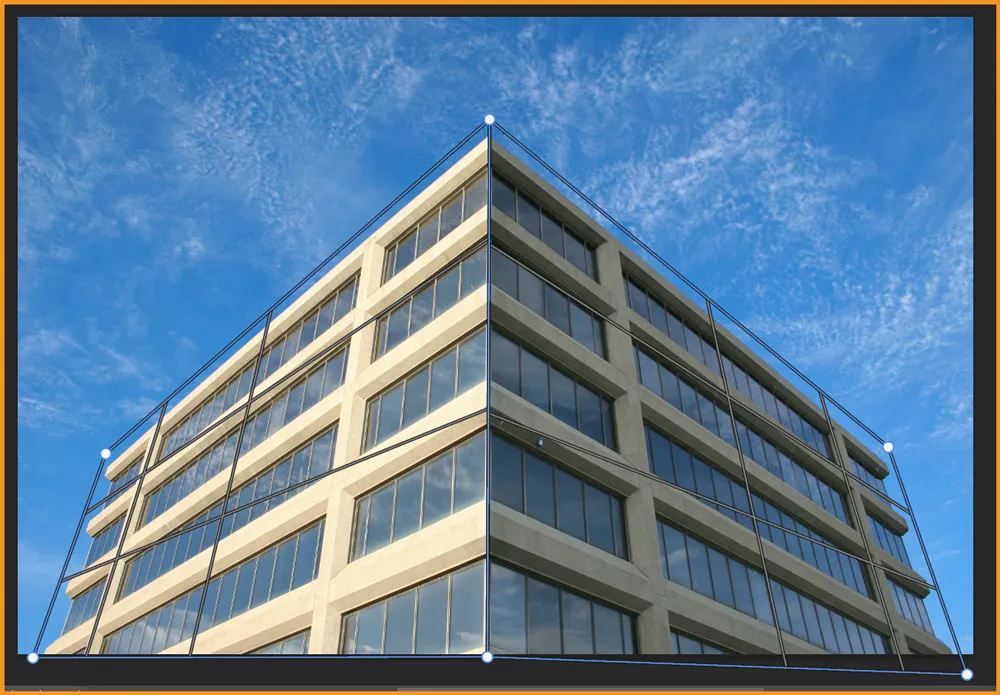
Related Topics:
Options for Perspective Warp

By default, Layout mode is active. Layout mode allows us to create planes and also to move and scale planes. It also allows to move anchor points.
We can click on the Warp to enable Warp mode which will enable three options available next to it. These three options are:
- Automatically straighten near vertical lines
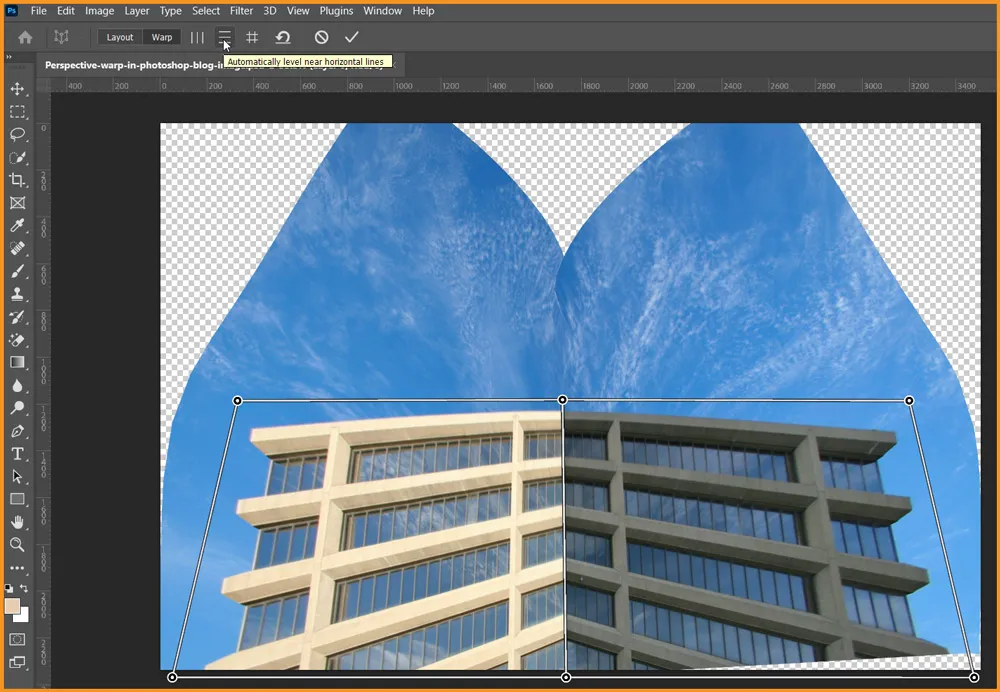
- Automatically straighten near horizontal lines
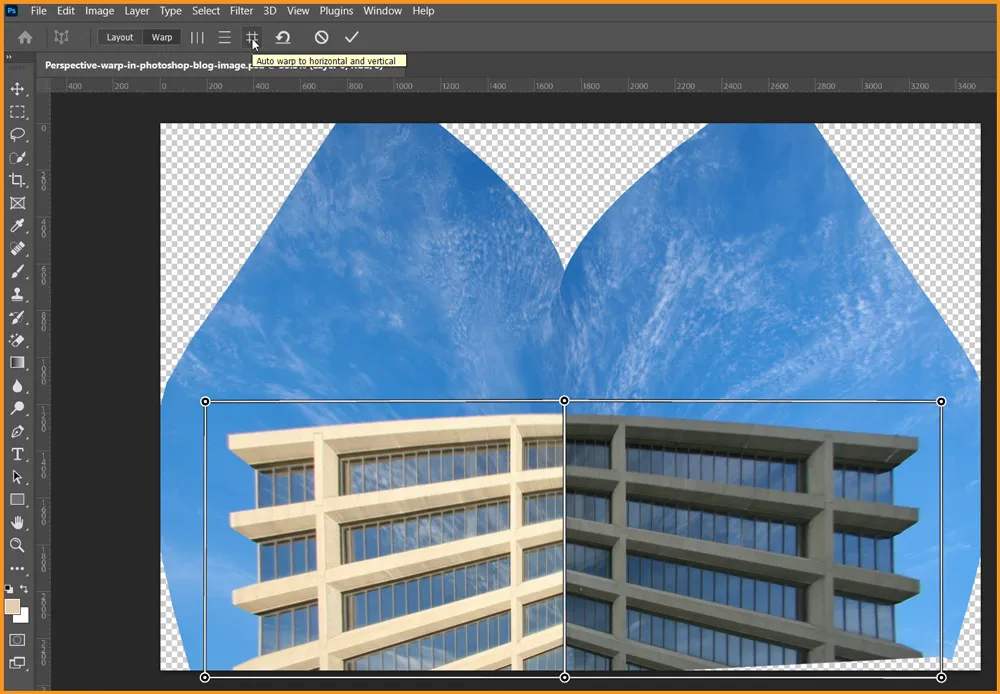
- Auto warp to vertical and horizontal
The result of these warp options are shown below individually.
Automatically straighten near vertical lines
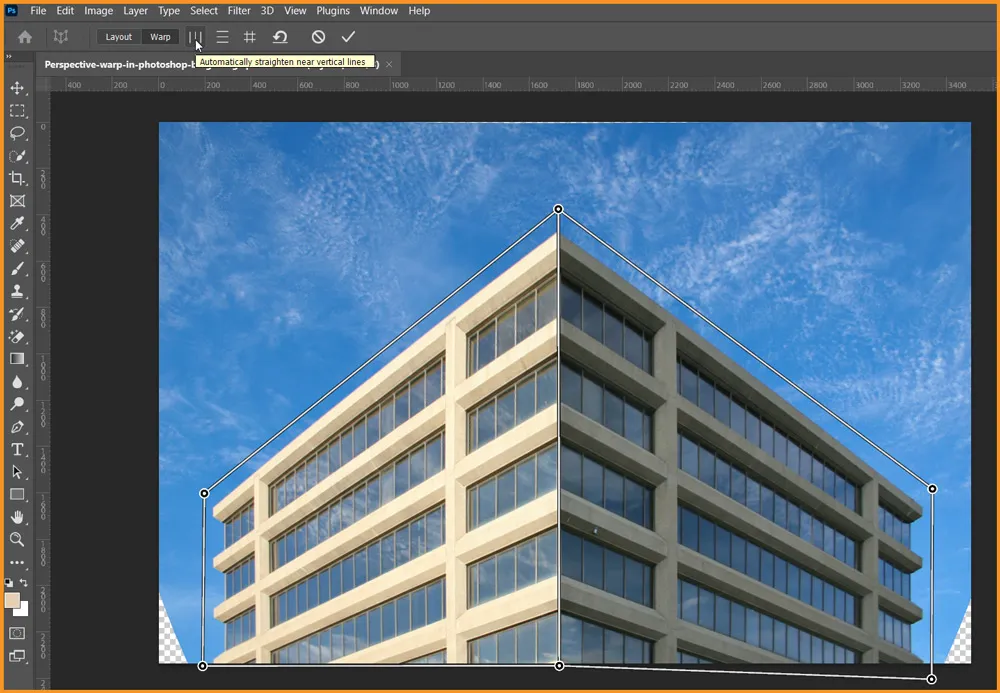
This result seems to be best for our case.
Related Topics:
Automatically straighten near horizontal lines
Auto warp to vertical and horizontal
Related Topics:
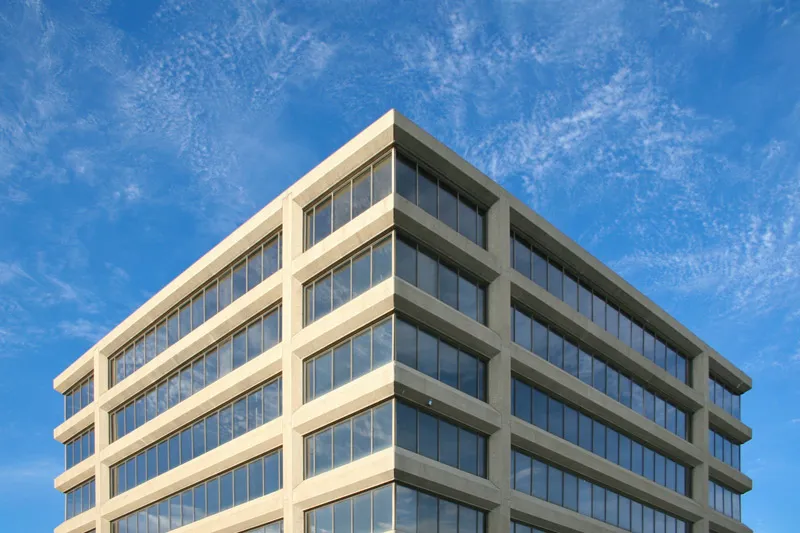
Final result
We can make custom anchor point adjustments too in Warp mode. In this case, I’ve chosen the Automatically straighten near vertical lines result.
It had some empty spaces which I had filled using Content-Aware Fill in Photoshop. Here’s the final result:
Related Topics:
- Toolbar in Photoshop
- List of websites for Royalty Free images
- List of websites for Royalty Free Raw images
- What is Photoshop
- Tools in Photoshop
- Selection Tools in Photoshop
- Type menu in Photoshop
- How to Crop in Photoshop
- Brush Tool in Photoshop
- Pen Tool in Photoshop


