In this Photoshop Lesson, I will be discussing about ‘Foreground color in Photoshop‘, ‘Background color in photoshop’, ‘Stroke in photoshop’ and ‘Fill in photoshop’.
I am Lalit Adhikari and we are at LTY. Let’s dive into today’s topic.
Table of Contents
Introduction
Generally, most of us have heard about color methods in Adobe Photoshop:
- Foreground Color
- Background Color
But there are 2 additional color methods for shape tools in Adobe Photoshop:
- Stroke
- Fill
Foreground Color
The foreground color decides what your brush and pencil color will be. It is the color that will be in front of the canvas which will be visible to us.
While selecting the foreground colors make sure it doesn’t come in the range of your background color.
Because whenever you are working on your design or artwork your design may not stand out properly. So, make sure the foreground color that you will use must attract the viewer’s eyes.
Related Topics:
Background Color
This color is generally ‘white’ by default and it is the color of the canvas that we are working on. The background color will occupy larger portions of the canvas area.
So, my advice would be to select a color which is less sharp and which can make the color of your design more appealing.
This foreground/ background tool is quite easy to work with other Photoshop tools like Brush Tool, Color Picker Tool, Color Palette, and Swatch Palettes to create wonderful designs.
You might be making an illustration, retouching photos or making a digital painting. So, you may need to access them quickly.
And for that double click on each one of the swatches and after clicking into the ‘set foreground color’ swatch (which is usually in the front) you will see a ‘foreground color’ color picker dialog box opening up.
From there you can select the exact color you want for your foreground. And the same procedure applies for background color too.
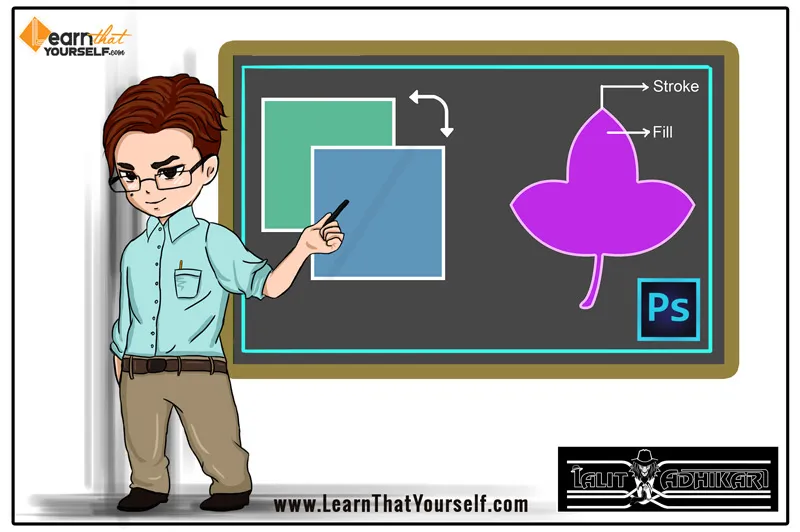
After selecting the foreground and background color, you can also reverse the colors from background to foreground only by clicking on the duel headed bent arrow located on the corner of the swatch.
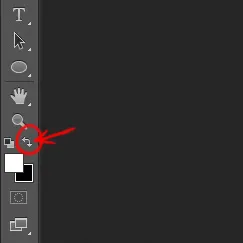
I generally prefer using foreground and background color pickers in Photoshop because they give me the options of adjusting the hue, saturation, and brightness.
Another thing you can do is to go to the window panel and select the ‘Color’ and then continue painting or making your design.
It opens the color pallet on the side of your canvas and this makes it more convenient to pick the color for your design.
Related Topics:
Creating Shortcuts for Foreground color & Background color Picker
In Photoshop, you have the ability to add keyboard shortcuts to the foreground and background colors.
To do so, you can go to the edit menu and choose keyboard shortcuts or you can also get it by Ctrl + Alt + Shift + K
And this command will bring up the ‘Keyboard Shortcuts and Menus’ dialogue box.
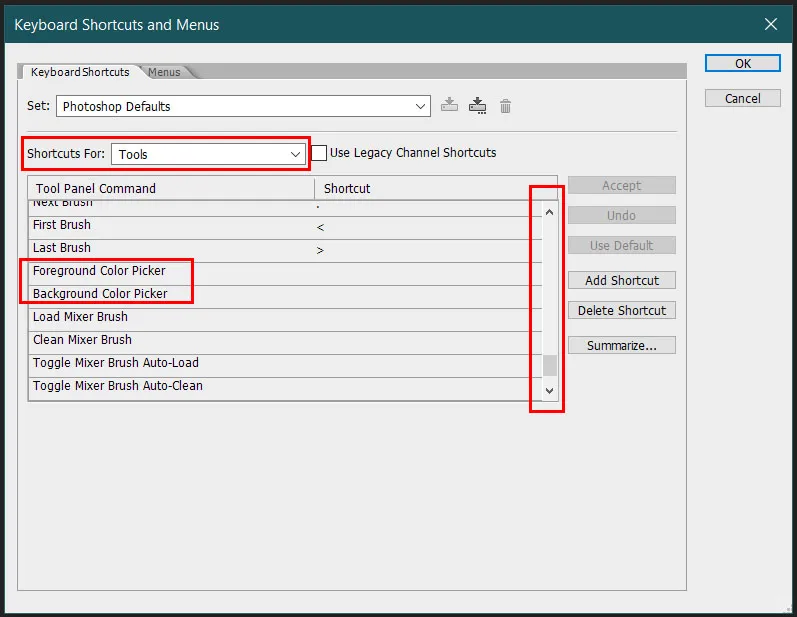
And under the option ‘shortcuts for’ you can select ‘Tools’ and you will see the tools and the keyboard shortcuts that they have.
All the keys are not taken.
For example: you can use the letter K and N for the Background and Foreground Color Picker.
After scrolling further down you will see the foreground and background color picker option. Set that to letter ‘K’ for foreground color picker and for background color picker set that to letter ‘N’.
Then click accept and press Ok.
Now, if I am making a design and I want to select a different color, I can press ‘K’ for the foreground color picker or can press ‘N’ for the background color picker.
So, this is a faster way for accessing the foreground and background tool instead of using the color panel or heads-up display that comes up when you press Shift + Alt and right click to select colors.
Related Topics:
- Pen tool in Photoshop
- Color Replacement tool and Mixer Brush tool in Photoshop
- How to use Gradient tool in Photoshop
Stroke And Fill in Photoshop
Let’s take a look at Stroke in Photoshop as well as Fill in Photoshop.
Stroke
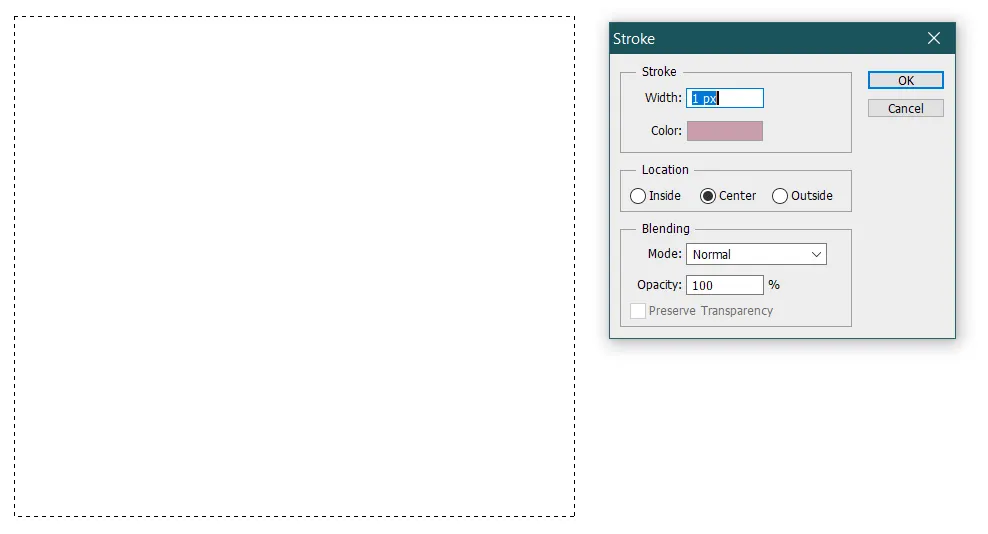
If we just create a selection, we can right-click on the selection and hit the stoke option. And that brings up the stroke dialogue box.
From there we can choose any color and hit ok. After that, we can set a width of the stroke and then its location.
Now, there are three options for the location of the stroke dialogue box and that is:
- Outside: which means the stroke is going to be placed on the outside the selection.
- Inside: which means the stroke is going to be placed on the inside of the selection.
- Center: It means the stroke straddles the selection.
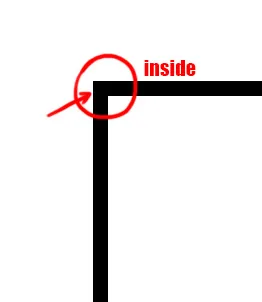
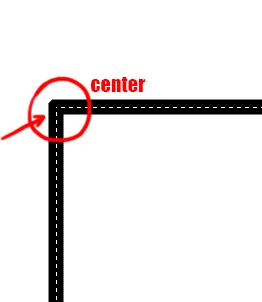
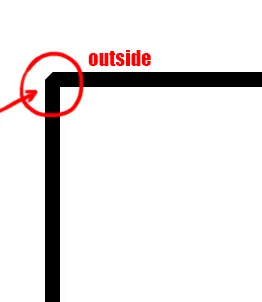
Now, if you want sharp corners of your stroke then you should choose the inside option.
The outside and center will give the 90-degree angles of your stroke from the inside, and the corners will be rounded from outside.
You can also set different blend modes according to your design. To deselect the selection of stroke just hit Ctrl + D on your keyboard.
The stroke we just got is a pixel based, so it will probably get pixilated.
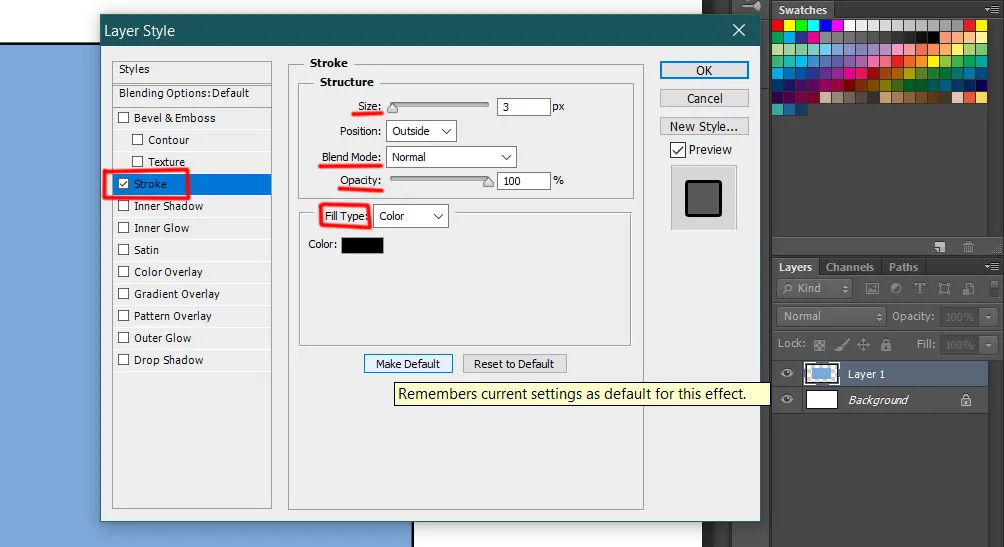
The other way to create a stroke is by creating selection. Fill that selection with any color and then go to layer style from the window panel and then click on the stroke.
Now, the good thing about layer style is that you can change its opacity, blend mode and most importantly ‘fill type’ which is fill of the stroke, in which we can choose pattern or gradient apart from solid color.
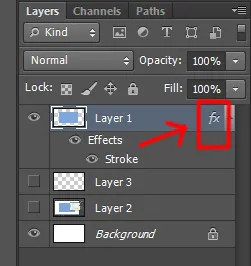
A convenient thing about this option is that you can always double click on your ‘fx’ icon and edit it or make it invisible.
You can also hit CTRL + T to edit your original object shape and the layer stroke will automatically update.
Related Topics:
Fill
In a new layer, if you create a new selection with the marquee tool of any kind and then click Alt + Delete on your keyboard, it will fill your selection with the foreground color which is black by default.
And if you press Ctrl + delete in your keyboard it will fill the selection with the background color which is white by default.
Next thing we can do is, we can create a path and go to the path panel in the window. From there we can right click on that path and choose to ‘fill path’.
You will find a small dialogue box opening up whose first option will be ‘Contents’ which means what you want to fill the path with, and there are many different options in it like foreground, background and custom colors.
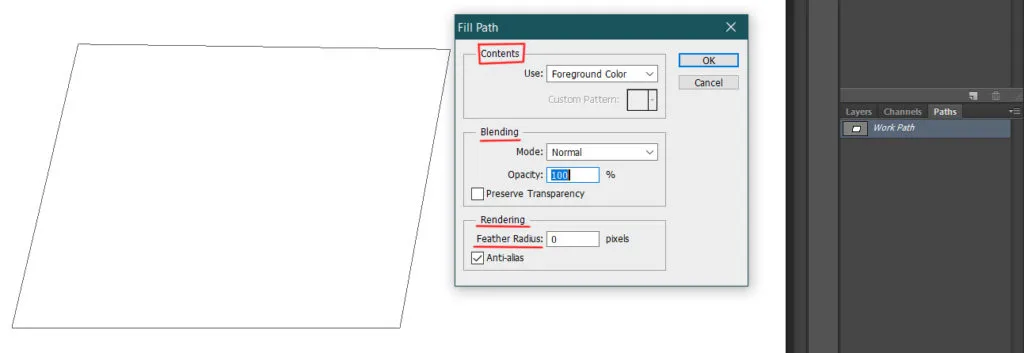
After that, we can choose blend mode, opacity and we can also render this with some kind of ‘feathered radius’ which means edges will be blurred.
Although, these are just pixels and if we can adjust the path our shape will not going to expand with the path
The shortcut to open the fill menu or the fill dialogue box is Shift + F5.
You can also choose a fill layer and apply the color of your choice, by opening the Edit menu in Photoshop.
If you are following our Free Photoshop Guide for Lessons and Tutorials then next you should read about, ‘Eraser tool, Background Eraser tool and Magic Eraser tool in Photoshop‘.
Related Topics:
- Photoshop Channels
- Dual light effect
- Feather in Photoshop
- How to create New Document in Photoshop
- Color Settings in Photoshop
- Color Profile
- Color Mode
- Bit Depth
- How to Create Rain Effect in Photoshop
- How to Add Falling Snow in Photoshop










Difficile est invenire materiam bonam legere de colore Foreground & colore background in photoshop.
It made me realize, we also have stroke and fill in photoshop other than illustrator.
Interesting, I didn’t know there so much detail in this topic. Thanks.