In this Photoshop Lesson, we’ll learn about ‘Content-Aware Scale in Photoshop’. Content-Aware Scale command is available under Edit menu in Photoshop.
My name is Lalit Adhikari and we are at LTY. Let’s begin!
Table of Contents
What is Content-Aware Scale
Content-Aware Scale helps to resize our image without changing any important visual content such as people, buildings, animals and so forth.
Content-Aware Scale was first introduced in Photoshop CS4 and since than it had been updated and made a lot more powerful.
While performing normal scaling, it affects all pixels of our image uniformly, content-aware scaling mostly affects pixels in areas that don’t have important visual content.
Usually, we have to crop an image to change the aspect ration of our image. But with Content-Aware Scale, now there’s no need to crop anything away.
It is because Photoshop can now move people and objects closer together (or further apart), so everything fits well within the new shape!
Content-Aware Scale lets us upscale or downscale images to improve a composition, fit a layout or change the orientation altogether.
If we’ve to preserve specific areas when scaling an image, we can do so using Content-Aware Scale, as it lets you use an alpha channel to protect content during resizing.
Content-aware scale works on:
- Layers and Selections
- Images can be in RGB, CMYK, Lab and Grayscale color modes
- All bit depths are supported
Content-aware scaling doesn’t work on: - Adjustment layers
- Layer masks
- Individual channels
- Smart Objects
- 3D layers
- Video layers
- Multiple layers simultaneously
- Layer groups
Related Topics:
How does Content-Aware Scale work
With the Content-Aware Scale command selected, Photoshop will examine our photo and try to figure out, high detail areas and low detail areas.
Photoshop will do its best to protect the high detail areas as we’re reshaping the image.
Content-Aware Scale can be a powerful and time-saving feature when it works but (there’s always a catch) the problem is that it doesn’t work indefinitely.
For every image it’ll have a limit after which the image will be distorted. In fact, it really varies from image to image.
In general, we can say Content-Aware Scale works best with photos that contain large areas of low image detail (blue skies, open fields, calm waters, and so on).
Option Bar with Content-Aware Scale

- Reference Point Location: Here we need to click a square on the reference point locator to specify the fixed point around which we want our image to be scaled. By default this point is at the center of the image.
- Relative Position: Here we can specify the X-axis and Y-axis reference positions to place our Reference Point.
- Scaling Percentage: Here, we have to specify the percentage change as compared to the original size. Percentage change in Width and Height are to filled at W and H boxes respectively. By default, aspect ratios are maintained.
- Amount: It specifies the ratio of Content-Aware Scaling to normal scaling to be done by Photoshop.
- Protect: Here in the drop down, we can chose the Alpha channel that defines an area to be protected.
- Protect Skin Tones: If turned on, Photoshop attempts to protect regions that contain skin tones.
Related Topics:
Example for Content-Aware Scale
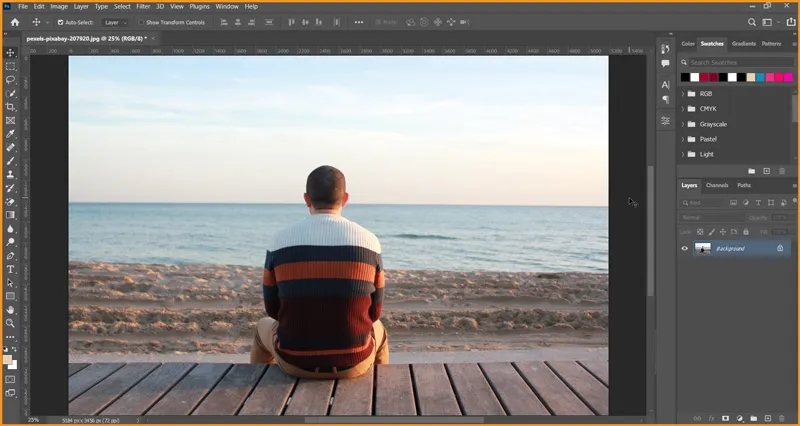
I’ve selected the following image for this example.
- First open the image in the Photoshop.
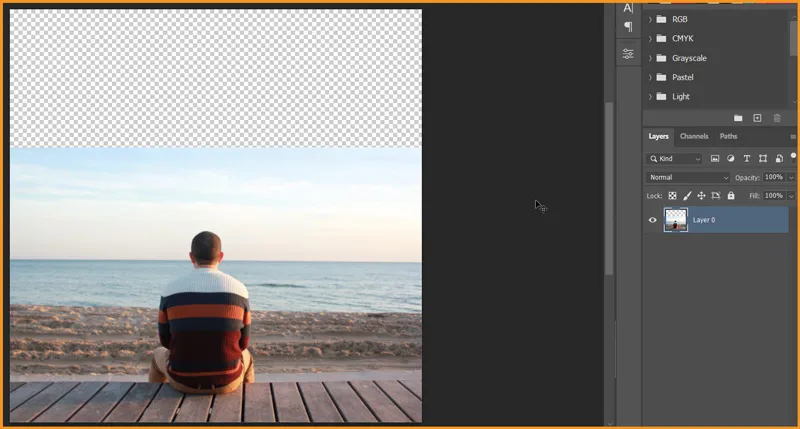
- Unlock the background layer and create some extra space above the sky using Crop Tool in Photoshop.
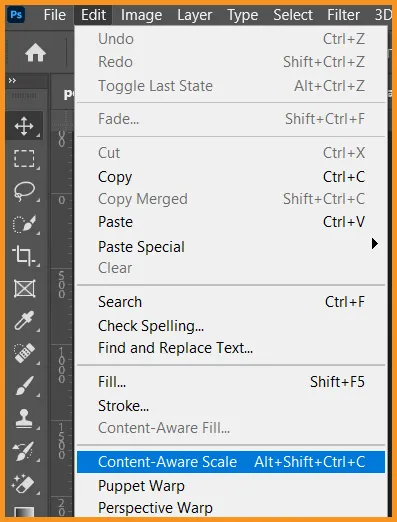
- Go to Edit > Content-Aware Scale
- In the option bar, turn off, Maintain aspect ratio option.

- In the Bounding box around the image, start dragging the top part from top-center.

- After a certain point, Photoshop’s Content-Aware Scale will start distorting our subject.
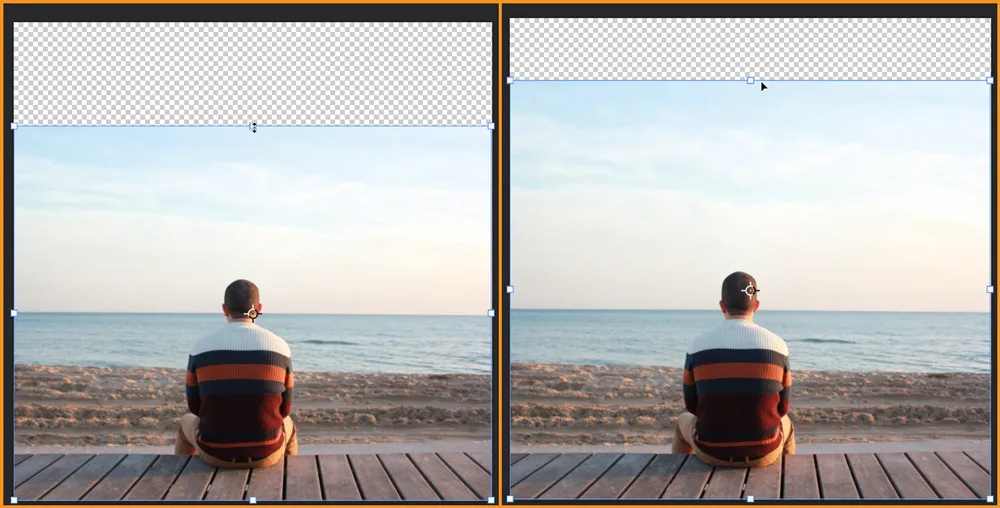
Now we can take either of the following two approaches to continue to use Content-Aware Scale.
Related Topics:
Approach – 1
- First, Scale the image up to the limit after which the subject starts getting distorted and commit the transformation by clicking on the icon or pressing Enter key.
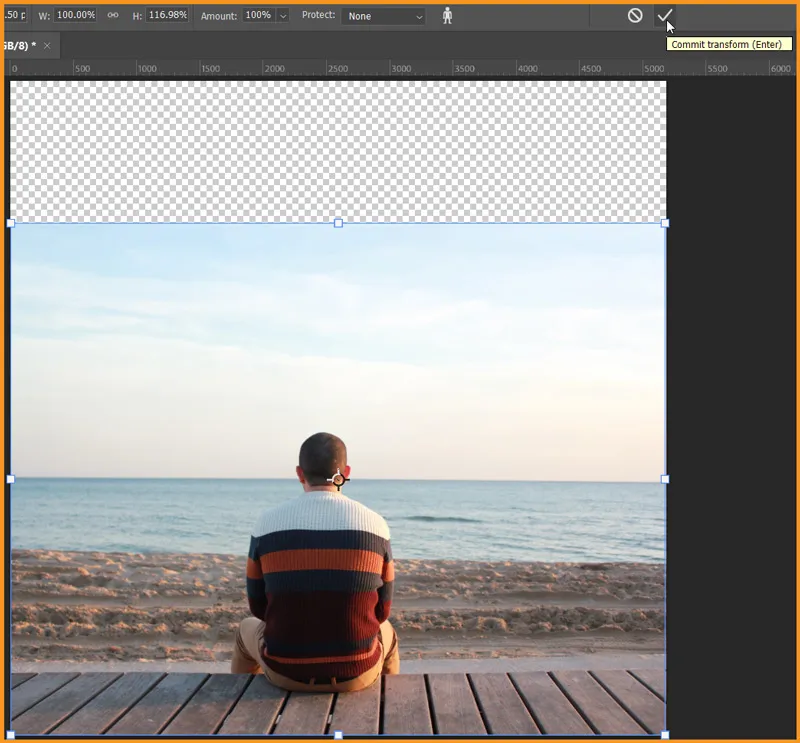
- Now, I’ll create the selection of the sky above the head using Rectangular Marquee tool.
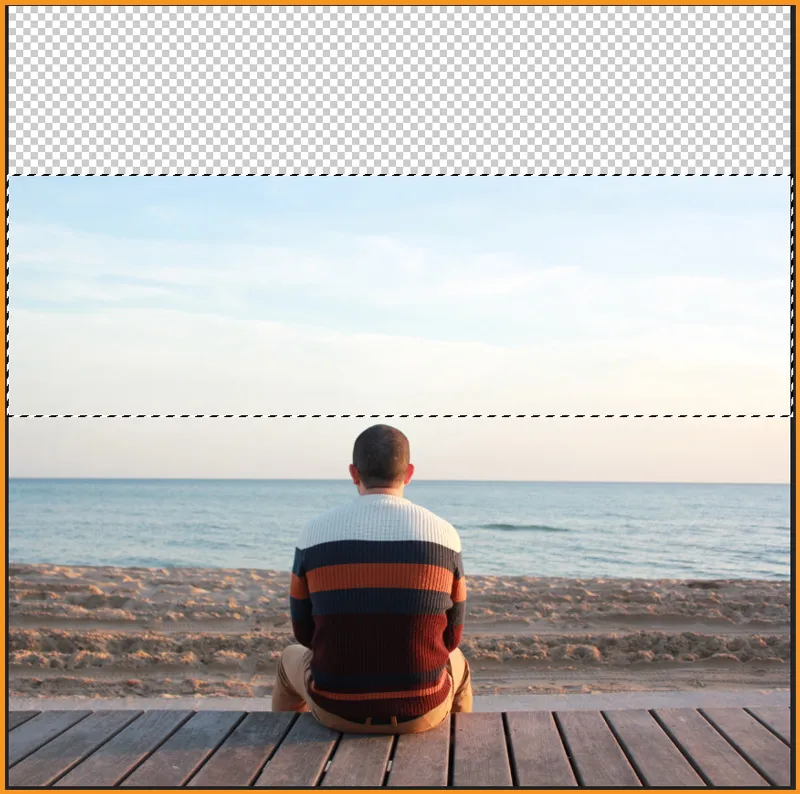
Now, apply Content-Aware Scale, same as before. Then commit transform and remove selection.

Related Topics:
Approach – 2
Second approach involves creating a rough selection of our subject and saving it as Alpha channel in Channels Panel.
- Take Lasso Tool and create a rough selection around the subject and important things if you are using a different image.

- Go to Channels Panel and click on Save selection as channel icon as shown below.

This will create a Alpha 1 channel in Photoshop’s Channel panel as shown below.
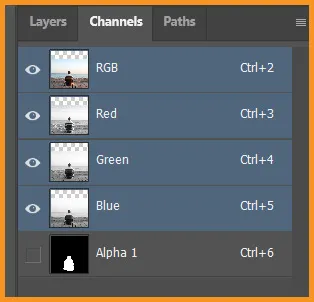
- Remove selection from screen. Then apply Content-Aware Scale and do following in option bar.

Then, drag the image from top as done earlier and commit transform.

Related Topics:
- Remote Connections in Photoshop
- Assign Profile in Photoshop
- Convert to Profile in Photoshop
- Keyboard Shortcuts in Photoshop
- Menus in Photoshop
- Toolbar in Photoshop
- List of websites for Royalty Free images
- List of websites for Royalty Free Raw images
- What is Photoshop
- Tools in Photoshop


