In this Photoshop Lesson, we’ll learn about ‘Stroke in Photoshop‘, ‘How to add Stroke in Photoshop‘ and ‘How to add Stroke to text in Photoshop‘. Stroke command could be found under Edit menu in Photoshop.
My name is Lalit Adhikari and we are at LTY. Let’s begin!
Table of Contents
Stroke in Photoshop
Stroke in Photoshop, when used via., Stroke command, automatically trace a colored outline around a selection or the content of a layer.
Note: If we have to add a Stroke to the background layer (by default locked) then we must first convert it to a regular layer. The background layer, contains no transparent pixels, so the entire layer is outlined.
Image for Photoshop Lesson
I have selected the following image for this Photoshop Tutorial.
Related Topics:
Where is Stroke in Photoshop
Stroke in Photoshop could be found in the following places:
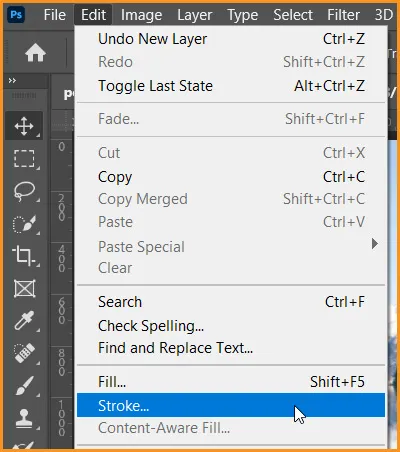
- Stroke as command in Edit menu in Photoshop
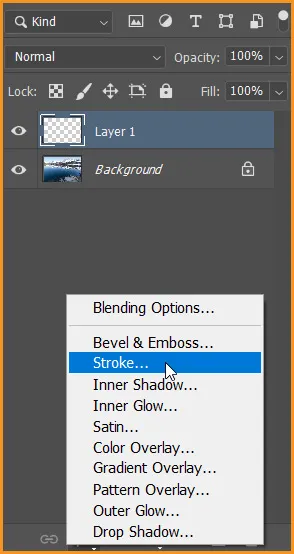
- Stroke as Layer Style in Layer Style dialog box
Related Topics:
How to add Stroke in Photoshop
To add Stroke in Photoshop, we can do the following:
- Open image in Photoshop or Create a New Document as per requirement. I’ll also create a new layer to protect the original image.

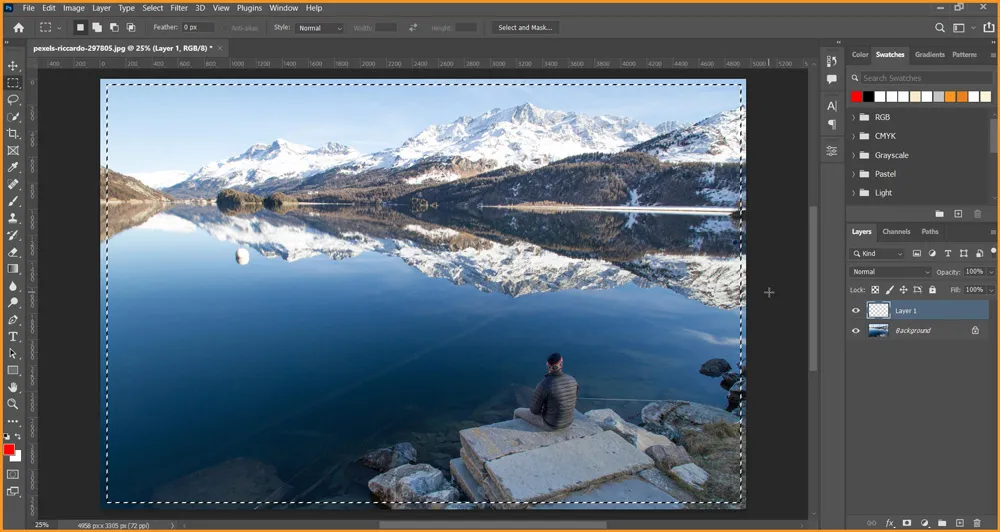
- Select an area in the image. Let’s suppose we need to create a border around our image which will be few pixels inside the image. Hence, creating a Rectangular selection using Rectangular Marquee Tool as shown below.
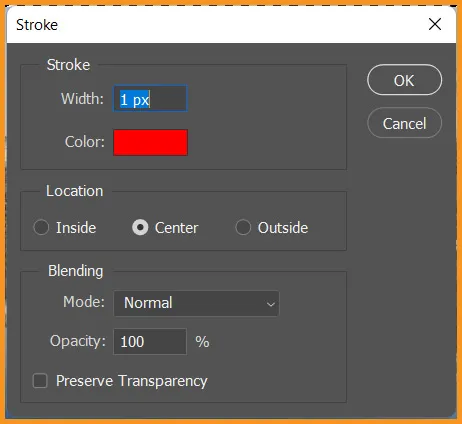
- Go to Edit > Stroke… The following Stroke dialog box will appear with default values.
Related Topics:
All properties in Stroke dialog box are explained below:
- Width: The thickness of the outline is determined by Width of Stroke. It can range from 1 – 250 px.
- Color: To set the color of the outline. Click on the color to open Color Picker.
- Location: To determine whether the outline will be outside, inside or centered to the selection edges or layer boundary.
- Blending Mode: To change the blending mode of the outline color with existing pixels in the image. (It’ll work if you are creating the stroke directly on the image without creating a new layer.)
- Opacity: To determine the opacity of the outline color.
- Preserve Transparency: If this checkbox is checked, it will only outline the areas containing opaque pixels in selection or on a layer. If there’s no transparency, this option wouldn’t be available.
- In the Stroke dialog box, I’ll have Width of 8 px and change the color value to something dark from the water body in the image. As I’m working on a different layer, I don’t need to change Blending Mode and Opacity.
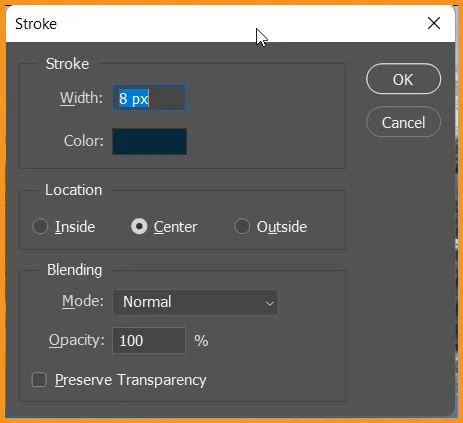
- Then Click OK and remove selection using shortcut Ctrl + D

Related Topics:
How to add Stroke to text in Photoshop
Let’s apply Stroke to a text in Photoshop.
- Using Text tool, we’ll type a word ‘RELAX’ all caps with Adriana Font as shown below. I’ve purposely chosen a dark background and Text color.

- Open Layer Style Dialog box with Stroke applied with following values.
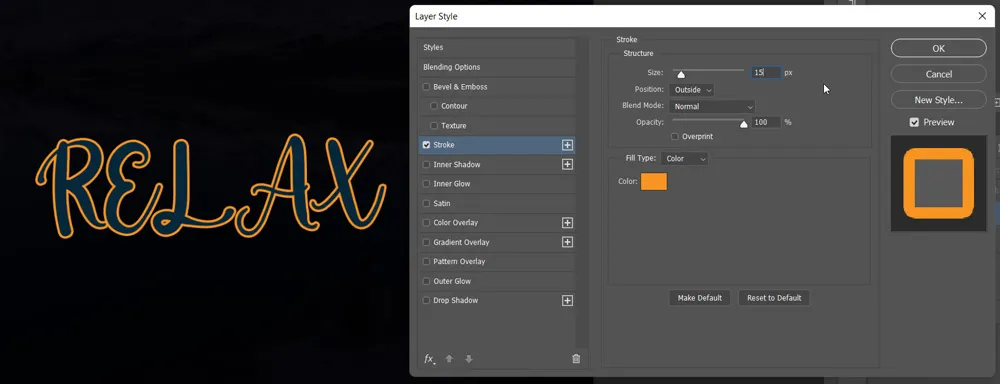
- Then Click OK

Related Topics:
Layer Styles Stroke Dialog box
Most of the properties in this dialog box are self-explanatory and similar to the one discussed above. The rest are explained below:
- Fill Type: It lets us determine what type of Fill we want to apply in our Stroke. It can be Color, Gradient or Pattern.
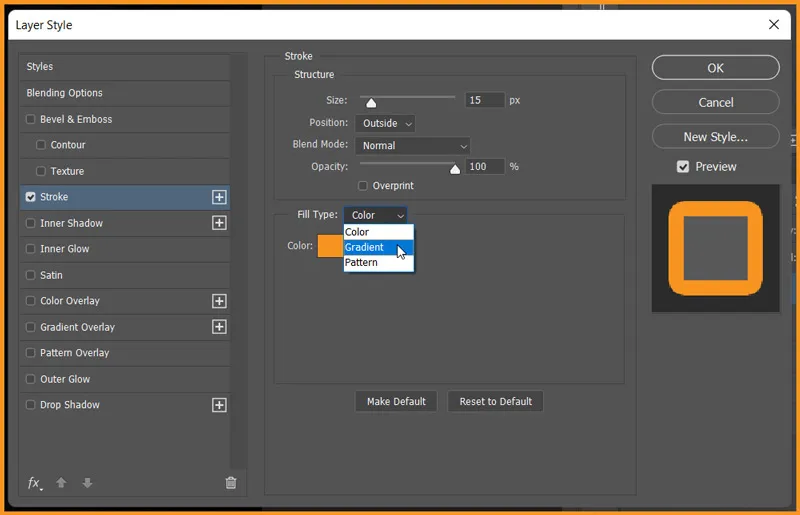
For more information of Gradient type Fill, please read our lesson about, “How to use Gradient Tool in Photoshop“.
Related Topics:
How to apply multiple Strokes in Photoshop
Layer Styles Stroke dialog box, have a plus symbol next to the Stroke Name as shown below:
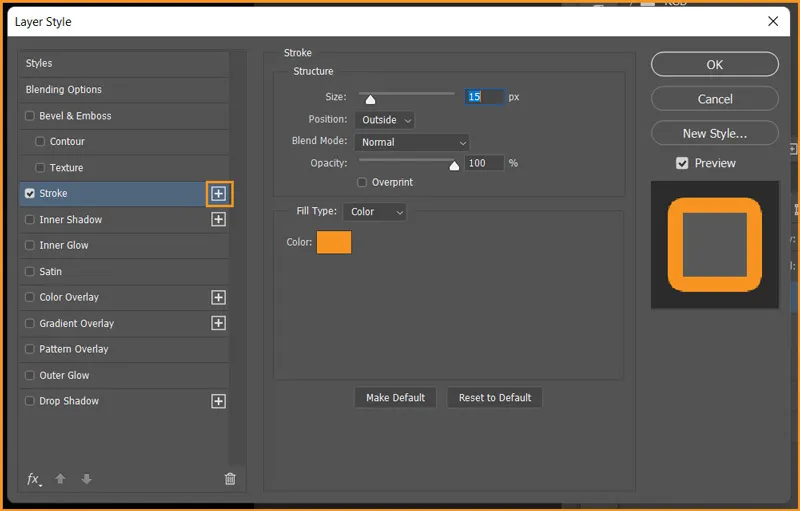
After clicking on the plus symbol a new Stroke Layer Style tab will be added. The tab order works as Layer order, the top one appears on top of the bottom one.
Let’s change the Width and Color of bottom Stroke Layer Style as shown below.
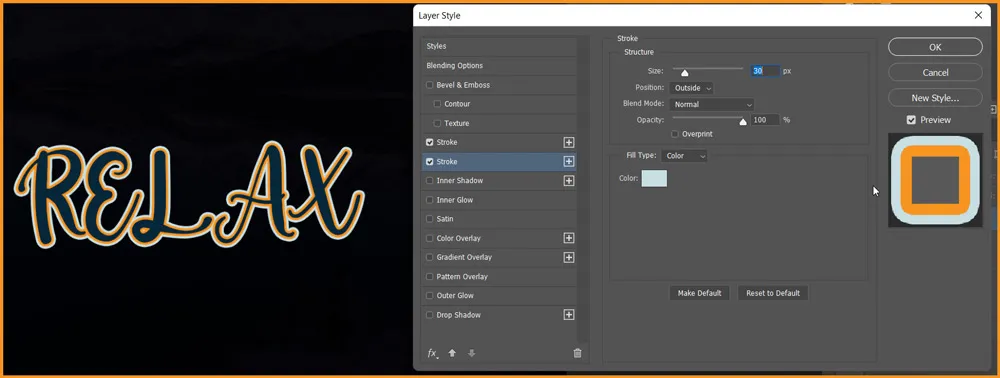
In this manner, we can create as many Strokes as needed. Then Click OK

Let’s place this text on our previous image.

Related Topics:
- Menus in Photoshop
- Toolbar in Photoshop
- List of websites for Royalty Free images
- List of websites for Royalty Free Raw images
- What is Photoshop
- Tools in Photoshop
- Selection Tools in Photoshop
- Type menu in Photoshop
- How to Crop in Photoshop
- Brush Tool in Photoshop


