In this Photoshop Tutorial, we’ll learn about creating Gold Text Effect in Photoshop.
I’m Shiv Pratap Singh and I welcome you to another tutorial by me at LTY.
Table of Contents
What does Gold symbolize
As Gold is a precious metal, it is the color of wealth and luxury. It also symbolizes the ideas of love, wisdom and magic.
It is commonly associated with Prestige, Influence and Prosperity but it is also Generous and Compassionate color.
It is inherently Optimistic, Uplifting and Enlightening in nature and it inspires us and gives us the confidence to reach our full potential.
| Metal | Symbolizes | Effects | Positive | Negative |
|---|---|---|---|---|
| Gold | Prestige, Success, Wealth and Prosperity | Enlightens, Inspires, Uplifts and Influences | Compassion, Generosity, Optimism and Confidence | Arrogant, Flashy, Egotistic and Pretentious |
Related Topics:
Video tutorial
Related Topics:
Create New Document
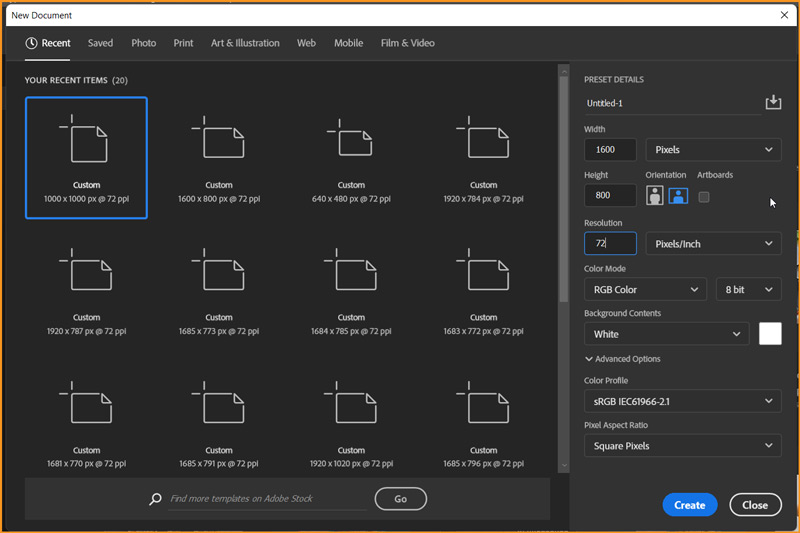
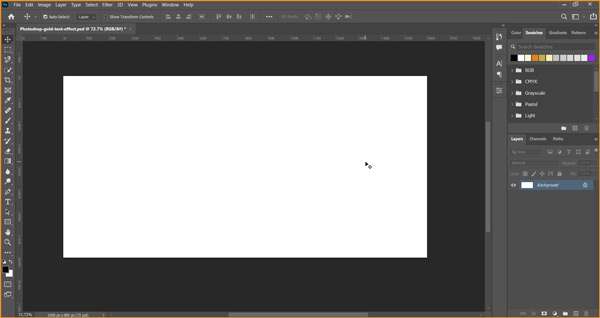
Let’s begin with our tutorial. First, we will create a New Document in Photoshop. I’ll will chose Width and Height to be 1600 px and 800 px respectively with Color Mode as RGB and Resolution at 72.
Related Topics:
Setting up the Background
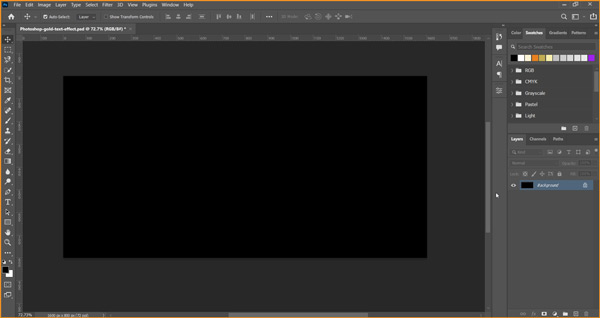
As Gold text effect will involve light or glow on the subject. Hence our background should be dark. In this case, I’ll take black as the base background color for our document. As Black and Gold create an amazing combination.
To fill black color on the layer, use shortcut ALT + DELETE with black as Foreground Color.
Preparing Text
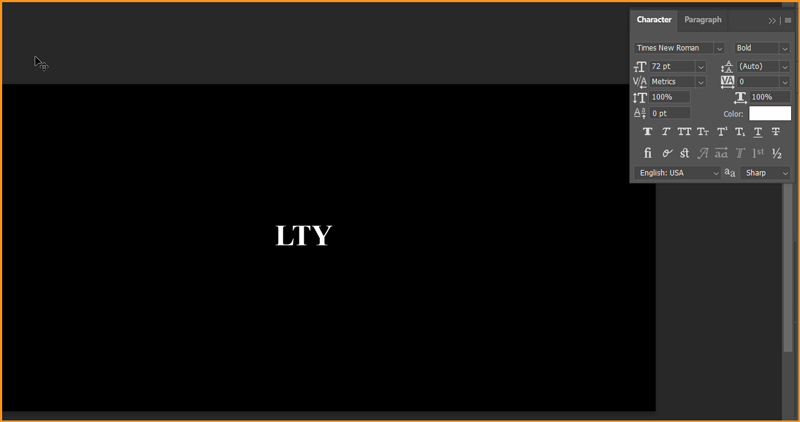
Now, we have to simply create text. Take text tool and click on the canvas and type the text for Gold effect to be applied. In my case I’ll be choosing LTY, shortform for Learn That Yourself, our blog name, as my text.
I will chose Times New Roman to keep things simple. I would recommend choosing a Serif font for this exercise with text color set to be White. Here, choosing white color has a simple purpose of making the text easily visible while typing it. It has no further use.
I have chosen ‘Times New Roman’ as Font Family and Bold in font variant and currently size set at 72 pt.
Now, we will transform text using shortcut CTRL + T to scale up the size of text.
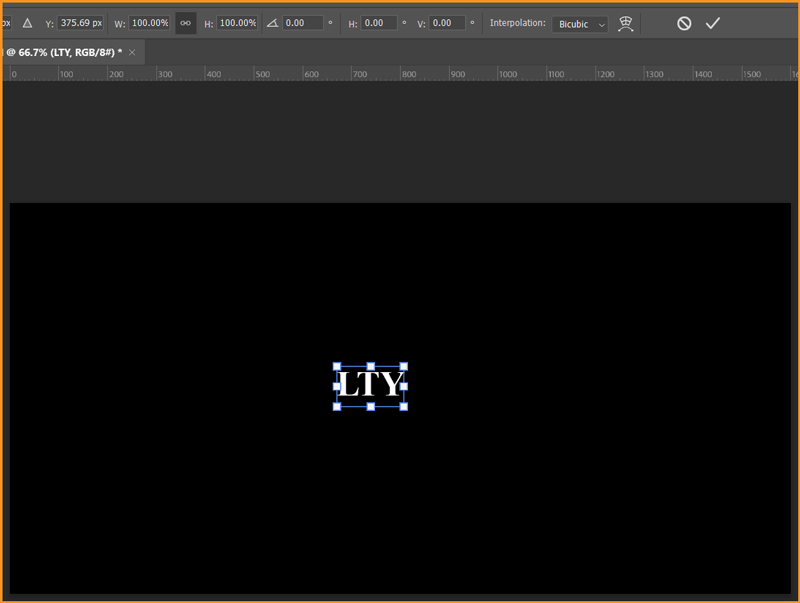
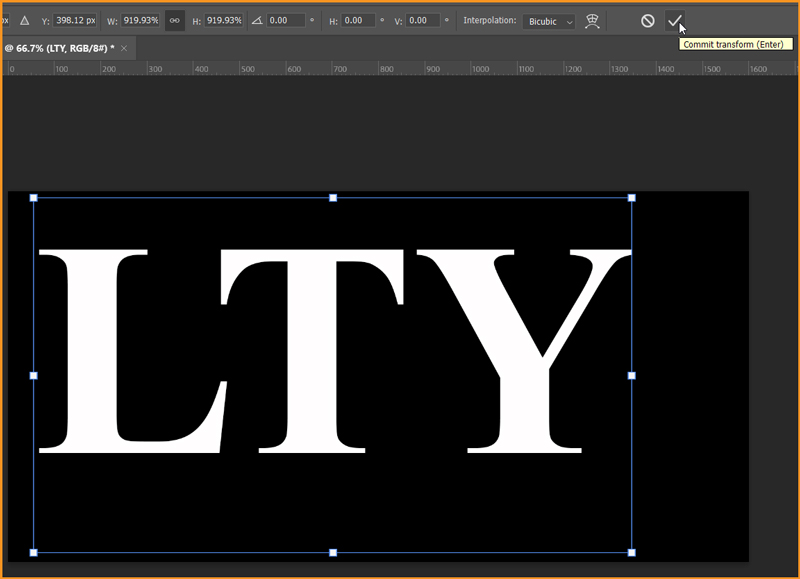
We will scale up the the size of the text to fill the canvas. Then apply transformation to the text.
Related Topics:
Align Text
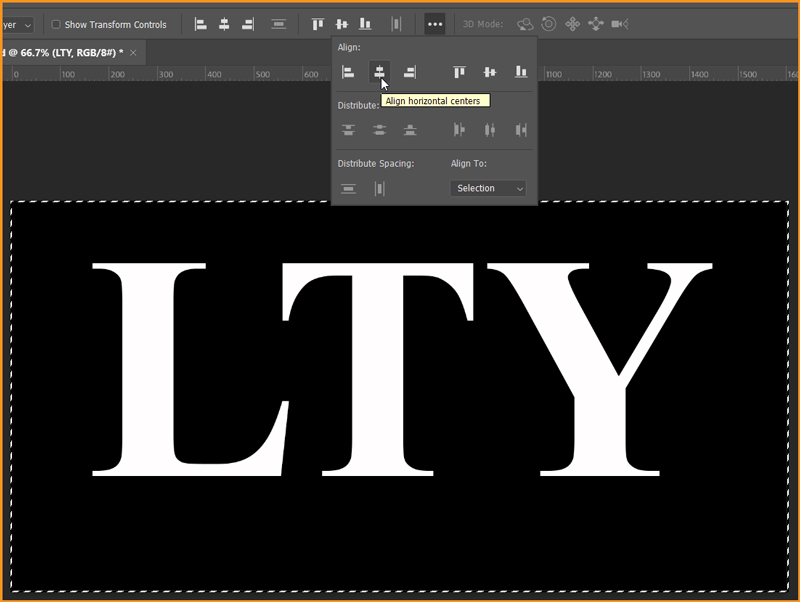
Now, we need to align our text to the Horizontal and Vertical center of the Canvas using Align Panel. First using shortcut CRTL + A to select the whole canvas.

Open Align Panel and arrange text to Horizontal Center.
Related Topics:
Similarly, we will arrange text to Vertical Center.
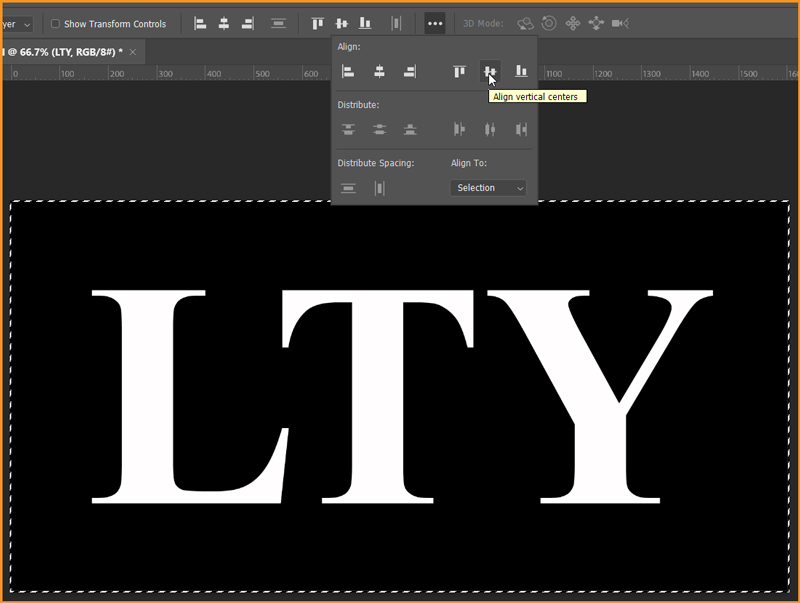
Then, use shortcut CTRL + D to remove selection from screen.
Duplicate text layer
Duplicate text layer using shortcut CTRL + J

Related Topics:
Adding Gold Color
With the duplicate layer selected, apply Gradient Overlay through Layer Style.
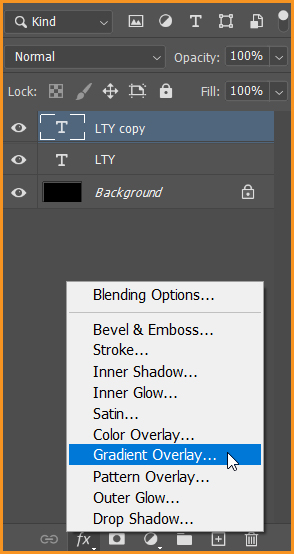
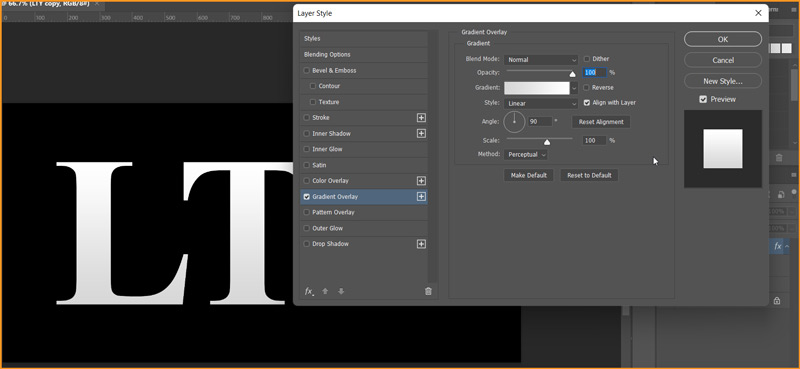
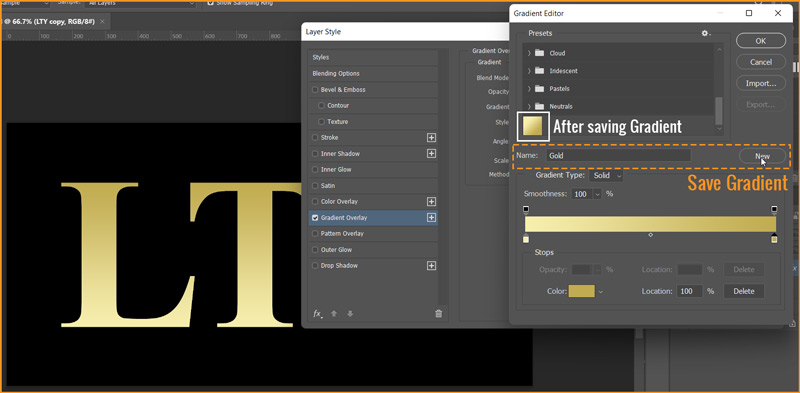
Change Gradient values to R=246, G=238 and B=173 and R=193, G=172 and B=81
Also save the gradients afterwards for future use.
Change the Gradient style to Reflected in the layer style dialog box.
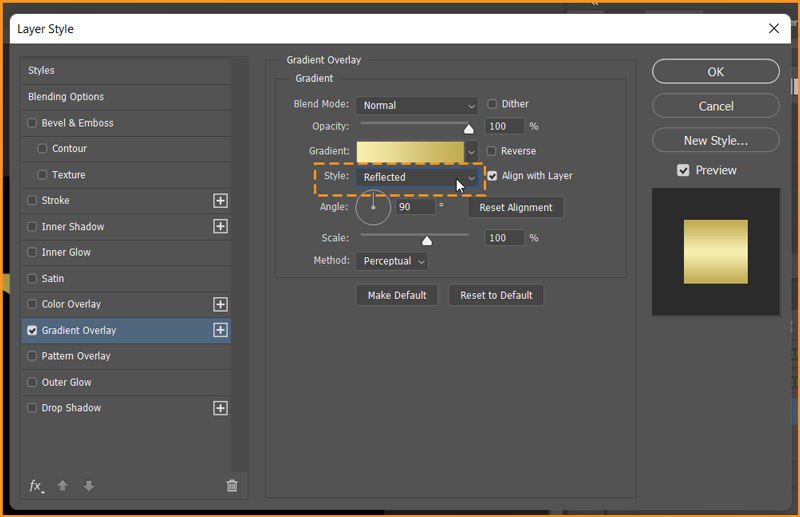
Do not click OK yet.
Related Topics:
Bevel & Emboss
Also apply Bevel & Emboss from the left tab menu in Layer Styles dialog box.
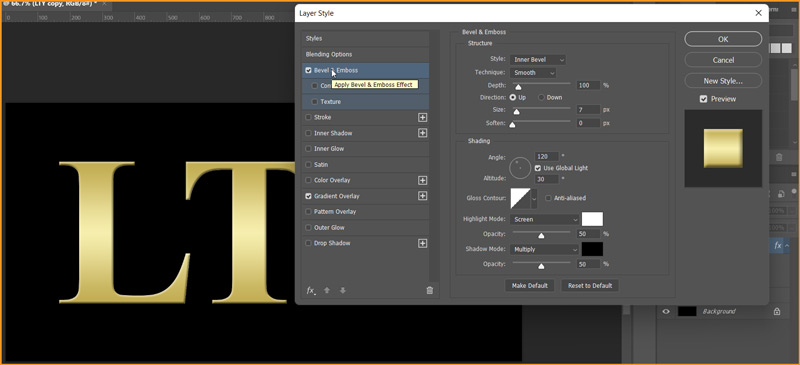
Change Technique to Chisel Hard. In shading section, find Glass Contour graph to Ring – Double, Angle to 120 degrees, check the Anti-alised checkbox along the Glass Contour option. Set opacity for Highlight Mode and Shadow Mode to 75%
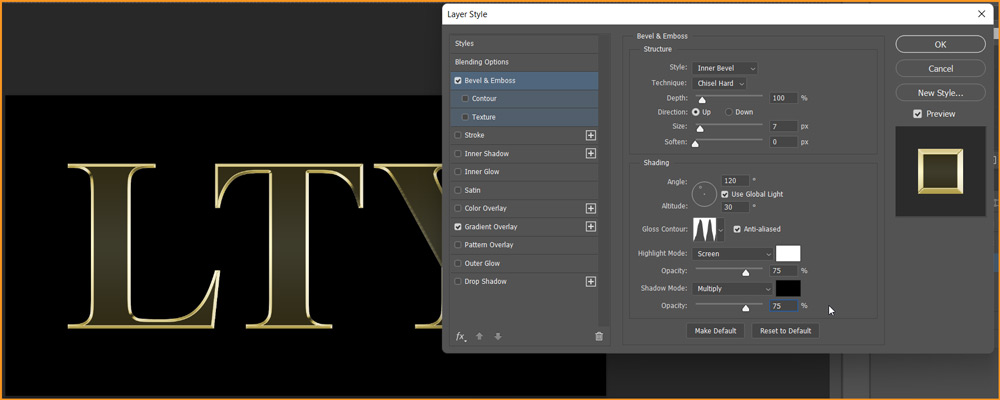
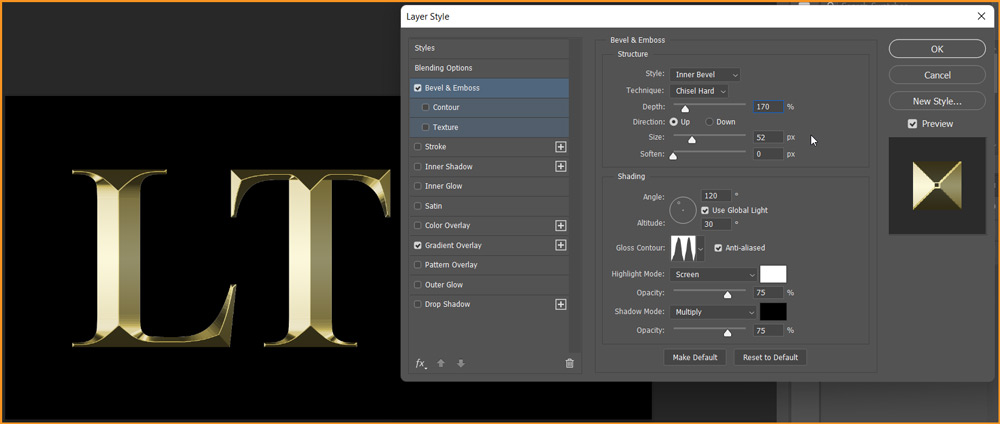
After applying the above setting, the text will appear to have a stroke. To cover the whole text in it, we need to increase the size of Bevel & Emboss. Increase size upto the level where it covers the whole characters. In my case it is 52 px.
Then set the Depth to around 170% to enhance lighting and add contrast.
Related Topics:
Inner Glow
Again, in Layer Style dialogue box chose Inner Glow. Here, make the following changes:
- Change Blending Mode of Inner Glow to Multiply.
- Set opacity to 50%
- Change Color to R=232, G=128 and B=31
- Change the size value to cover the whole characters in it.
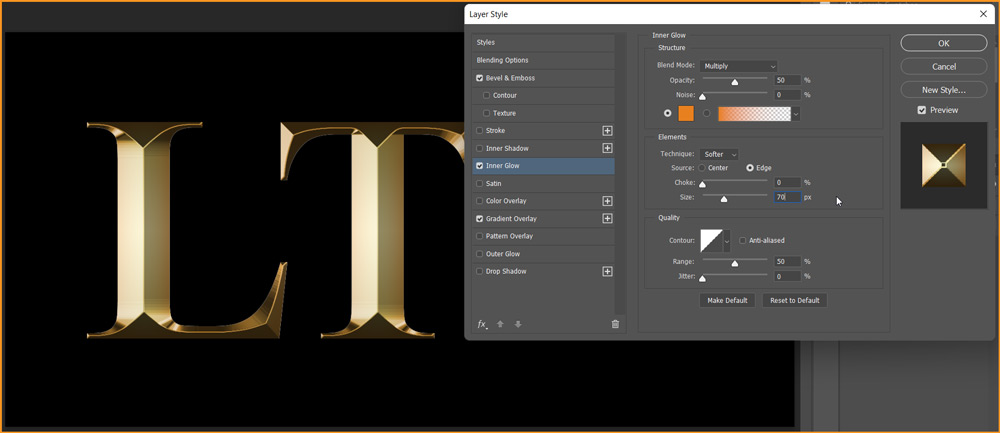
Then click OK
Related Topics:
Stroke
Now, we need to apply Layer Style to the original text layer. So, click on the original text layer and chose Stroke Layer Style from the bottom Layer Style options.
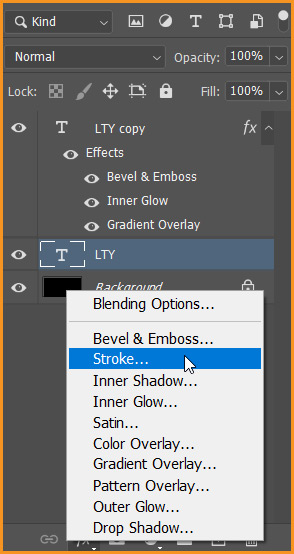
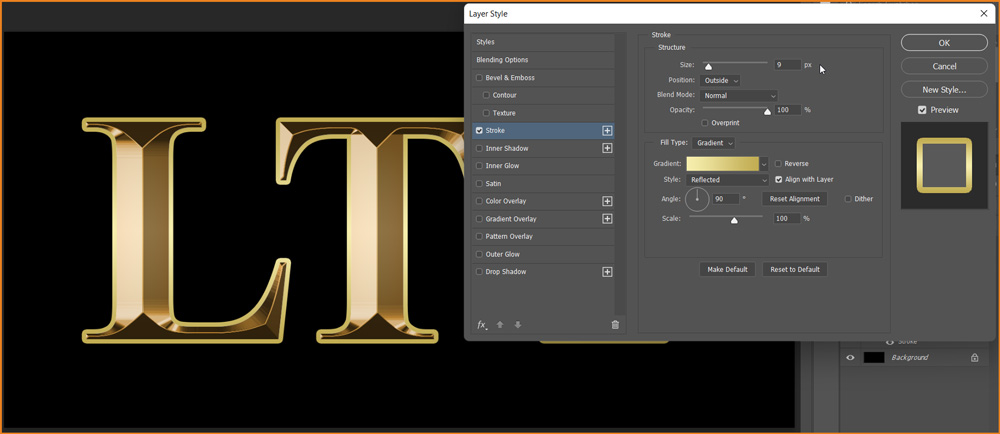
Change the Fill type to Gradient. Apply the Gold Gradient, we saved earlier and switch Style of Gradient to Reflected. Change the Position of Stroke to Outside. Increase the Stroke size to around 8-10 px.
Related Topics:
- List of websites for Royalty Free images
- List of websites for Royalty Free Raw images
- What is Photoshop
Bevel & Emboss
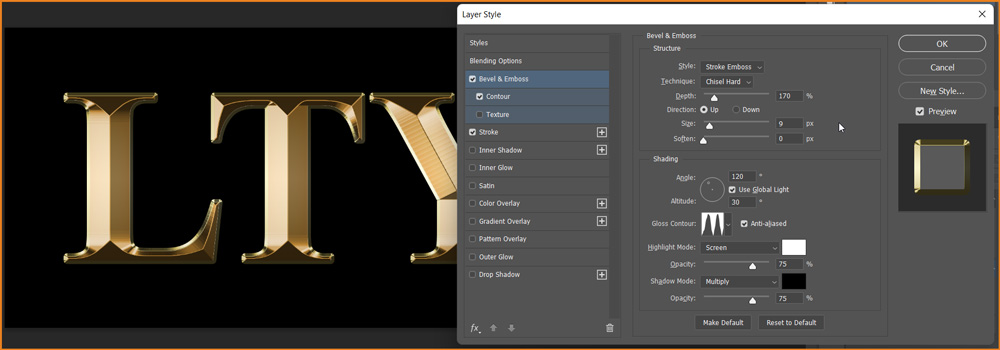
This time we need to apply it to the stroke. So, change the style to Stroke Emboss. Technique should be Chisel Hard. Depth at 170% and size to be same as Stroke size in previous step.
Under shading section, Angle at 120 degrees. Glass Contour to Ring – Double. Anti-aliased option checked. Set opacity of Highlight Mode and Shadow Mode at 75%
Also check Contour box under Bevel & Emboss on left side of Layer Style dialog box.
Related Topics:
Outer Glow
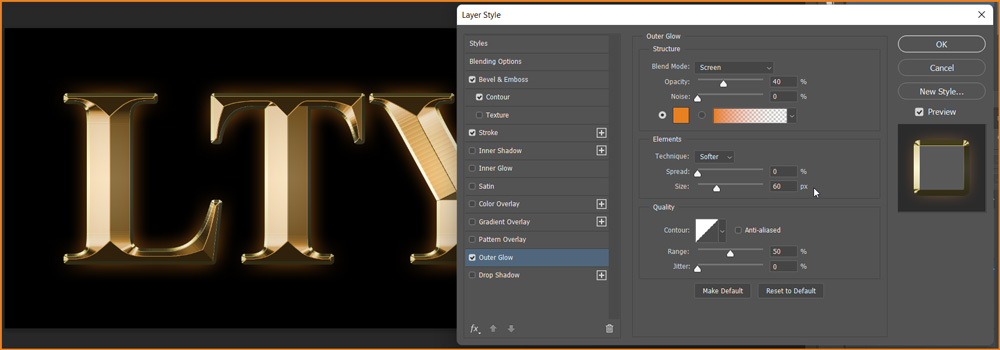
Now, apply Outer Glow from left menu in Layer Styles dialog box and set the opacity to 40%
Change glow color values to R=232, G=128 and B=31
Increase size to around 50-60 px.
Then click OK
Related Topics:
Add Sparkles
To create sparkles, create a New Blank Layer at the top of all the existing layers in layer panel. Select Brush tool and open Brush Preset Picker. Choose Crosshatch 4 brush preset inside Assorted Brushes under Legacy brushes.
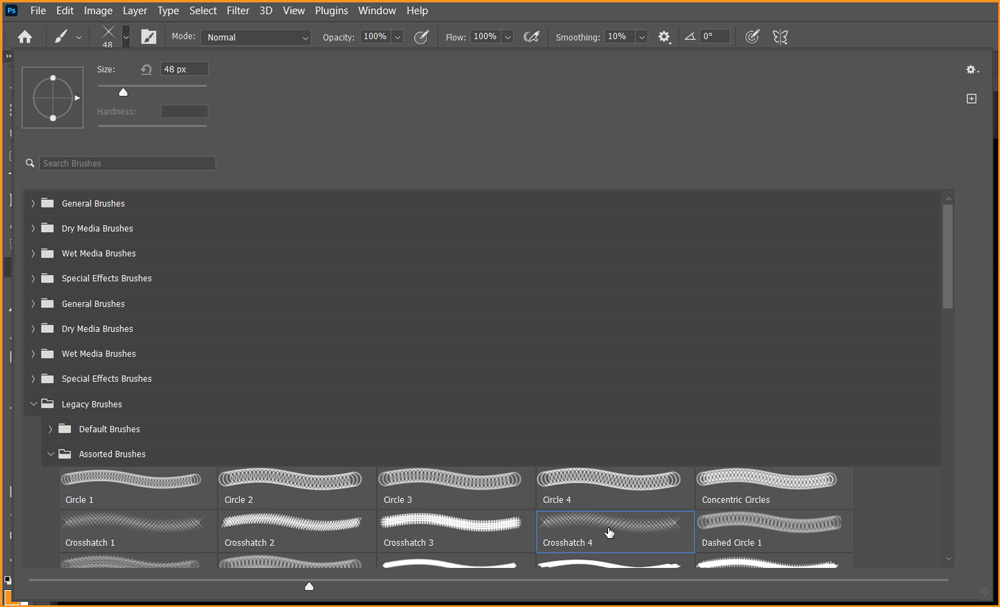
Press ALT on keyboard and click on the highlight color of text to pick highlight color.

Click on few highlighted corners with varying size of brush to create sparkles. You can also add gold dust if you want to make it more royal.

Related Topics:
- What is Digital Painting
- History Brush Tool in Photoshop
- Color Replacement Tool & Mixer Brush Tool
- Healing, Clone & Pattern Stamp Tools in Photoshop
- How to use Gradient Tool in Photoshop
- Burn, Dodge & Sponge Tool in Photoshop
- Blur, Sharpen & Smudge Tool in Photoshop
- Foreground Color, Background Color, Stroke & Fill
- Eraser tool in Photoshop
- Skin Retouching


