In this Photoshop Lesson, we’ll learn about ‘Brush Tool in Photoshop‘, ‘Brush Preset Picker’ and ‘Brush Panel’.
My name is Lalit Adhikari and we are at LTY. Let’s begin!
Table of Contents
Brush Tool
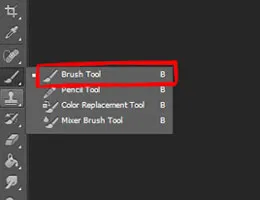
Brush Tool in Photoshop, in simple words are the digital form of our art brushes. As it’s a digital version of the traditional form of art brush, it has numerous advantages over the traditional counterpart.
It’s not only available in different shape and sizes but it also give us the option of creating our own brush preset .i.e., custom brush shape.
Related Topics:
Brush Preset Picker
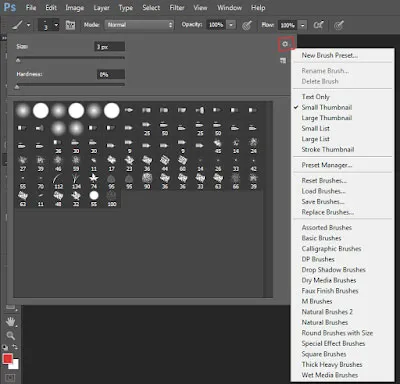
If you pick the brush tool from the toolbar, the first menu in the options bar you will see is “Brush Preset Picker”. There we can change the brush tip.
This menu shows different types of icons which are different types of brushes available in Adobe Photoshop.
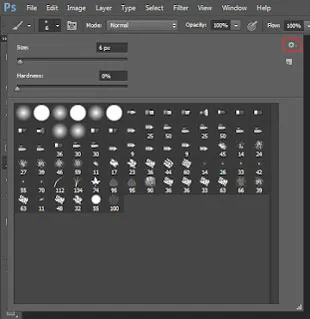
If you click on the small wheel icon on the top right of the preset box you will get different groups of preset brushes. These brushes are inbuilt with Photoshop. If you want to add any brush preset just click on it.
For example: I choose “Assorted Brushes” then Photoshop will ask you to Replace Brushes or “Append” them. “Append” means Photoshop will add them to the existing list of brushes and if you click “ok” then it will replace all the brushes together.
Now, let’s say you have downloaded a set of brushes and you want to add them to your brush preset. For this, you have to click on the option “Load Brushes”.
There are also options for changing the properties of the brush.
Related Topics:
- Healing, Clone & Pattern Stamp Tools in Photoshop
- How to use Gradient Tool in Photoshop
- Burn, Dodge & Sponge Tool in Photoshop
Size
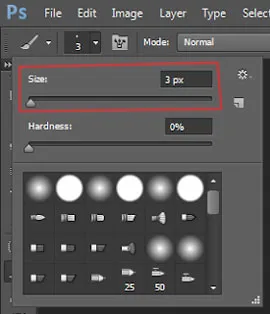
Here, you can control the size of the brush.
Hardness
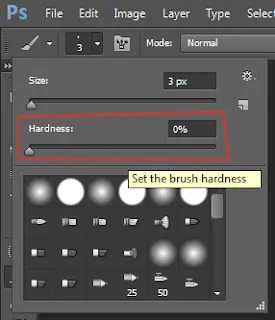
This option determines the hardness and softness of your brush edge. If you keep hardness to 0% then the brush strokes will have a very soft edge and if the hardness is at 100% then strokes will have very hard and sharp edges.
And the brush is going to paint whatever the color you’ve set as your foreground color. {Explanation for foreground and background colors is out of scope for this post. We will create another post for foreground and background color topic.}
We can also apply blend modes to brushes. If we choose “overlay” or “soft light” mode then it will blend the brush strokes with the background image.
Related Topics:
- Blur, Sharpen & Smudge Tool in Photoshop
- Foreground Color, Background Color, Stroke & Fill
- Eraser tool in Photoshop
Opacity

If we are making an artwork which needs to have brush strokes with some transparency, then we can manipulate the opacity to get the desired transparent strokes you need.
And the “flow” option determines in how much area does the pixels flow when clicking the brush.
There is a shortcut to change the size of the brush tip and it is by pressing the left bracket [ and right bracket ] on the keyboard to size down and up respectively.
Related Topics:
Brush Panel

To get a bit more creative with the brush tool, let’s look at some more edit options available in Photoshop.
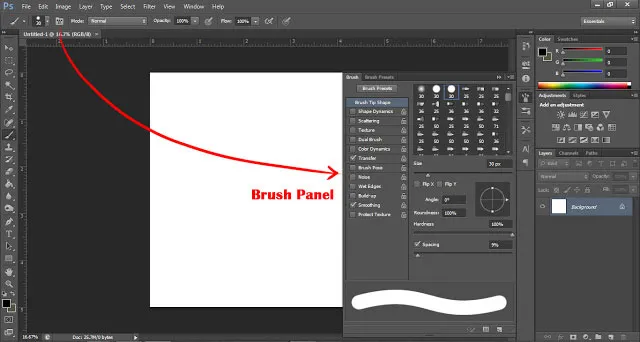
To make that happen, click on the icon up in the options menu next to the brush preset picker and it will open up the brush options panel. There is another way to open it by clicking on the “window” menu and selecting the brush option.
In this panel, at the top list of options, there is “brush tip shape”. We have the same option in this menu that is in “brush preset picker” with few other options such as angle, roundness, and spacing.
There are many options which can add more to our brush behaviour such as “Shape dynamics”.
Shape Dynamics
In this option, at first, you will see is “Size Jitter”. Jitter means Photoshop randomizes the feature of the brush as you paint. You can also choose different control such as fade, pen pressure, pen tilt and stylus wheel.
You can see the preview panel at the bottom of the brush panel. Here you can see the changing behaviors of the brush as you change them.
There are different “Jitter” options in this menu such as Angle Jitter, Roundness Jitter apart from Size Jitter. The brush will paint according to how you set different values in this panel.
Scattering
In this option, you can scatter the brush. We can increase or decrease the count of the brush when we paint and we can set the Count Jitter too.
Texture
In this option, we can give texture to the brush. And for that, you have to go to pattern picker and choose any texture you like from the texture menu.
Dual Brush
In this option, we can use two different brushes at the same time with the help of blending mode. And we can modify their size, spacing, and count.
Color Dynamics
In this option, we can set the color of our brush in between the foreground and background color. And in this option, we can also change hue Jitter, Saturation Jitter, Brightness Jitter, and Purity to get the proper output as we’ve desired.
Transfer
In transfer Option, you can randomize the opacity and flow of the brush.
Brush Pose
It is the new feature that is able to modify the tilt and rotation of any brush.
Noise
In this option, you can use noise to give a noise effect to your brush strokes.
Wet Edges
It helps to give a bit of natural look to your brush. This option can give a wet watercolor look. So, it is quite effective if you are making an artwork based on the watercolor effect.
Build Up
This option allows you to build up other brush strokes over the previous one in a natural way as if it is done with natural brushes.
Smoothing
This option makes the brush strokes a lot smoother than usual.
Protect Texture
By clicking on this option you can protect your texture on the images.
If you are following our Free Photoshop Lessons and Tutorial Guide, then next you should read about, ‘Color Replacement tool and Mixer brush tool in Photoshop‘.
Related Topics:
- Image menu in Photoshop
- Select menu in photoshop
- Filter menu in Photoshop
- View menu in Photoshop
- Window menu in Photoshop
- Photoshop Channels
- Dual light effect
- Feather in Photoshop
- How to create New Document in Photoshop
- Color Settings in Photoshop


