In this Graphic Design Lesson, we’ll be discussing about, ‘What is Digital Painting’, ‘How Technology is Evolving Paintings’, ‘Advantages of Digital Painting’ & ‘Process of creating Digital Painting’.
My name is Lalit Adhikari and we are at LTY. Let’s begin!
Table of Contents
Digital Painting
Digital Painting in Adobe Photoshop or in other digital medium is a modern approach to traditional art process. It is mostly the same as traditional painting, but only in digital form. With all the options available on one platform it is becoming an easier art form for the contemporary artist.
It is an inexpensive art form as no matter how many times we discard them or use them there is no wastage of resources or money. The artwork is editable and we get lots of options to edit that artwork.
The painting process is quick and we don’t have to worry much about the canvas to dry for applying further changes which are quite common when working with oil and acrylic colors.
Technology is Evolving Paintings
Technology is slowly replacing the traditional artwork methods. In this fast-paced world when there is so much lack of time artists are more and more gravitating towards digitizing their artworks.
And some of the well-known software for making such digital painting are Adobe Photoshop, Corel Painter, and Krita.
In these software, we can get every possible brush and canvas option so that we can create a variety of artworks using absolutely no art supplies.
But the only difference is that in the place of brush we have to use specialized digital pen or graphic to make our artwork possible.
Related Topics:
Advantages of Digital Painting
Digital Painting is very quick to prepare and it has almost every editable option and we can make changes to our artwork anytime we like.
It takes literally no time to make huge changes to the artwork which might take hours and days for traditional painting if we do it manually.
This method of painting is so convenient that a digital painter can store all his/her artwork in a simple pen drive or hard drive and can save the huge amount of space or can carry anywhere they like.
To make a digital art the only thing we need is a computer and a graphics pen. There is an even more advanced version of graphics pen available in the market like Wacom Cintiq editions on which we can make our artwork directly on the screen.
Process of creating of Digital Painting
Here, I will be discussing different types of digital paintings and there process of creation.
Concept Art
Concept art could be a rough sketch or a fully detailed painting of any concept usually related to movies, TV shows, books or stories of any kind.
In pre-productions, when directors or producers want to design any scene or imagine a character from their story, they need specialized concept artists to execute their thoughts so that they can further work on it.
To make concept art, at first, write down all the features or conditions that are required to make that art, then slowly move on to the sketch. At first, try to lay the rough outlines and then move on to adding the details.
My advice before starting the sketch would be to use blue or red color for the initial construction lines because it gets very easy to draw over it, you can easily work on your final sketch without getting interrupted by the rough lines of the layer below.
After the final sketch is finished we can move on to coloring. The first step would be the base layer which is usually the flat colors without the changing of any tones.
After that, we can add the shadows and highlights while keeping in mind the intensities of shadows that have been cast. Trying to keep things as realistic as possible and for doing that we must have to be a keen observer.
To make the concept art we don’t really have to see any reference photos that are why it’s called a concept art which will only include the thoughts of the artist. Concept art may include bizarre character design or any books or movie props.
Here is an example of the concept art of my favourite anime character ‘Kakashi Hatake‘ from Nurato. Making a realistic concept art out of a 2D character could be a quite tricky job.
So, as I advised above, first start drawing the basic construction lines with a red brush. Keep in mind that the features of the original character should match the realistic one.
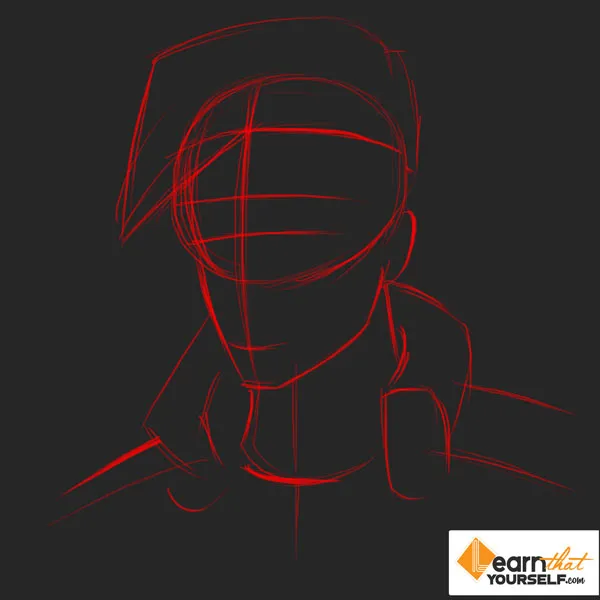
After you are satisfied with the basic shape of your ‘red brush’ lines, move on to the blue sketch in a different layer while keeping down the opacity of the red sketch layer.
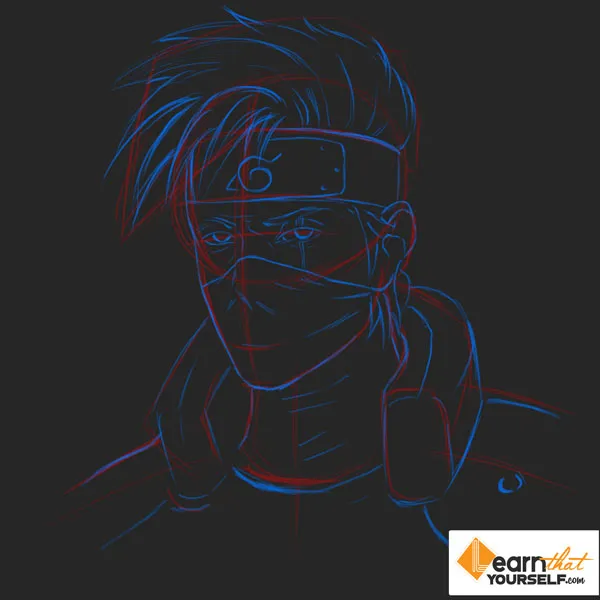
The blue sketch has more details than the red ones. Keep adding humane details until it looks realistic enough.
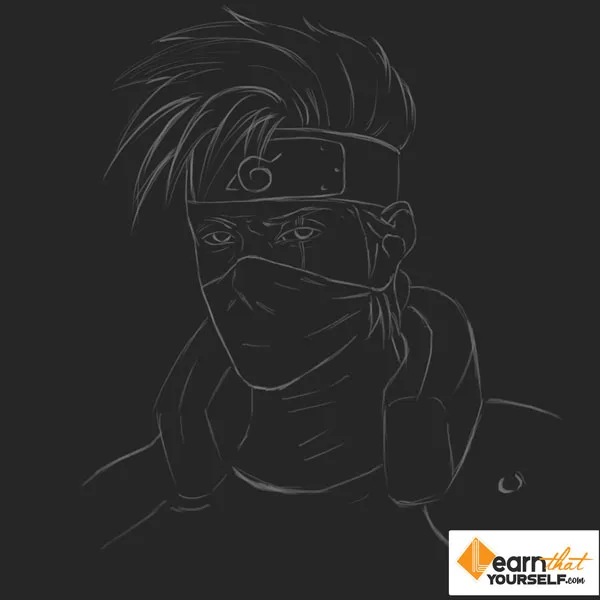
After you are done with your blue sketch, duplicate the layer and make another copy of that blue sketch and de-saturate the layer. It will make the sketch look gray giving it more pencil sketch look.
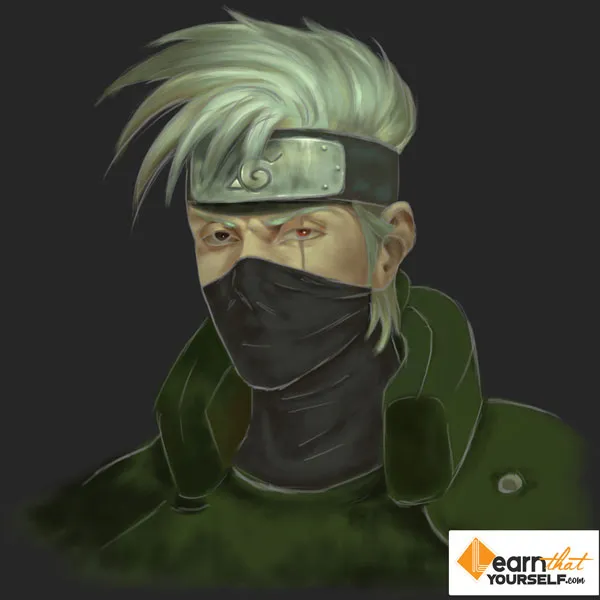
Now, turn off the blue and red sketch layer and in another layer start painting the base color of the character. Keep in mind the exact colors that are used in the original character.
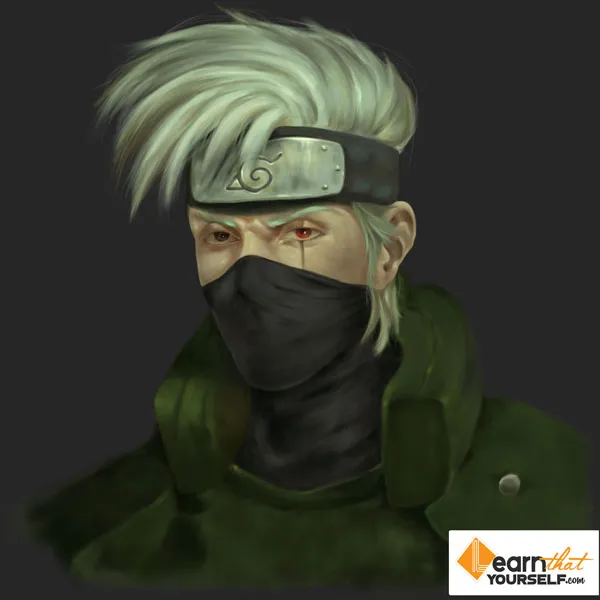
After you are done with the detailing move on to adding the details of the character. Here, try to boost up your imagination and think how will a shinobi (ninja) look like in real life.
Try focusing on skin texture and details of the face as it is a portrait painting. Remember that the character of your portrait should match with your original 2D character.
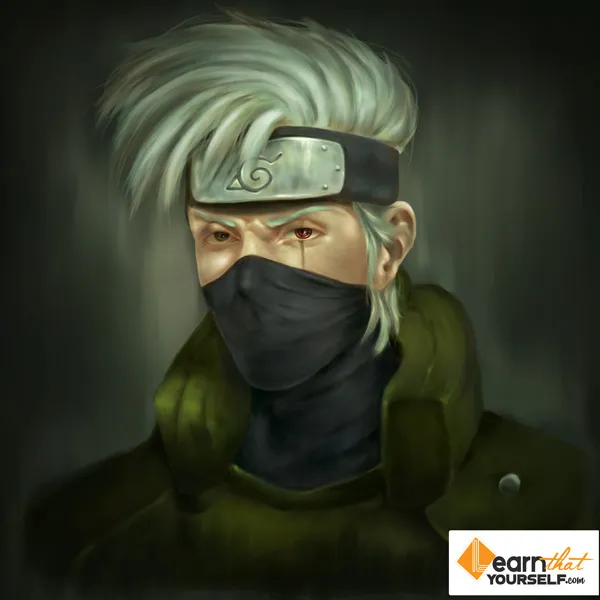
So, this is after some finishing details and color correction. Do not forget to add an appealing background so that your character should look more vibrant.
Related Topics:
Hyper-realistic digital painting
Hyper-realistic or photo-realistic digital painting means making a realistic portrait of anyone or any object.
This is very similar to ‘art study’ in traditional painting. In this type of painting, we usually try to copy the exact shape, color and texture of the ‘subject ‘that we want to paint.
Like every other painting, its process also starts with a rough sketch and then proceeded to the detailed version. But the major difference that comes with it is its coloring.
The coloring is done by making a color pallet that matches the tone or the ‘subject’. Color picker tool is very beneficial in this case as it helps us to get the exact colors we will require while making the replica of that ‘subject’.
Observing the exact texture of ‘subject’s’ surface we need to proceed with the final steps. We have to make sure that we need to exactly replicate the shadows and highlights as a slight mistake might ruin the whole piece.
Especially with the portrait painting, we need to study how light reflects back from the skin and the way it looks when the light gets absorbed in the skin.
To make a hyper-realistic painting the most important thing we need to keep in mind is that we have to replicate the texture of its surface as accurately as possible making sure to cover every detail of the ‘subject’.
After finishing the piece we can play with adjustment sliders like ‘levels’ or ‘brightness and saturation’ to intensify our paintings.
Here is an example of a hyper-realistic digital painting that I’ve created a while ago. I chose to paint my favorite could drink “Thumbs’ Up”. Like I said above I started off with a sketch which then proceeded into a detailed one.
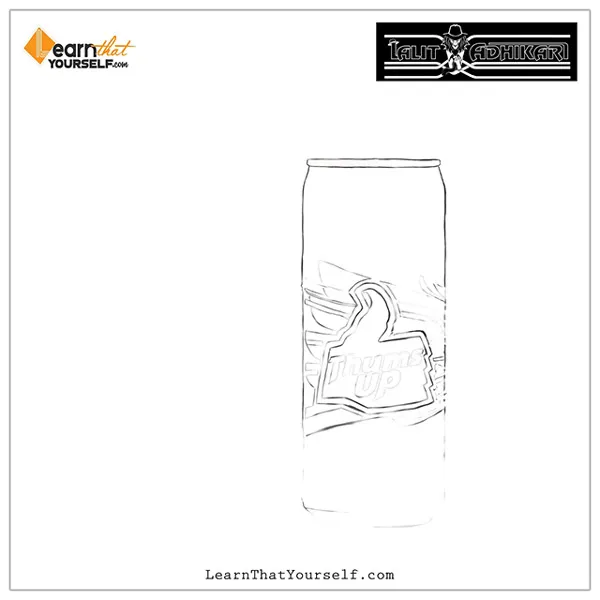
Then the base sketch with various colors picked directly from the subject by the color picker tool.
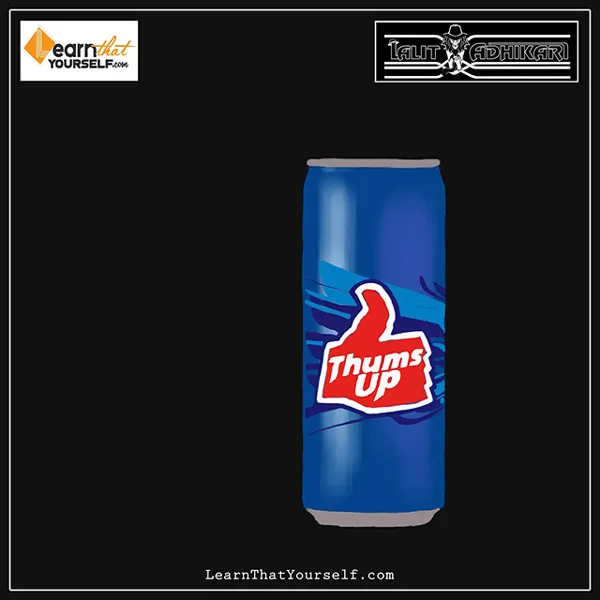
Then, I started on with detailing, which is quite a long process and you must have a bit of patience to pull that off.
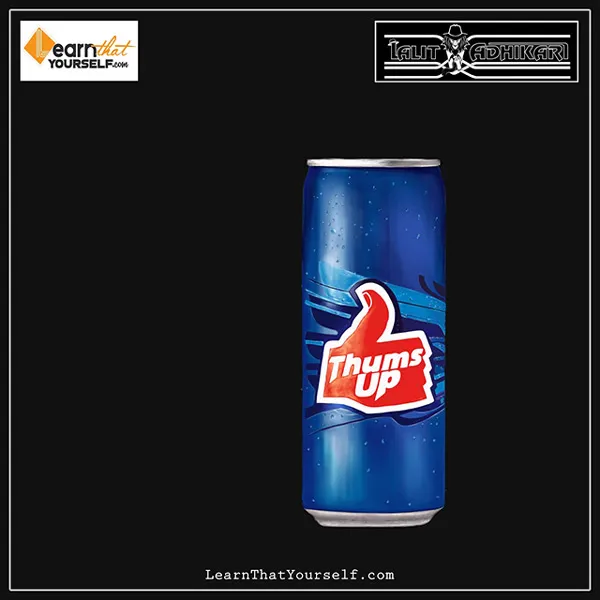
To make the Thumbs up art look a bit dramatic, I created a merged copy of the whole painting and placed it in the horizontal position.
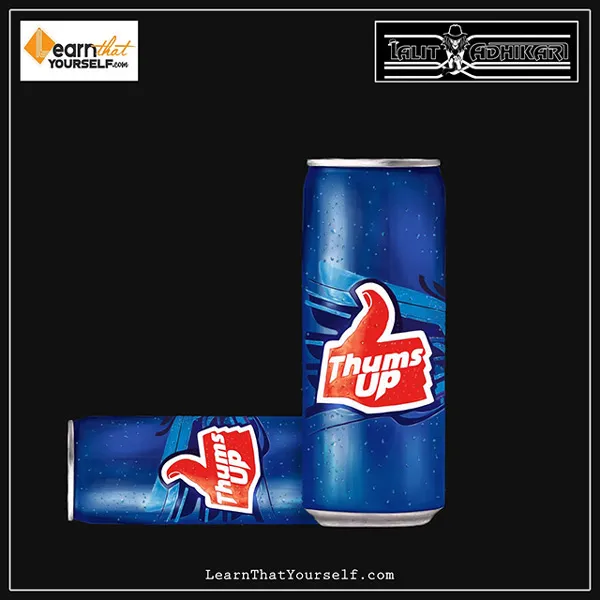
The next challenge was to create the background, as my reference image simply had a white background. Then I thought it would be interesting if I give the background a glass floor effect as if the subject is kept over a glass surface.
To create this I simply made a copy of the image, rotated it and lowered its opacity. I also masked the image from below to create that look.
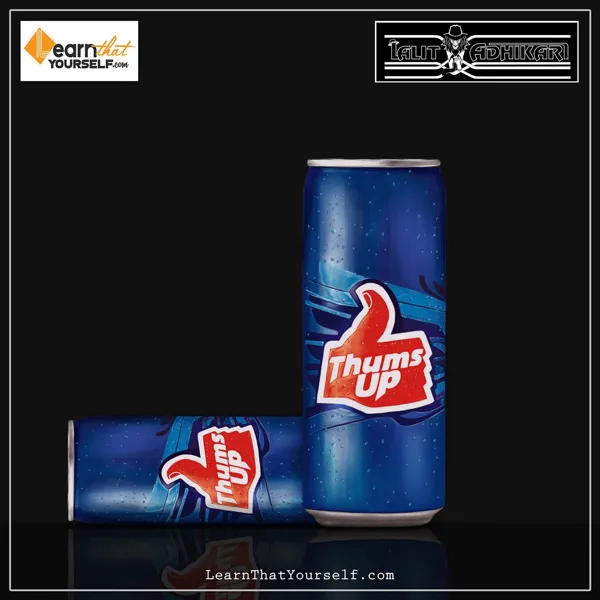
After that, as discussed above, I played a bit with levels and brightness to intensify the painting. And that’s how I finished this hyper-realistic art.
Related Topics:
- Elements of Design
- List of Websites for Royalty Free Images
- List of Websites for Royalty Free Raw Images
Anime style art
In anime and cartoon styled art we mostly focus on sketches.
At first, we start with rough constructions lines and then we move on to detail sketching. The coloring in this style of art is very simple compared to the concept and hyper-realistic art.
Usually, starting with a base color and then moving on to highlights and shadows which shouldn’t be more than two tones. There is no need for blending the shadows and highlights with the base color.
This style of art is mostly used by comic artists.
Here’s another example of anime art of my other favourite character from ‘Beyblade’ anime series Kai Hiwatari.
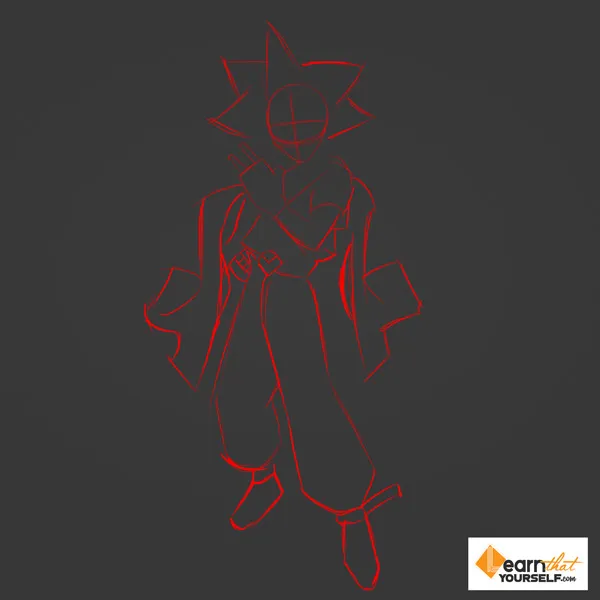
Same as the concept art process I started out with red construction lines, drawing the basic shape and pose of the character. After I’ve done that I quickly moved on to the next step of the blue sketch.
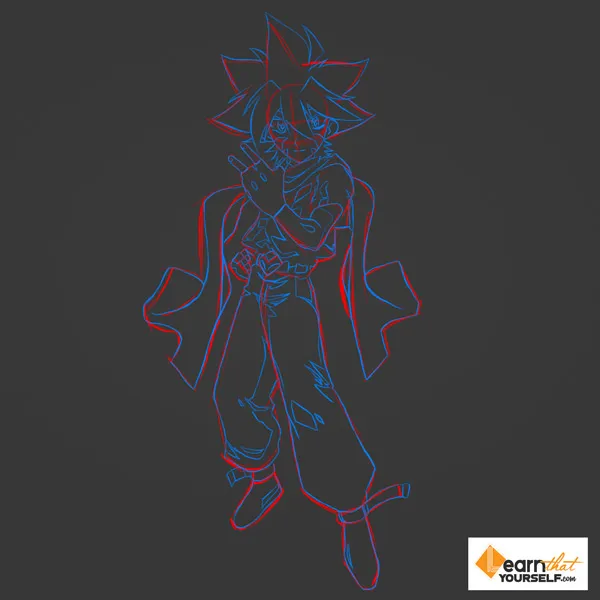
The blue sketch is usually more detailed. Making the brush flow low (below 25) and opacity maximum (100%) I easily completed the detailed sketch as a red sketch underneath that layer helped as guides.

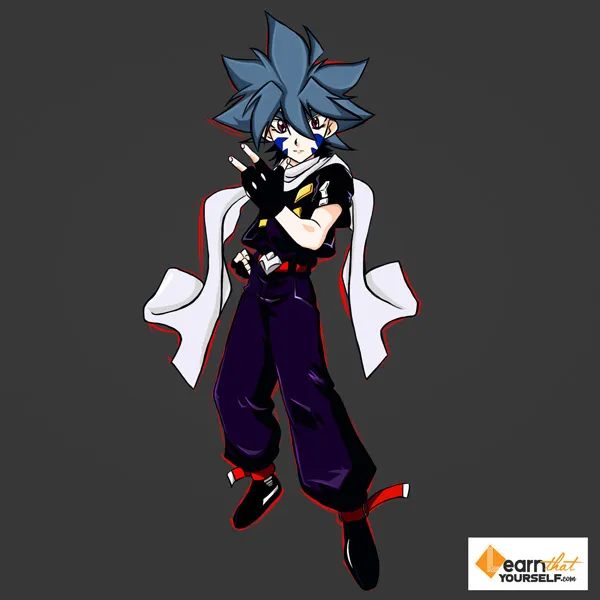
The next step was applying the colors on the character. As it’s an anime art the color tones will be usually not more than three. So I applied only three tones of color which were shadows, mid-tone, and highlights.
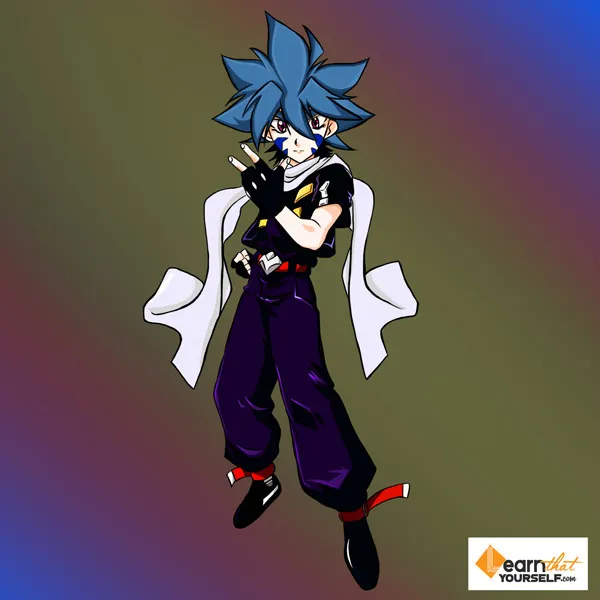
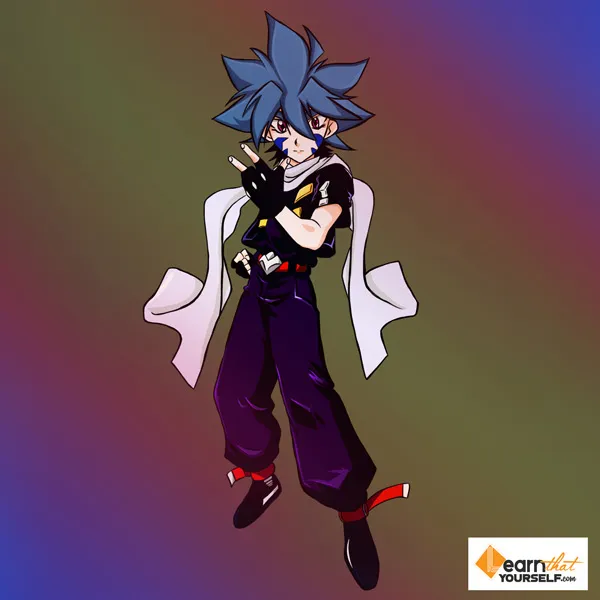
And like always I do not leave my artwork with the simple plain background as it looks very unfinished. So, in this artwork, I applied a few gradient and adjustments and that’s the final result.
Related Topics:
Landscape/ Environment/ Background Art
Landscape art is quite different from all kinds of digital arts. Its process usually starts with painting an abstract background shape of the landscape then slowly developing the bits of details.
We don’t need to build every detail of the landmark as it is generally a long shot view and we can’t really see all the details of the landmark.
The main focus we need to give is the lighting of landscape art. We must know how a source of light interacts with the elements of nature especially plants and reflecting surfaces like glass and shiny metal object.
Another most important thing to keep in mind for making landscape art is ‘architecture’.
In any kind of environment or landscape art, there could be a building or castle of some kind which needs correct architectural measurements to look good. Another thing which we need to focus on is ‘Perspective’.
There are mainly six perspectives on which we can make our landscape art starting from one point perspective to six point perspectives.
Here, is another example of environment art. The workflow of creating this artwork is very similar to the concept art where you start off by creating a concept sketch.
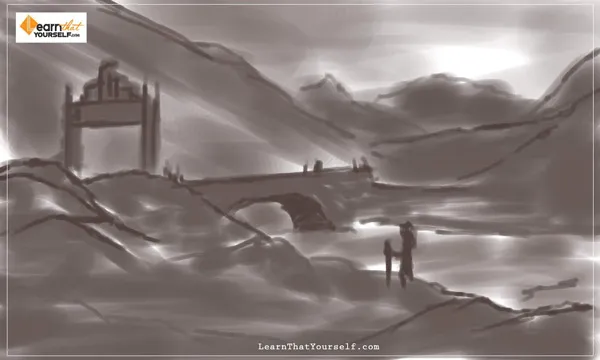
Then, a detailed sketch followed by adding elements over the top.
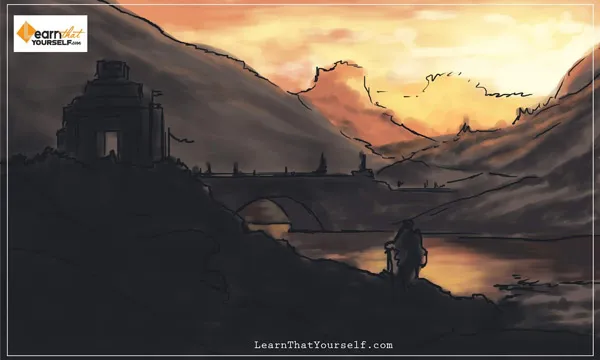
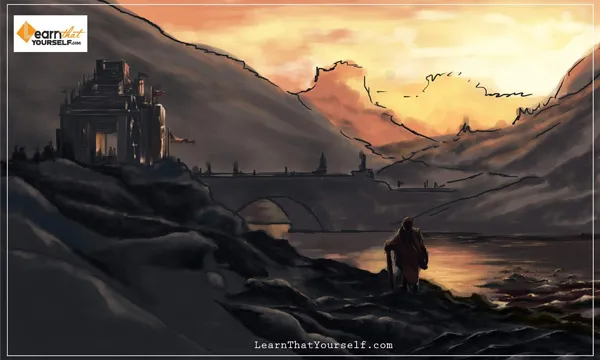

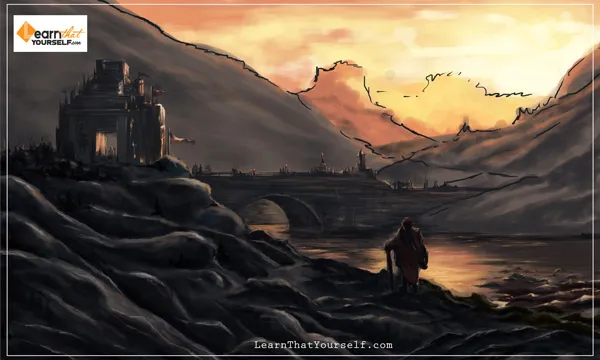
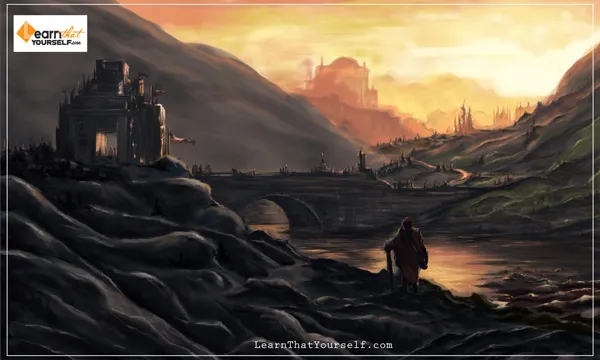
After you are satisfied with the details, move on to the color adjustment part. In this artwork, I used two gradients: blue gradient and the yellow and green gradient to add a more natural touch to the painting.
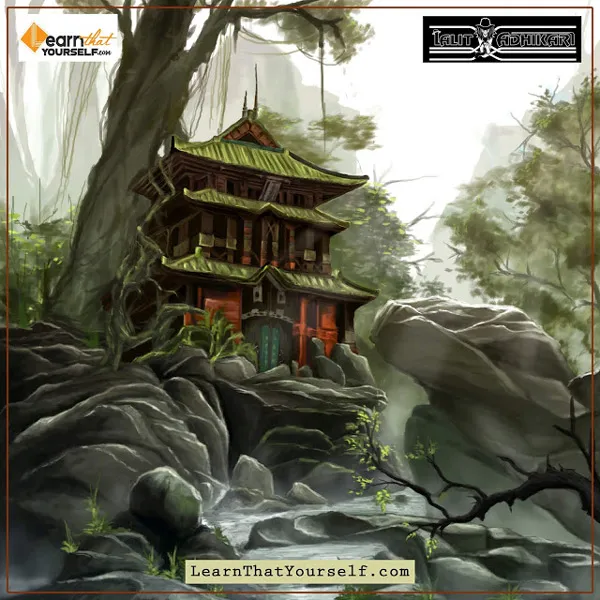
Whenever you are creating environment art focus, more on “perspective” and ‘lighting’ which is the key point to make your artwork look more natural and appealing.
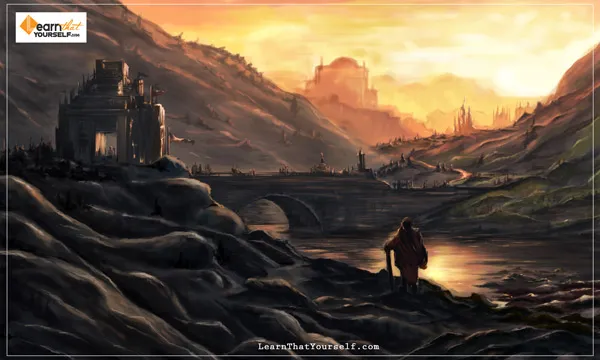
Another example of environment art and it’s Work In Progress (WIP) are below.
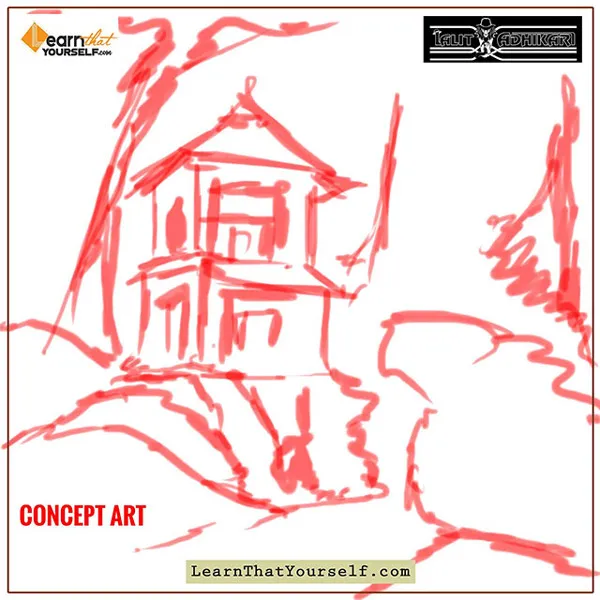
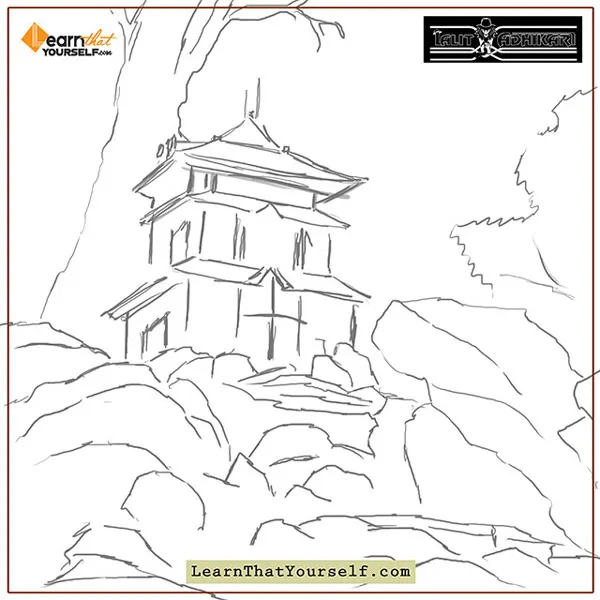
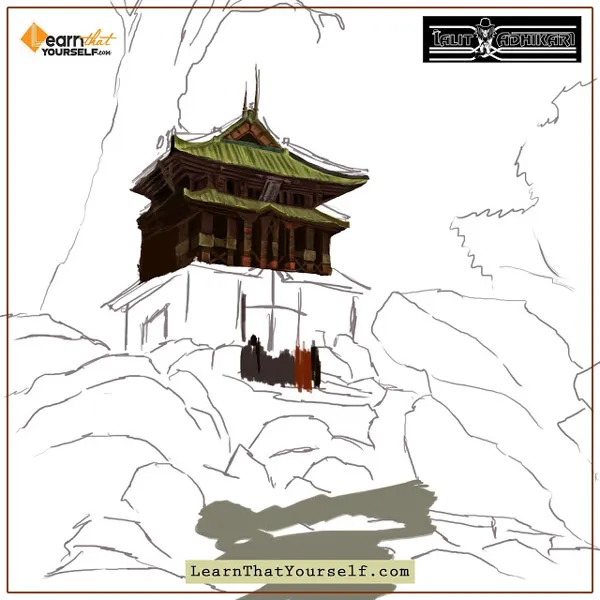
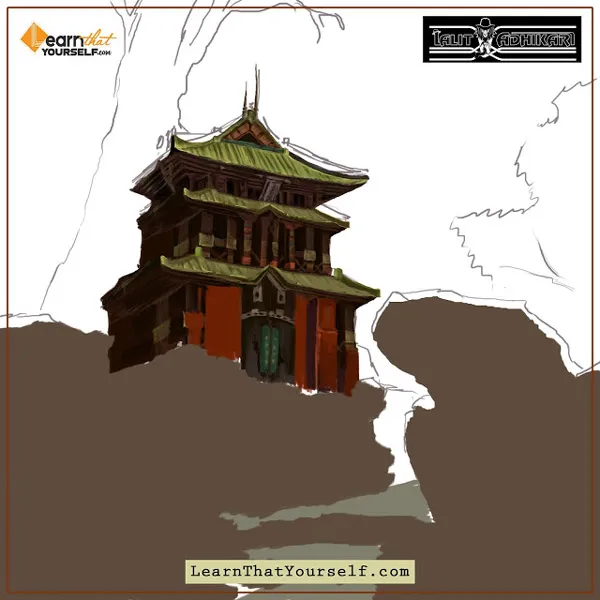

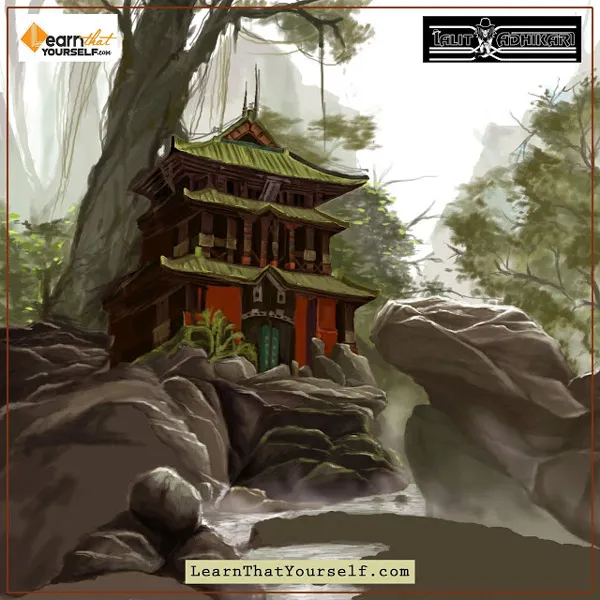
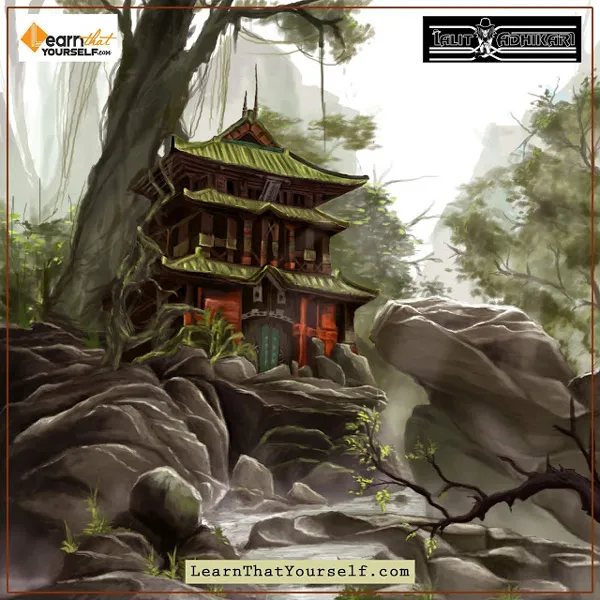
Related Topics:
How to Create Digital Painting in Photoshop (Videos)
Here, we are show casing the screen recording a Digital Painting of Deepika Padukone being made by Gaurav Maurya.
Speed Art Video
Part: 1
Part: 2
Part: 3
Part: 4
Part: 5
Part: 6
Related Topics:
- What is Photoshop
- Tools in Photoshop
- Selection Tools in Photoshop
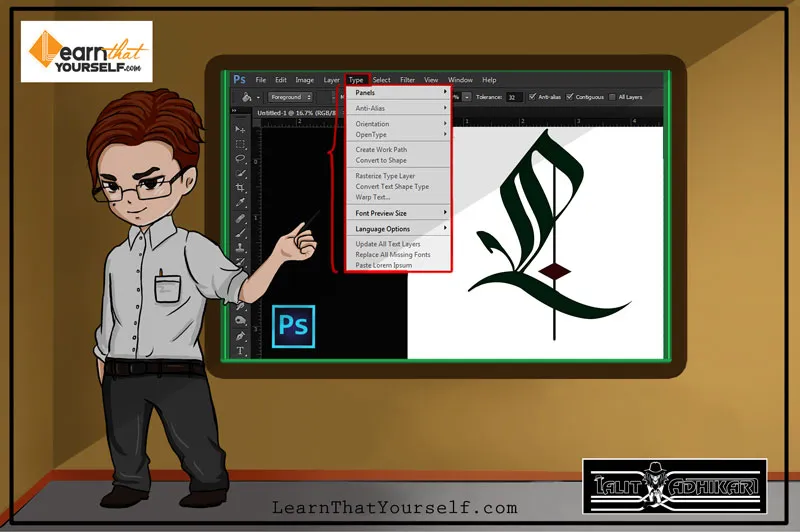
- Type menu in Photoshop
- How to Crop in Photoshop
- Brush Tool in Photoshop
- Pen Tool in Photoshop
- History Brush Tool in Photoshop
- Color Replacement Tool & Mixer Brush Tool
- Healing, Clone & Pattern Stamp Tools in Photoshop






Nice
Very interesting and detailed information! Perfect just what I was searching, serves perfectly for digital paintings in photoshop!