In this Illustrator Lesson, we will be learning about Type Tool in illustrator by Lalit Adhikari at LTY.
Type tool in illustrator is one of the most widely used tool in Graphic Designing, to create typographical designs or text for digital or print designs, ads etc. In this blog post, I will be talking about the basics and different options you have with the different type tools available in the Adobe Illustrator.
Table of Contents
Type tool
To access the type tool go to the toolbar on the left side of the Illustrator interface and select the ‘T’ Type tool. If you hover over the ‘T’ option can also see the name of the tool which is ‘Type tool’. Or for the shortcut, you can press T on your keyboard.

So, if we click and hold down the type tool option, you will see a fly-out menu open up where there are other type options like:

- Area Type tool
- Type on the Path Tool
- Vertical Type tool
- Vertical Area Type Tool
- Vertical Type on a Path Tool

On the extreme right-hand side of the fly-out menu, there is a Chevron icon. And if you click on this triangle the fly-out menu will convert into a small dialogue box which will make your usage of type tool a bit easier.

Two ways to use Text tool:
- Point Text: For this, we have to click on the Artboard using Type Tool. A blinking cursor will appear which will means you can type your text.
- Text Box: For this, click and drag, we have to make a box. Then we can type into this box or paste any text that you’ve copied.
Point Text
Point Text, as the name suggests, it is created in reference to a point. The point where we click with our Type tool. This point is called the Reference Point.
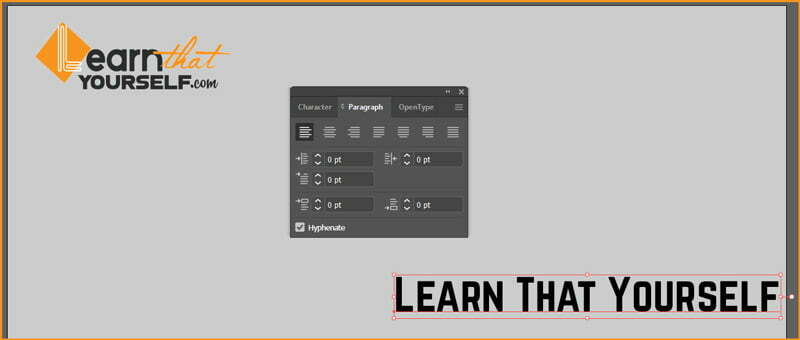
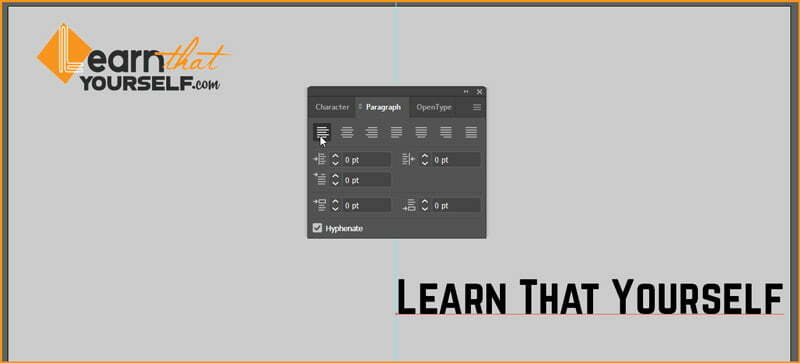
The image above shows a Point Text and Paragraph Panel. The Point Text was created by clicking at the approximate center of the Artboard.
The Paragraph Panel currently shows that our text is Left Align. It is also the default alignment for text.
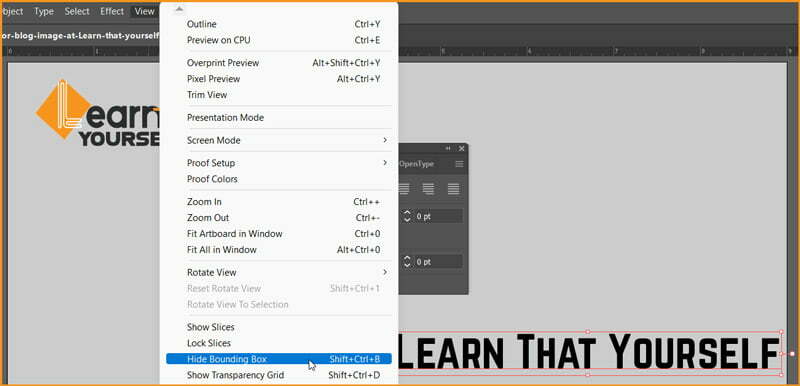
And as our text is selected, we can see a bounding box around the text, due to which its hard to see our Reference Point. So, let’s hide the Bounding Box by going to View menu and choose Hide Bounding Box option.
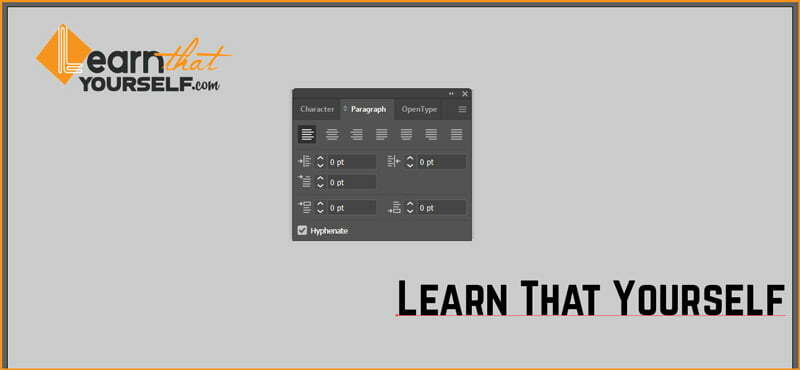
Now lets zoom in to the text, to locate the Reference Point of Text.
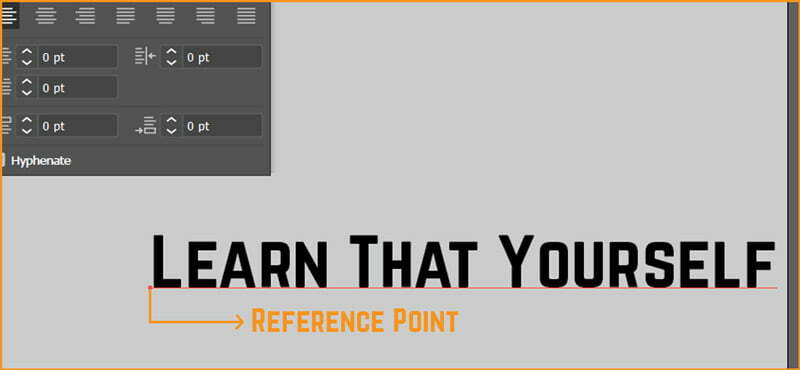
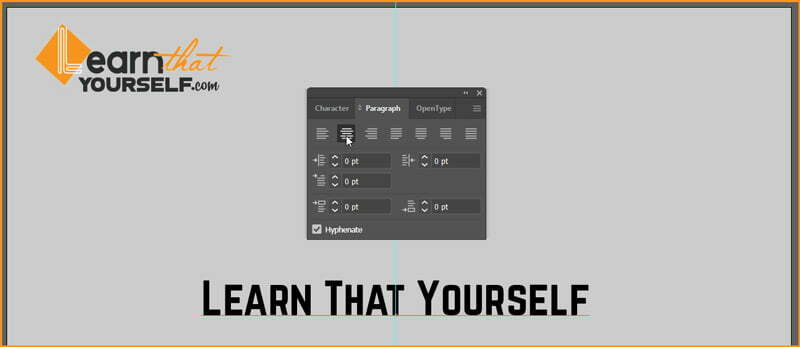
This is called Reference Point because this point doesn’t change its location unless we move it. It can be easily noticed if we just place a guide on the point and then change its alignment.
- Below image shows a Guide marks the position of Reference Point with text being Left Aligned.
- Text center aligned. Image below.
- Text Right Aligned. Image below:
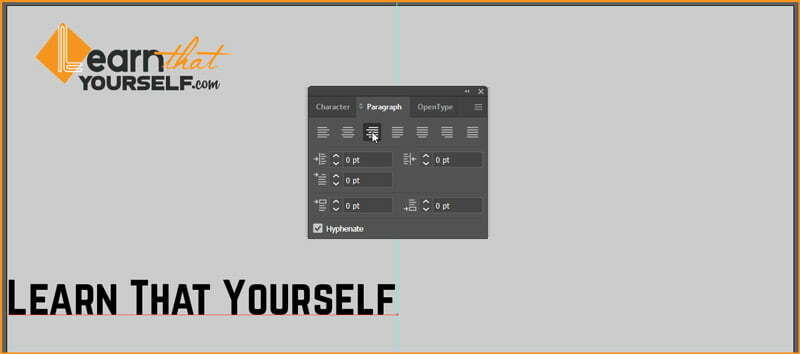
As we are on topic of Alignment too, I want to point out that Point Text can’t be Justified. As to Justify a text we need defined Left and Right edges. A Point Text is only defined at one point. So, we can’t use Justify Alignment with it.
We can drop Type Tool Selection by either clicking on the Selection Tool or press CTRL + ENTER or hit ESC on your keyboard.
Text Box
Text Box, as name suggest, we have to click and drag using Type Tool and create a Rectangular shape. As we drop the click, we can type inside the box.
After you’ve deselected the selection you can manipulate the shape of the box and the arrangement of text will change according to its shape.


Text in Text Box can be used with Justify alignment.
The options in the Type menu of Illustrator is similar to the options of Type menu in Adobe Photoshop. To know more about Type tool option, you can read my blog post on Type Menu in Adobe Photoshop.
Related Topics:
- Paintbrush & Blob brush Tool in illustrator
- How to use Eraser tool in illustrator
- How to use the Pen Tool in illustrator
Area Type Tool

You can take any shape, click on the edge of the path and then you can start typing or place your text. And this text will fill the area that you’ve created.
This option is beneficial if you are making any infographics or icons. And you can apply all the Type tool and paragraph options in your text.
Related Topics:
- Perspective Tool in Illustrator
- Selection Tools in illustrator
- Width Tool, Warp Tool, Twirl Tool, Pucker Tool, Bloat Tool, Scallop Tool, Crystallize Tool and Wrinkle Tool in Adobe Illustrator
Type on a Path Tool

If you create any shape, let’s say ellipse. And then after selecting this type option, you can click on the edge of the path.
You will see a ‘Squiggly’ blinking cursor over the edge of your shape and as you type you will see that your text will cover the edge of your shape.

You can click on the ‘Direct Selection Tool’ and change the placement of the text by tampering with the ‘little lines’ sticking out of the shape.
And it can push your text around or if you hold Shift key and drag the text inside, your text will be inside the edge of the circle.
There is a small point in the edge of the path and you can manipulate the shape of the path by selecting the Direct Selection Tool while clicking and dragging on it.
This will not distort the type but it can distort the space of the type.
Related Topics:
- Shape Builder Tool, Live Paint Bucket tool and Live Paint Selection Tool in Adobe Illustrator
- How to use Gradient Tool in Adobe Illustrator
- How to use Mesh Tool in Adobe illustrator
Vertical Type Tool

This is a Type tool where it types downwards. If you make a box and type any text like I’ve explained above while selecting this type option then the text will run from top to bottom instead of left to right.
It will be the same as the Vertical Area or Vertical Type on Path Tool.
Related Topics:
- How to make a Semicircle in Adobe Illustrator
- How to design a Retro Flower Pattern in Adobe Illustrator
- How to set Brush Pressure in Adobe Illustrator
Wrapping Text around Graphics

To wrap a text around any image of graphics, first you have to select the type tool and drag out the text box, then write or copy your text.
After doing that import the graphics, image or any shape you want to wrap around and place it over the text box like I did below.

Then click on the first one and Shift click on the other one, go to object in the options menu bar and select the text wrap option.
A fly-out menu will open up as you hover your cursor over the text wrap option. The first option in this menu is ‘Make’ and you need to select on that.
And this option will automatically wrap your text around your object.

There is another option available in Adobe Illustrator for doing this wrapping is if you want to wrap your text around a bit more complicated shape. Drag the text box and write your text on the same way as I’ve described above.
Now, go to the object option, select the ‘Text Wrap’ and then in the fly-out menu select the ‘Text Wrap Options’ which is under the ‘Make’ option.
As you click on that option it will open up a dialogue box which has ‘Offset’ option where you can change the settings of the text wrap to fit more precisely around your shape or graphics.
For all the Adobe Illustrator lessons, Free Adobe Illustrator Lessons.
Related Topics:
- How to Create A Pressure Sensitive Brush in Adobe Illustrator
- How to Create Metallic effect in Adobe Illustrator
- How to Create Flower using Gradient Mesh in Adobe Illustrator
- How to Recolor Artwork in Adobe Illustrator
- How to Create Silver Metallic Effect in Adobe Illustrator
- What is Adobe Illustrator
- Line Segment Tool, Arc Tool, Spiral Tool, Rectangular Grid Tool and Polar Grid Tool in Adobe Illustrator
- Rectangle Tool, Rounded Rectangle Tool, Ellipse Tool, Polygon Tool, Star Tool and Flare Tool in Adobe Illustrator
- Typography
- Laws Of Design


Long but informative … really great.