In this byte size Adobe Illustrator Tutorial, I will teach you, ‘How to set Brush Pressure in Illustrator’.
Table of Contents
Introduction
If we have a pressure-sensitive graphics tablet, it’s possible to use pen pressure in Illustrator brushes.
However, as Illustrator has five types of brushes with different settings, creating a pressure-sensitive brush can be quite tricky.
We will be discussing them one by one below.
How to set Brush Pressure for Calligraphic Brushes
Follow the following steps:
Step – 1
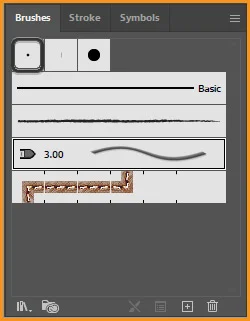
Open Illustrator, create a Document and then go to Window > Brushes
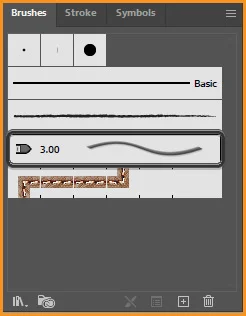
Take Paintbrush Tool and select the first brush from the list — a simple Calligraphic Brush.
Step – 2
If we draw a line with it, we’ll notice it doesn’t matter whether we use a graphics tablet or a mouse, the line looks exactly the same.
Step – 3
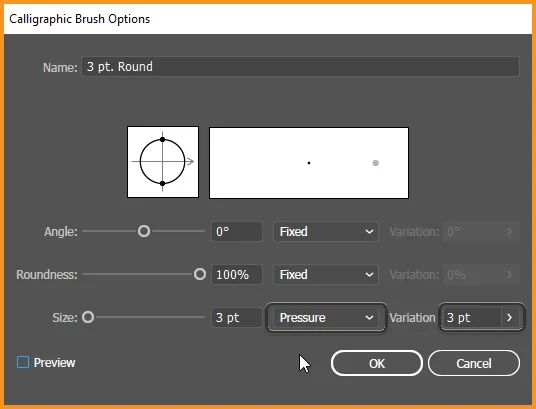
To set the pressure sensitivity for this brush, double-click on its icon in the list.
Calligraphic Brushes have only three settings: Angle, Roundness and Size.
All of them can be linked to the pressure of your pen. To give your lines tapered tips, we just need to set Size to Pressure and increase the Variation.
Step – 4
Press OK and draw another line, pressing lightly at the beginning and strongly at the end. Now the line looks exactly as we would expect!
Related Topics:
- How to Create A Pressure Sensitive Brush in Illustrator
- How to Create Metallic effect in Illustrator
- How to Create Flower using Gradient Mesh in Illustrator
How to set Brush Pressure for Art Brushes
Follow the following steps:
Step – 1
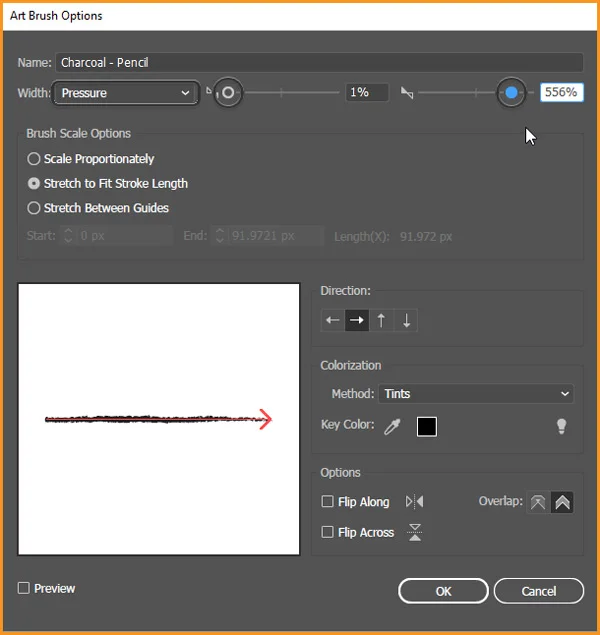
Select the brush in the third row now — “Charcoal – Pencil” an example of an Art Brush.
Step – 2
If we draw a line with it, we’ll notice it actually has a tapered end but only because it’s a part of the shape of the brush — it’s not actually linked to the pressure of your pen.
Step – 3
To set the pressure sensitivity for this brush, double-click it to open its settings.
Art Brushes are more complex but for now we’re only interested in the Width property. If we open the drop-down menu next to it, we’ll be able to pick Pressure.
Then, by dragging the markers on the left and right, we can set the Minimum width (low pressure) and the Maximum width (high pressure).
Step – 4
Press OK and draw another line just like before — starting lightly and ending strongly. The width of the line will be adjusted to your pressure!
Related Topics:
- How to Recolor Artwork in illustrator
- How to Create Silver Metallic Effect in Illustrator
- What is Adobe Illustrator
How to Set the Brush Pressure for Bristle Brushes
Follow the following steps:
Step – 1
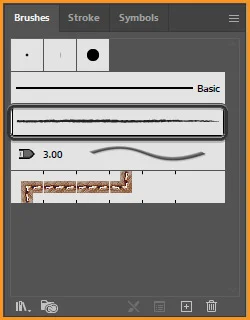
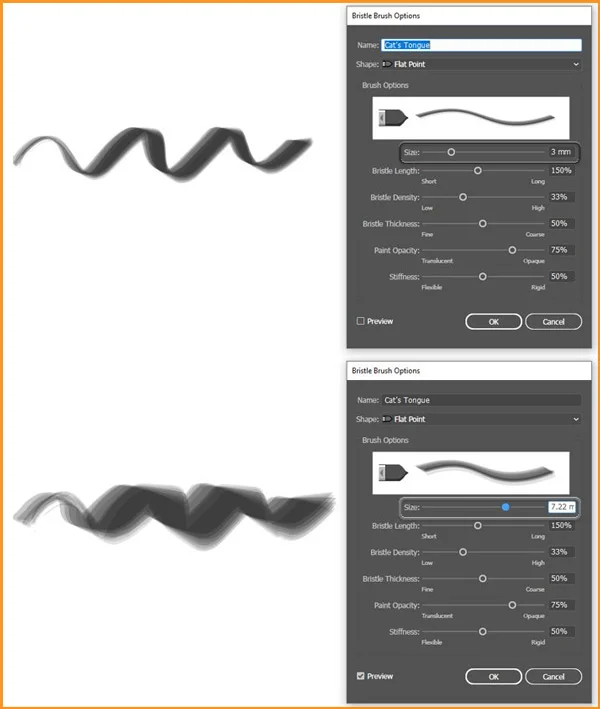
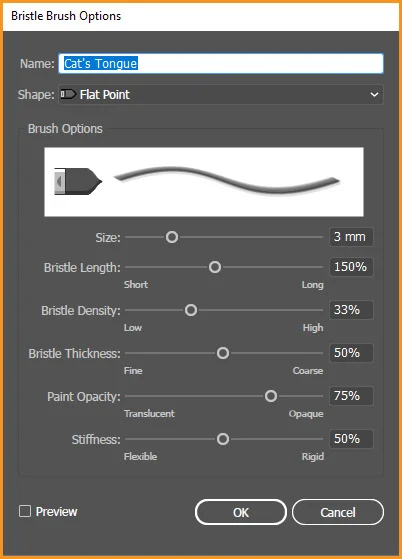
Another brush on the list is “Cat’s Tongue”, and it’s an example of a Bristle Brush.
Step – 2
If we open its settings, we’ll notice it doesn’t really have any drop-down menu that we could set to Pressure. This is because Bristle Brushes are pressure-sensitive by default!
Step – 3
If we don’t believe me, just draw a line with your mouse and another one with our pen. The difference is pretty clear!
Step – 4
Bristle Brushes are supposed to imitate traditional brushes and in traditional brushes things are more complicated than “low pressure = small; high pressure = big”.
That’s why we can find a lot of different settings in the Bristle Brush options, and finding the correct configuration may require some experimenting.
However, both Size and Bristle Length are a good place to start if we want to control the general variation in size.
Related Topics:
- Line Segment, Arc, Spiral, Rectangular & Polar Grid Tool
- Rectangle, Rounded Rectangle, Ellipse, Polygon, Star & Flare Tool
- Type Tool in illustrator
How to Set the Brush Pressure for Pattern Brushes
Follow the following steps:
Step – 1
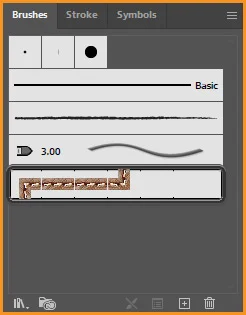
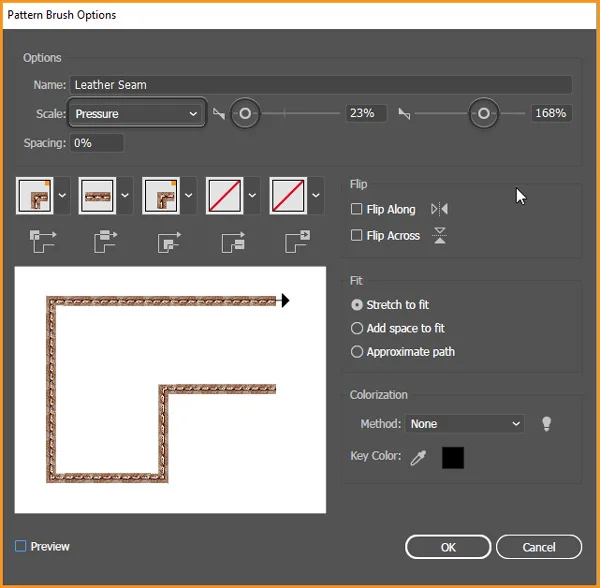
Another brush on the list is “Leather Seam”, an example of a Pattern Brush.
Step – 2
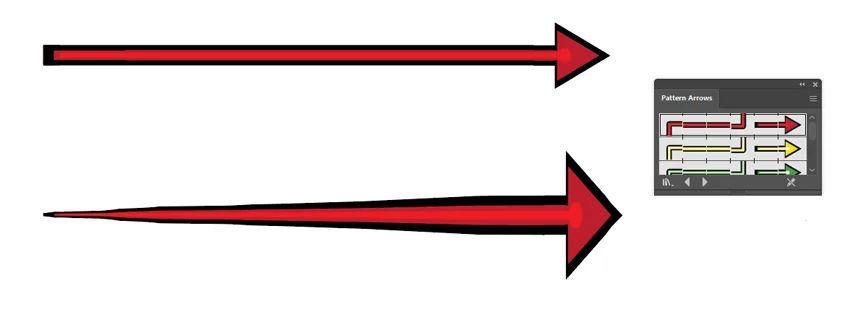
If we draw a line with it, it doesn’t react to pressure:
Step – 3
Open its settings. They look quite complicated but again, we’re interested just in one — Scale.
Open its drop-down menu and set it to Pressure. Just like in the Art Brushes, define the Minimum and Maximum size.
Step – 4
Not all Pattern Brushes work nicely with Illustrator brush pen pressure. This one, for example, doesn’t have its beginning and end defined, which works for the mouse — but makes the line go crazy when pressure is involved.

Step – 5
However, if we open the menu in the upper right corner of the panel and go to Open Brush Library > Arrows > Pattern Arrows, we’ll have a chance to experiment with brushes that don’t have this problem.
So if we want to create your own pressure-sensitive Pattern Brush, it’s good to learn from those!
Related Topics:
- Paintbrush & Blob brush Tool in illustrator
- How to use Eraser tool in illustrator
- How to use the Pen Tool in illustrator
How to Set the Brush Pressure for Scatter Brushes
Follow the following steps:
Step 1
The last type of brush in illustrator is a Scatter Brush.
We won’t find it on the default list, so open the menu and go to Open Brush Library > Decorative > Decorative Scatter.
Select one of these brushes and draw a line.

Step 2
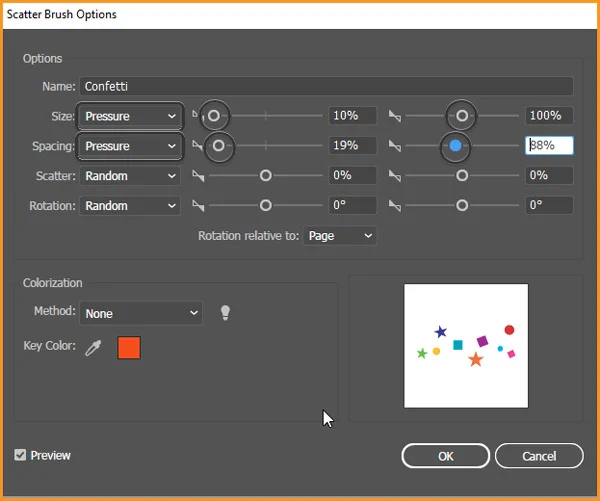
Scatter Brushes have four main settings:
- Size
- Spacing
- Scatter
- Rotation
All of them can be set to Pressure, although Size and Spacing are best suited for it.
Step 3
Now, compare our pressure-sensitive Scatter Brush to a default one.

Related Topics:
- Perspective Tool in Illustrator
- Selection Tools in illustrator
- Width Tool in illustrator
- Shape Builder, Live Paint Bucket tool in illustrator
- How to use Gradient Tool in Illustrator
- How to use Mesh Tool in illustrator
- How to make a Semicircle in Illustrator
- How to design a Retro Flower Pattern
- How to set Brush Pressure in Illustrator
- List of websites for Royalty Free images


