In this Adobe Illustrator Tutorial, I will show you, ‘How to Create a Pressure Sensitive Brush in Illustrator’.
Table of Contents
How to Create a Pressure Sensitive Brush
It is recommended to have some previous knowledge on, ‘How to set Brush Pressure in Illustrator‘.
Now, we will create a new brush from scratch in Illustrator.
Step – 1
Create the element or a whole design which you want to be convert into brush. A Scatter Brush can be made out of one or more elements.
After creating the elements, select all the parts and Group them using shortcut CTRL + G

Step – 2
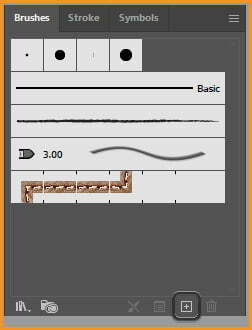
With the group selected, click on the plus icon at the bottom tray of Brush Panel.

Step – 3
Select Scatter Brush from the New Brush dialog box.

Step – 4
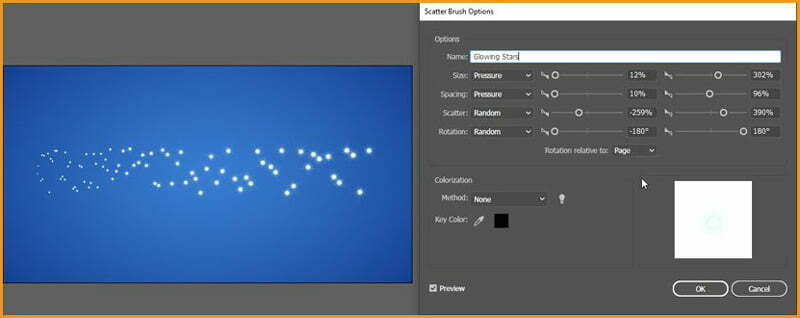
Scatter Brushes have four main settings:
- Size
- Spacing
- Scatter
- Rotation
We can put all of them to pressure but it’s better to put Size and Spacing in pressure. In this case, I would recommend to use random settings at first, click OK. Then draw a line using brush. After drawing option the scatter brush options again, change settings with Preview option checked.

Final comparison
The image below shows the difference between the same brush stroke when drawn by a mouse and a pen tablet.

Related Topics:
- How to Create Metallic effect in Illustrator
- How to Create Flower using Gradient Mesh in Illustrator
- How to Recolor Artwork in illustrator
- How to Create Silver Metallic Effect in Illustrator
- What is Adobe Illustrator
- Line Segment, Arc, Spiral, Rectangular & Polar Grid Tool
- Rectangle, Rounded Rectangle, Ellipse, Polygon, Star & Flare Tool
- Type Tool in illustrator
- Paintbrush & Blob brush Tool in illustrator
- How to use Eraser tool in illustrator


