Just like Brush tool and Pen tool, Gradient tool is a common tool in most Graphic Designing Software. Here, we will learn about, ‘What is Gradient’, ‘How to use Gradient Tool in Illustrator’, ‘Types of Gradient in Illustrator’ and ‘How to create a custom Gradient in Illustrator’.
My name is Lalit Adhikari and we are at LTY. Let’s begin!
Table of Contents
What is Gradient
Gradient is a smooth blend of multiple colors or tints of same color. It can be used to add volume, light and shadow to your vector objects or artwork.
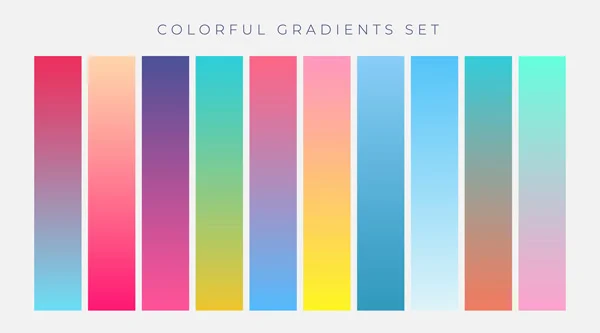
Few sample gradients in illustrator are shown below:
Related Topics:
- How to use Mesh Tool in illustrator
- How to make a Semicircle in Illustrator
- How to design a Retro Flower Pattern
How to create a Gradient in Illustrator
In general, there are four ways to create a Gradient in Illustrator. I will be showing all these methods, one by one.
Creating Gradient using Gradient tool
We can create, apply and modify a gradient using Gradient tool and Gradient Panel. Let’s create a Gradient using Gradient tool.
In order to create a Gradient, we need to create a document in Illustrator and then create any random shape in it.
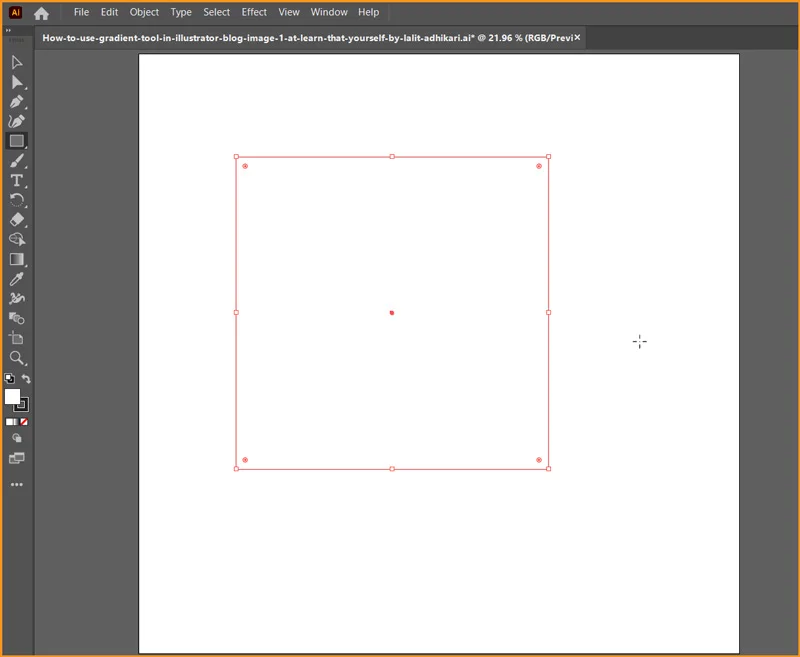
Here, I have created a document with a square shape artboard and also chose to create a square in it. Look at the image below:
As Fill and Stroke are at default values, the square has a White Fill color and a Black Stroke color with Stroke weight of 1.
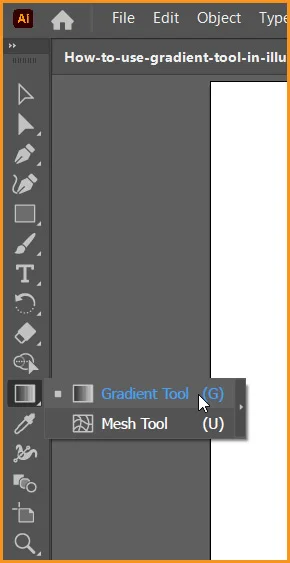
Now, choose Gradient Tool in Illustrator.
Now, the square created before must be selected, click on the square with the Gradient tool. A basic linear gradient of Fill color to Stroke color, in this case, White to Black will fill the shape.
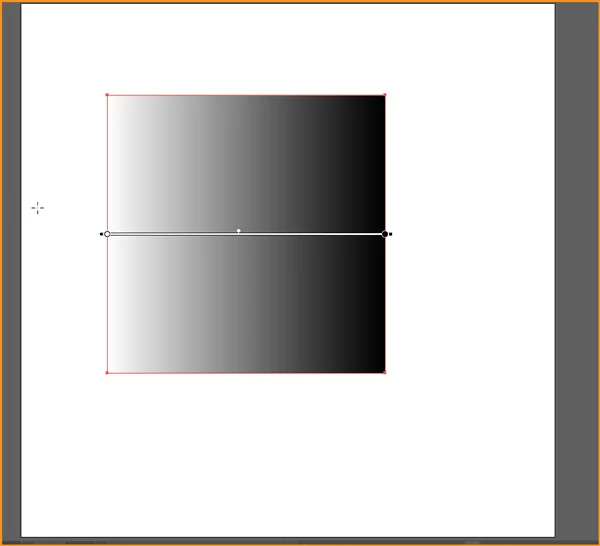
This is how we can create a Gradient using Gradient Tool in Illustrator. In the image above, we can notice a White line passing through our Gradient in the direction of our gradient. It is called Gradient Annotator. We will be discussing about it in detail after our next topic.
Related Topics:
- How to set Brush Pressure in Illustrator
- How to Create A Pressure Sensitive Brush in Illustrator
- How to Create Metallic effect in Illustrator
Creating Gradient using Gradient Panel
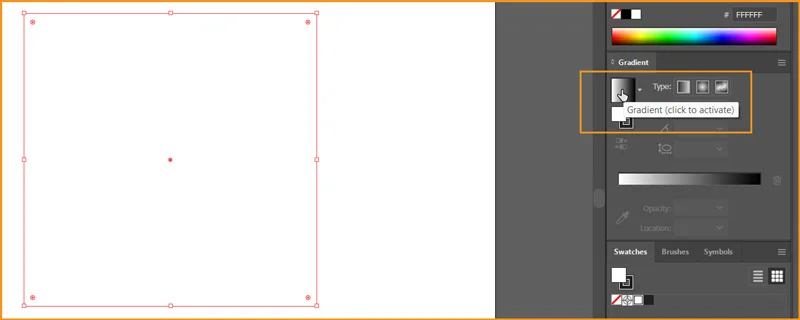
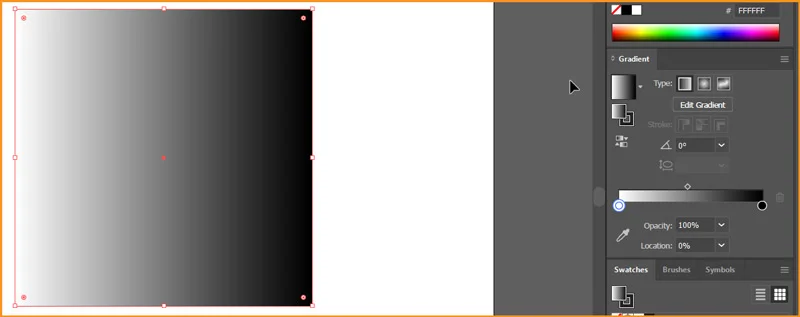
Open Gradient Panel and with your shape selected click on the Gradient color. Look at the image below:
After we click the Gradient in the Gradient panel. It will be applied to the shape as shown below:
Creating Gradient using Swatches
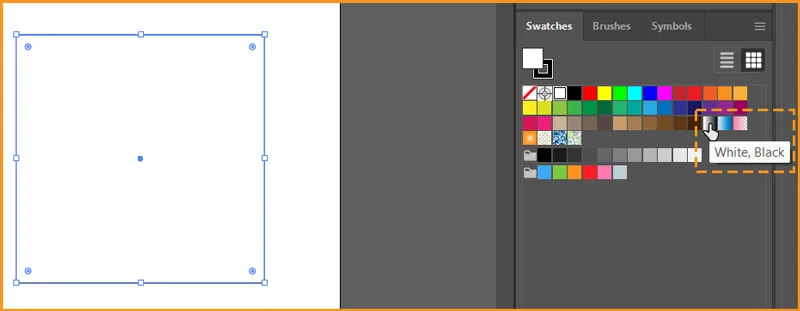
Swatches in Illustrator have some predefined Gradients in it. As you can see in the image below:
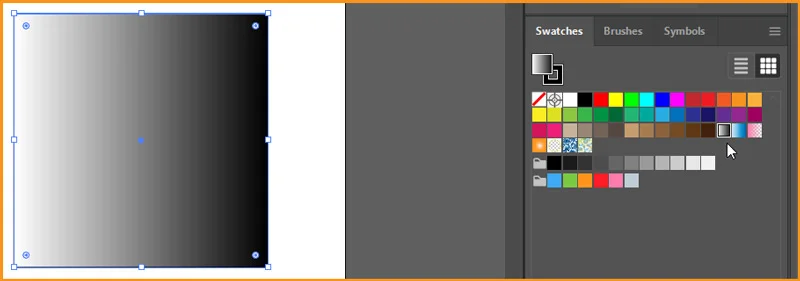
After applying the gradient from swatches, the result is shown below:
Creating Gradient using shortcut
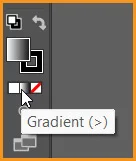
The shortcut for Gradient is > key. As shown in image below:
Related Topics:
- How to Create Flower using Gradient Mesh in Illustrator
- How to Recolor Artwork in illustrator
- How to Create Silver Metallic Effect in Illustrator
Types of Gradient
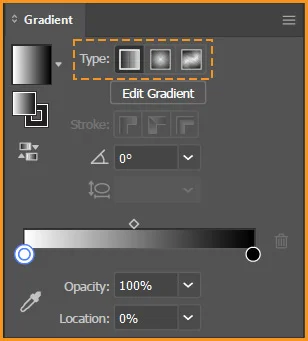
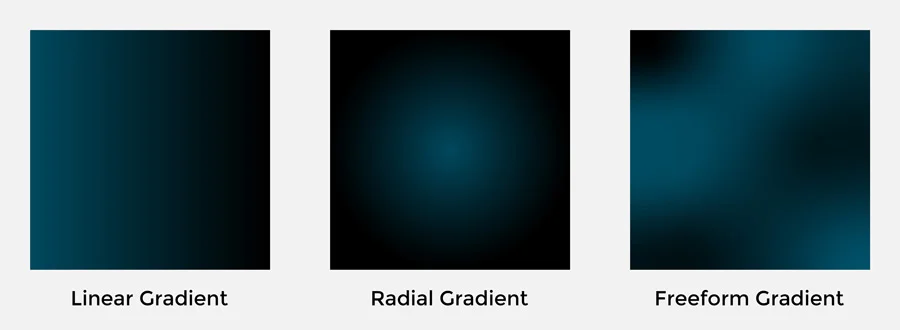
Illustrator has three types of Gradient which can be applied or changed through its Gradient Panel.
The three types of Gradients are as follow:
- Linear Gradient: Linear gradient blend colors from one point to another in a straight line. It can be applied to both Fill and Stroke of an object.
- Radial Gradient: Radial gradient blend colors from one point to another in a circular pattern. It can be applied to both Fill and Stroke of an object.
- Freeform Gradient: Freeform gradient creates a blend color stops within a shape in an ordered or random sequence. It can only be applied to Fill of an object.
- Points: It is used to create a shade of color spot in an area.
- Line: It is used to shade an area around a line.
Related Topics:
- What is Adobe Illustrator
- Line Segment, Arc, Spiral, Rectangular & Polar Grid Tool
- Rectangle, Rounded Rectangle, Ellipse, Polygon, Star & Flare Tool
Create a Linear Gradient
We can do anyone of the following:
- Click the Gradient tool and then click the object on the artboard. The Gradient Type buttons are displayed in the Properties panel. With the object selected, click Linear Gradient to apply the Linear gradient on the object.
- In the Gradient panel, click Linear Gradient.
- In the Properties panel, click Linear Gradient in the Gradient section.
Create a Radial Gradient
We can do anyone of the following:
- Click the Gradient tool and then click the object on the artboard. The Gradient Type buttons are displayed in the Properties panel. With the object selected, click Radial Gradient to apply the Radial gradient on the object.
- In the Gradient panel, click Radial Gradient.
- In the Properties panel, click Radial Gradient in the Gradient section.
Create a Freeform Gradient
We can do anyone of the following:
- Click the Gradient tool and then click the object on the artboard. The Gradient Type buttons are displayed in the Properties panel. With the object selected, click Freeform Gradient to apply the Freeform gradient on the object.
- In the Gradient panel, click Freeform Gradient.
- In the Properties panel, click Freeform Gradient in the Gradient section.
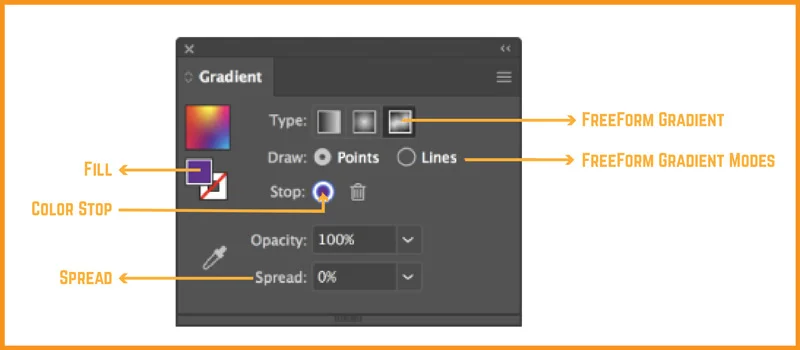
After we click Freeform gradient, the following two options are available:
- Points: Select this option if you want to create color stops as independent points in the object.
- Lines: Select this option if you want to create color stops over a line segment in the object.
Freeform Gradient in Point Mode
We can do the following to create, modify and delete the freeform gradient for the point mode:
- To add one or more color stops, click anywhere in the object.
- To change the position of color stops, drag them and place at the desired location.
- To delete the color stop, drag them outside the object area or click Delete in the Gradient panel or press the Delete key.
Related Topics:
- Type Tool in illustrator
- Paintbrush & Blob brush Tool in illustrator
- How to use Eraser tool in illustrator
Spread for points in Freeform Gradient
We can set the spread of a color stop in the points of Freeform Gradient. Spread is the circular area around the color stop or point in which a gradient is to be applied. To set the spread of a color stop, we can select the color stop and do one of the following:
- In the Gradient panel, select or type a value in the Spread drop-down list.
- Type a value in the Spread drop-down list in the Properties panel.
- We can also use slider that appears when you click Spread.
By default the spread of color stops is 0%. Spread is supported only for point mode in Freeform Gradient in illustrator.
Freeform Gradient in Lines Mode
To add color stops for the freeform gradient for line mode, we can do the following:
- Click anywhere in the object to create the first color stop, which is the starting point for the line segment.
- Click to create the next color stop. A straight line is added connecting the first and the second color stops.
- Click again to create further color stops. The straight line changes into a curved line.
We can create multiple individual line segments in an object. To create a new line segment:
- Drag the pointer outside the object and bring it back to the object and then click anywhere to create the first color stop for the line segment.
We can also drag the line segments and join them together.
To delete the selected color stops:
- Drag them outside the object area or click Delete in the Gradient Panel.
To change the position of color stops:
- Drag the color stop and place it at the desired location. The line segment also shrinks or expands when you change the position of a color stop. The position of other color stops remains unchanged.
Related Topics:
- How to use the Pen Tool in illustrator
- Perspective Tool in Illustrator
- Selection Tools in illustrator
Gradient Panel
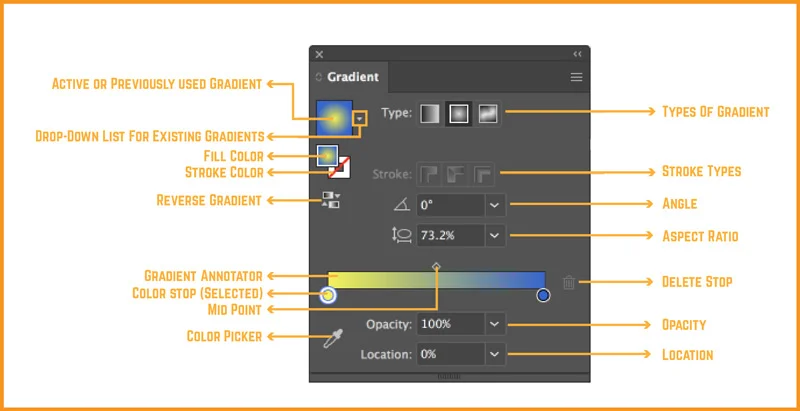
To open the Gradient Panel, we can either go to Windows menu and then choose Gradient or simply double click on the Gradient tool. It is similar in case of Linear Gradient and Radial Gradient.
The Gradient Panel in case of Freeform Gradient is marked below:
The Gradient tool and Gradient panel have many options common in them. However, there are some tasks that you can perform either only with the tool or the panel.
Using the Gradient tool and Gradient panel, you can specify multiple color stops, their location and spread. You can also specify the angle at which colors display, the aspect ratio of an elliptical gradient and the opacity of each color.
Related Topics:
Gradient Annotator
For linear and radial gradient types, when we choose the Gradient tool, Gradient Annotator appears in the object. Gradient Annotator is a slider that shows a starting point, an end point, a midpoint and the color stops for the starting and end points.
Gradient Annotator can be used to modify the angle, location and spread of a linear gradient and the focal point, origin and spread of a radial gradient.
Once the Gradient Annotator appears in the object, you can either use the Gradient panel or Gradient Annotator to add new color stops, specify new colors for individual color stops, change opacity settings and drag color stops to change locations.
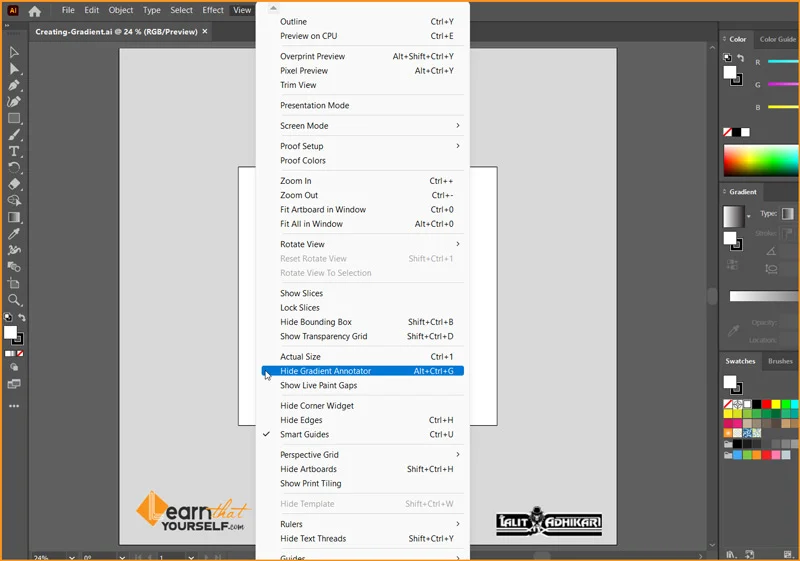
To hide or show the Gradient Annotator; choose View > Hide Gradient Annotator or View > Show Gradient Annotator.
Gradient Annotator in Linear Gradient
- Gradient Annotator: It helps in changing Gradient size, rotation and color stop location.
- Start Point: The point from where the Gradient begins. Moving this point moves the whole gradient.
- Color Stop: These are the stops where color to the Gradient are applied. It is a point where the color intensity is full.
- End Point: The point where our Gradient ends. It controls the total length of the gradient.
- Mid Point: It is represented through a diamond shape. It is present in between two colors and controls the spread between two colors.
Related Topics:
Gradient Annotator in Radial Gradient
- Gradient Annotator: It helps in changing Gradient colors, size, rotation and color stop location.
- Rotation Cursor: It is used to rotate the whole Gradient. Cursor changes into Rotation Cursor when we hover over the circumference of the Dotted Ring.
- Dotted Ring: As Radial Gradient involves color to be blended in a circular pattern, the dotted rings mark the pattern of the radial gradient.
- End Point: The point where our Gradient ends. It controls the total length of the gradient.
- Color Stop: These are the stops where color to the Gradient are applied. It is a point where the color intensity is full.
- Mid Point: It is represented through a diamond shape. It is present in between two colors and controls the spread between two colors.
- Selected Color Stop: It is the color stop which is selected in the gradient.
- Origin Point: The point from where the Radial Gradient begins. Moving this point moves the center of Color stops applied in gradient.
- Point to resize Radial Gradient: This point resizes the size of radial gradient without changing the aspect ratio of the gradient.
- Point to change Aspect Ratio: This point changes the aspect ratio of the radial gradient making it oval or circular.
In Linear and Radial Gradient Annotators, dragging the starting point of the Gradient Slider repositions the origin of the gradient and dragging the end point increases or decreases the range of the gradient.
If we place the pointer over the end point, a rotation cursor appears that you can use to change the angle of the gradient.
A Freeform gradient, lets us place color stops anywhere in the object. Therefore, Freeform gradient does not require a Gradient Annotator.
Predefined Gradient Swatches
Illustrator, provides us, a predefined set of gradients that we can set using the Swatches panel. In addition, we can create a gradient and save it in the Swatches panel for future use.
To apply a predefined gradient from the swatch library:
- Open Window menu then go to Swatches to open the Swatches panel.
- In the Swatches panel, click on the panel menu in the upper-right corner. In the list, choose Open Swatch Library > Gradients and then choose the gradient you want to apply.
- To display only gradients in the Swatches panel, click the Show Swatch Kinds drop-down list and choose Show Gradient Swatches.


