In this Illustrator Lesson, I will explain, ‘How to use Eraser Tool in illustrator’. Eraser tool with Scissors tool and Knife are a great combination to use while creating digital illustrations.
My name is Lalit Adhikari and I’m a blogger at LTY. Let’s dive into our topic.
When you are working with any brush tools (Paintbrush or Blob brush) in Illustrator then the best tool for editing your artwork is the eraser tool.
Table of Contents
Eraser tool
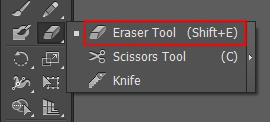
The shortcut for the eraser tool is Shift + E
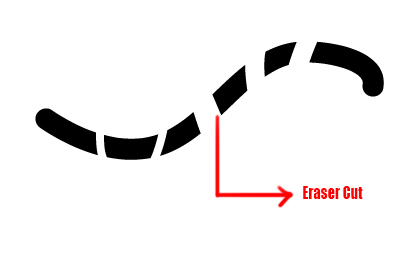
Here, I have a blob brush stroke that I just drew and when I applied the eraser tool then you can see that it cuts through the blob brush stroke.
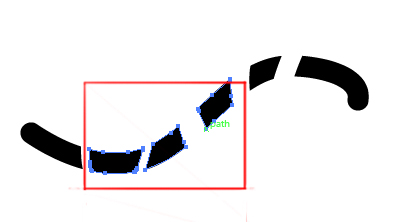
If you select the stroke you can see that the eraser tool has curved these strokes into individual closed shapes. Therefore, it is great to work on closed paths like I’ve made above with the blob brush tool.
If you double click the eraser tool you will see all these familiar options for changing the size, roundness, and angle.
So, it’s quite similar to a brush tool option dialogue box. And after you are done with the eraser tool settings you can click the ‘OK’ button to close the dialogue box.
Another shortcut for changing the size of the eraser tool is using the bracket keys ( ). The left bracket key is for decreasing the tip size and increasing the tip size.
How to use eraser tool in illustrator
You don’t have to select any path or shape to use it. It will erase anything (Shape, path, and anchor points) on the layer if it is not locked. But there are few things that you can’t do with an eraser tool such as text and imported images.
To erase a text layer you first need to convert it into outlines and then the erase tool can be applied. You can also limit what you want to erase by selecting the objects that you want to erase by selection tools.
So, in between many shapes when you apply the eraser tool, only the selected shape will get erased.
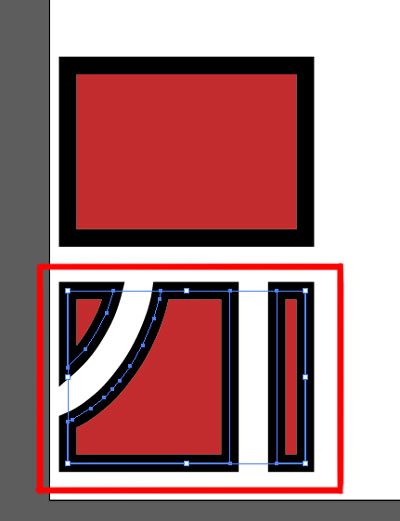
If you apply the eraser tool on the shapes like this (see the image) which has a stroke and fill then the eraser tool will create separate individual shapes and the stroke and the fill will get reapplied to the individual shapes.
Or you can also say the shape gets re-rendered.
And like other drawing tools like brush tools, holding Shift key constrains the angle you are drawing to 45 and 90 degrees so you can make perfectly straight lines with the eraser tool.
If you hold down the Alt key on your keyboard then this will let you work with the Eraser Tool in a rectangular marquee fashion. If you hold both Alt and Shift key together and apply the eraser tool you will have a square marquee eraser.
Another thing to remember here is that an eraser is not a very good match for paintbrush stokes because of its re-rendering behavior.
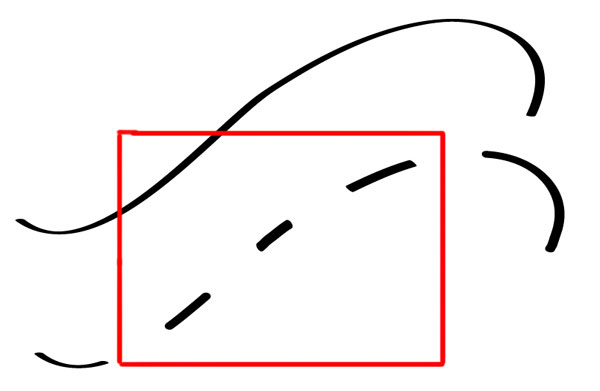
Here, there are a few strokes drawn with the paintbrush tool. And when you will apply eraser tool over these stokes then you can see how the stroke gets re-rendered and the brush stroke loses its individual width variation.
Note: The best tool for erasing the paintbrush path is a scissors tool which is in the fly-out menu under the eraser tool option which doesn’t drastically change the width of the stroke.
Related Topics:
- How to use the Pen Tool in illustrator
- Perspective Tool in Illustrator
- Selection Tools in illustrator
Scissors Tool
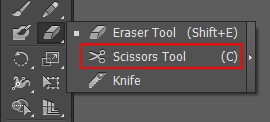
If you click and hold the eraser tool option you can find the scissors tool in its fly-out menu. The shortcut key for this tool is C.
After you select this option you can hover over your shape and make a click with your mouse or graphics pen to wherever you want to place the cut.
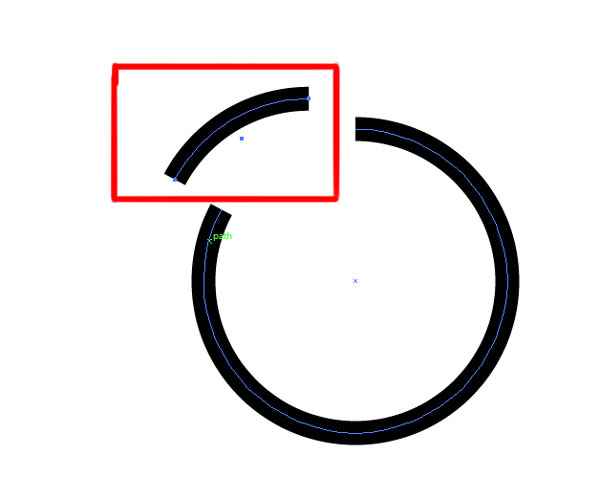
So, if you make two cuts like I did on the circle, then you can drag out the small cut path from the main circle by the selection tool. Therefore, it acts just like how a pair of scissors would act on real life.
Related Topics:
- Width Tool, Warp Tool, Twirl Tool, Pucker Tool, Bloat Tool, Scallop Tool, Crystallize Tool and Wrinkle Tool in illustrator
- Shape Builder Tool, Live Paint Bucket Tool and Live Paint Selection Tool in illustrator
- How to use Gradient Tool in Adobe Illustrator
Knife Tool
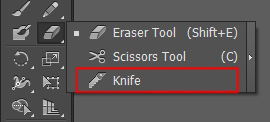
This is the last option in the fly-out menu of the eraser tool. The main difference between this tool and other tools in the eraser tool fly-out menu is that it only works on closed paths.
So, before applying the knife tool make sure that your shape is a closed path.
To use the knife tool, you first need to select the shape that you want to cut with the direct selection tool. Then select the knife tool, click away from the object, hold and while moving your mouse or graphics pen draw a cut line.
You can’t change the path of the cut after you’ve applied the cut and thus you get two separate shapes.
If you are following our Free Illustrator Lessons and Tutorial Guide, then next you should read about, ‘How to use Pen Tool in illustrator‘.
Related Topics:
- How to use Mesh Tool in illustrator
- How to make a Semicircle in Adobe Illustrator
- How to Design a Retro Flower Pattern in illustrator
- How to set Brush Pressure in illustrator
- How to Create A Pressure Sensitive Brush in Adobe Illustrator
- How to Create Metallic Effect in illustrator
- How to Create Flower using Gradient Mesh in illustrator
- How to Recolor Artwork in illustrator
- How to Create Silver Metallic Effect in Illustrator
- What is Adobe Illustrator




Saved as a favorite! on How to use eraser tool in illustrator, I love it! This blog also has working of Scissors tool and Knife tool in illustrator. Thank you
It’s really a nice and helpful piece of info. I’m satisfied that you simply shared this useful information with us. Please keep us up to date like this. Thanks for sharing.
Pretty nice post. I just stumbled upon your weblog and wished to say that I have truly enjoyed surfing around your blog posts. In any case I will be subscribing to your rss feed and I hope you write again soon!
I like reading your content. Have you got a twitter i can connect to?
It’s really a nice and helpful piece of info on eraser tool, scissors tool and knife tool in adobe illustrator. I’m satisfied that you simply shared this detailed information with us. Please keep us up to date like this. Thanks for sharing.
Post writing is also a fun, if you be familiar with then you can write if not it is complicated to write. Great work on this topic of eraser tool in illustrator.
I think this is a real great blog article on how to use eraser tool in adobe illustrator. It also includes scissor tool and knife tool. Thanks Again. Great.
This is really the best detailed post for Eraser tool in illustrator and I guess that’s why it tops the Google search results! Good work mate!
I like the helpful info you provide in your articles especially this one about eraser tool in adobe illustrator.
I will bookmark your blog and check again here regularly. I am quite sure I’ll learn plenty of new stuff right here!
Good luck for the next!
Terrific post however, I was wondering if you could write a little more on this topic? I’d be very grateful if you could elaborate a little bit further. Thank you!
I like the helpful information you supply for your articles about designing and adobe software. I’ll bookmark your blog and take a look at once more. I’m somewhat certain I will learn a lot of new stuff proper here! Best of luck for the following!
Everything is very open with a very clear description of how to use eraser tool in illustrator with other tools included. It was really informative. Your site is very useful.
Thanks for sharing!
I have to thank you for the efforts you’ve put in penning this blog.
I really hope to see the same high-grade blog posts by you later on as well.
In fact, your creative writing abilities has encouraged me to get my own blog now 😉
My family, all the time, say that I am killing my time here at web, however I know I am getting knowledge every day by reading such good articles. Good read about eraser tool in illustrator. Thank you!
Hi, Neat post. Thank you.
You are giving us something informative to read. Thank you!
An intriguing blog is worth comment. To the next! All the best!!
It’s an remarkable blog in support of all the budding designers; they will get advantage from it I
am sure.
Thank for this article. Helpful! Thank you again!
Great post however , I was wondering if you could write a little more on this topic? I’d be very grateful if you could elaborate a little bit more. Bless you!
I was suggested this web site by my cousin. You are incredible! Thanks!
Thank you!
I need to to thank you for this wonderful read!! I absolutely learned from every bit of it. I have got you bookmarked to check out new stuff you post…
It is quite helpful! Keep writing such articles.
There is definitely a great deal to find out about this topic. I really like your way of explaining eraser tool.
Thank you!
It was really helpful. I wasn’t able to find few tools in illustrator. It helped a lot! Thanks.
I developed a good understanding of these tools in illustrator from your blog articles.
Nice post. I was checking continuously this blog and I am impressed! Extremely useful information particularly on Graphic Design and I also loved Food For Thought category. 🙂 I care for such info a lot. I was looking for this certain info for a long time. Thank you and best of luck.