In this Photoshop Tutorial, we will learn, ‘How to Add Falling Snow in Photoshop’.
Introduction
Snow fall are used in artworks to represent various emtions like Peace, Purity, Divinity, Cleanliness, Innocence, Rebirth, Patient Progress towards noble goal and Frozen Feelings. It can also symbolise Death and Sadness.
So, with all these varing and opposite emotions, I hope that you understand the importance of snow fall in artworks. Let’s begin with our tutorial.
Image
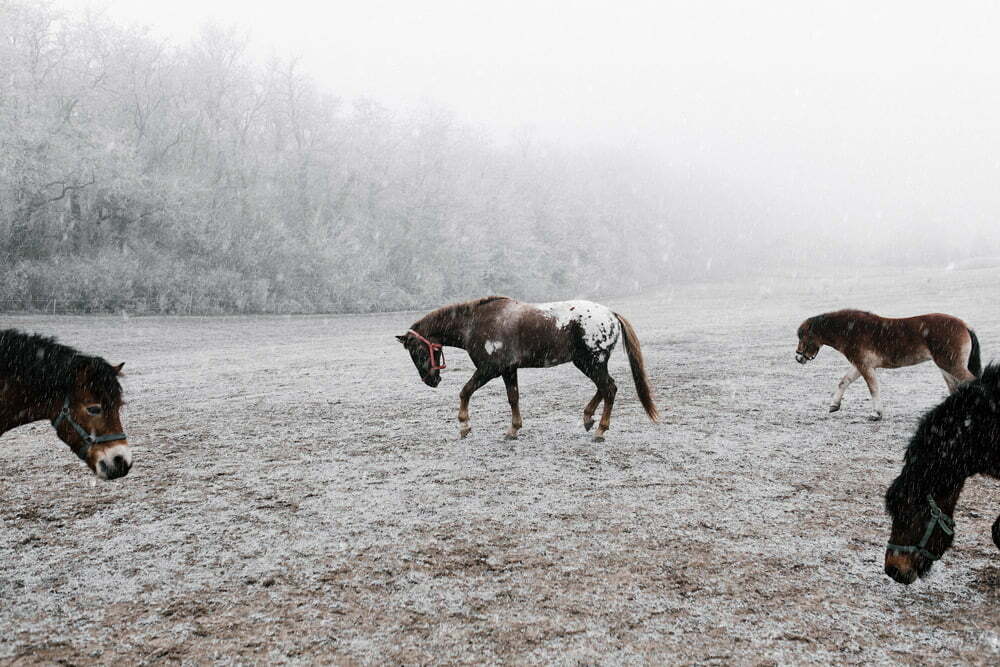
As this is a tutorial based on the adding snow fall only. So, I will select an image and create Snow Fall on it using Photoshop.

For snow fall effect, if you are also going to pick an image for practice then I would recommend either chose an image with snow on ground and if possible, a little snow on subject too or you will also need to add snow in it.
Create Falling Snow Effect
- Open the image in Photoshop.
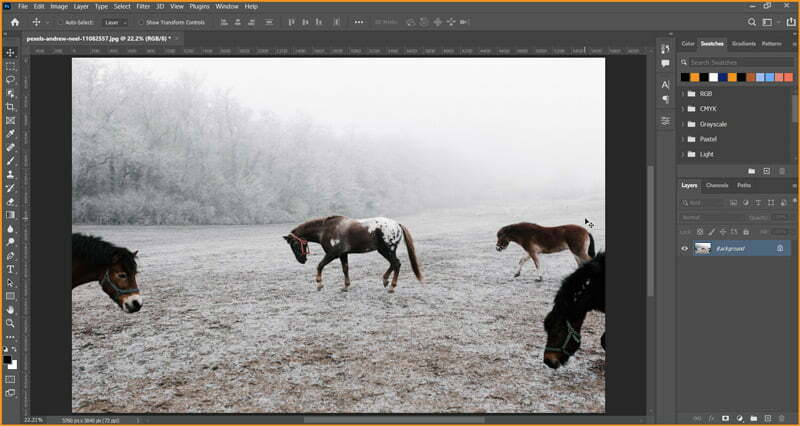
- Create a New blank layer.
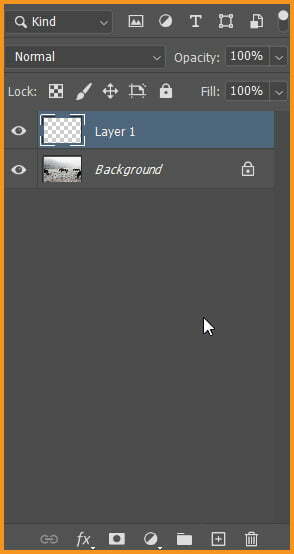
- Fill the blank layer with Black color.
To fill the blank layer with Black color, make sure your Foreground Color is Black then use shortcut ALT + DELETE or we can also use Fill option under Edit menu.
Remember, after we Fill black color, Image will not visible to us anymore.
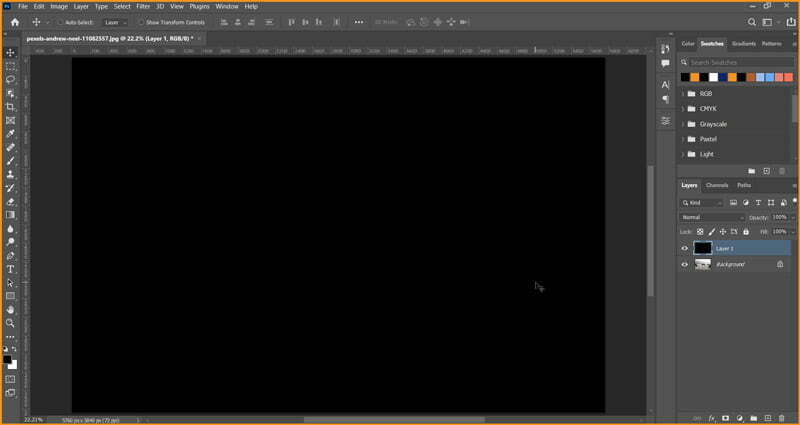
I will rename Layer 1 as Snow Fall.
- Add Noise…
Go to Filter > Noise > Add Noise…
This will add random dots or Noise to the Black Layer. I will be converting these dots into snowflakes. I will set the Amount value at 25% and check Gaussian option. I will also check Monochromatic to limit color of the noise to Black & White.
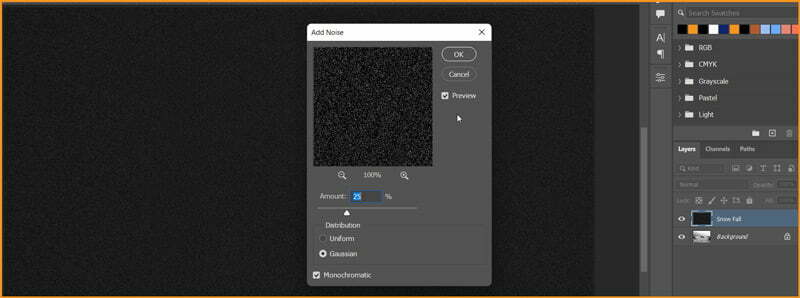
After adding Noise the result is shown below:

- Currently, the dots in Noise are small and we have to scale them up using shortcut CTRL + T
Scale up the size of Snow Fall Layer. Increase size to 400%.


Now, the size of Noise is big enough.
- Convert Snow Fall layer to Smart Object.
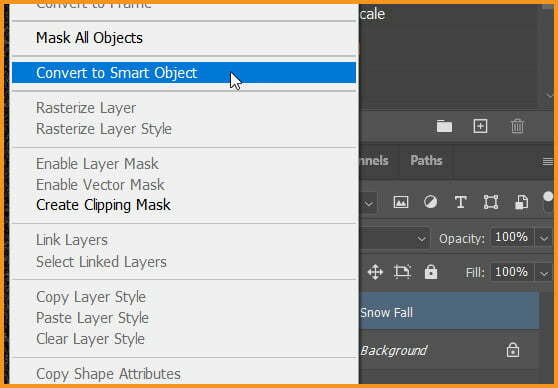
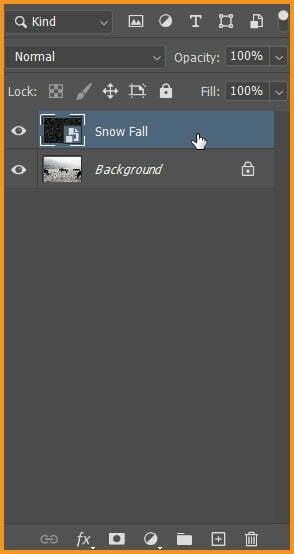
- Change Blending Mode of Snow Fall layer to Screen.
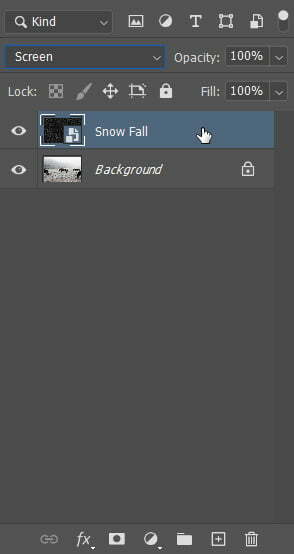

As shown above, the result after changing Blend Mode of Snow Fall layer to Screen.
- Add Motion Blur to Snow Fall Layer
Now, to make the snow appear as if falling, I will apply Motion Blur filter. Go to Filter > Blur > Motion Blur…
In the Motion Blur dialog box, I will set the value of angle as 75 degree. So, it appears to be falling from Upper-right. Here, Distance sets how much motion is applied to the Noise particles.
Higher value of Distance will make snow look more like Rain. I will use a value of 12 for Distance.
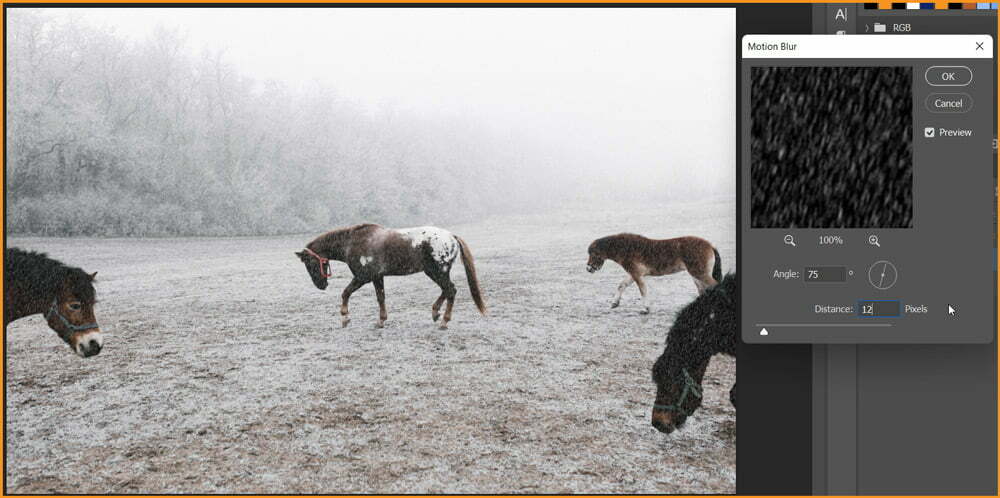
The results look as follow:
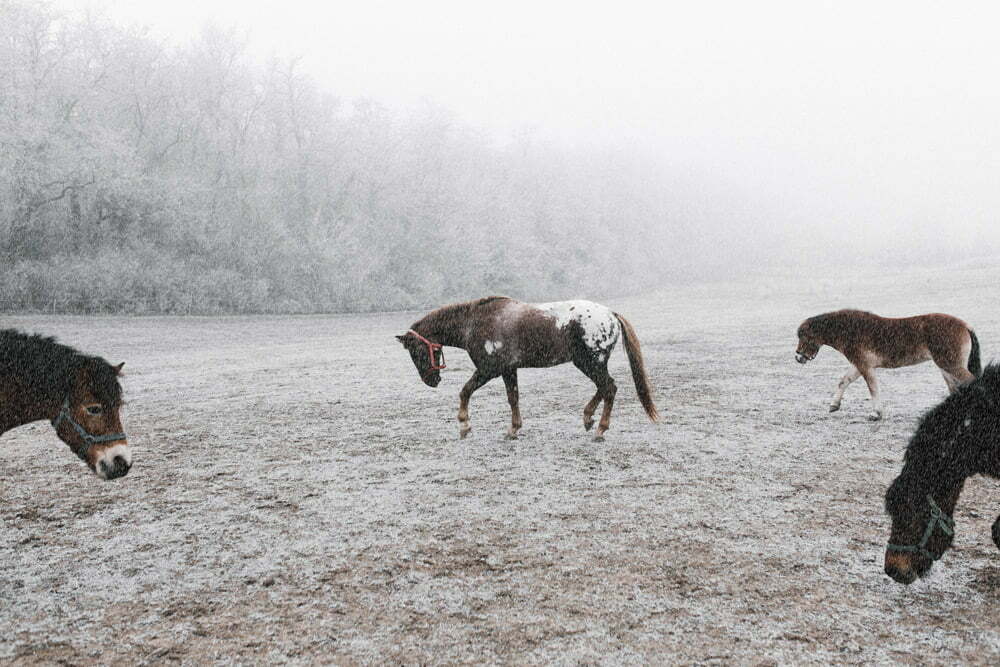
As I have applied the Motion Blur on a Smart Object. Photoshop has converted our Filter to Smart filter which can be easily edited or modified later if needed.
- Add Levels adjustments to enhance snow falling effect.
Go to Image > Adjustments > Levels…
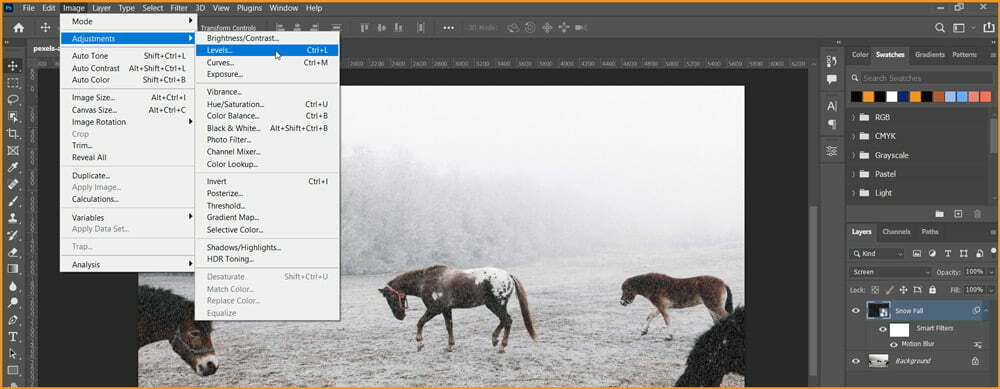
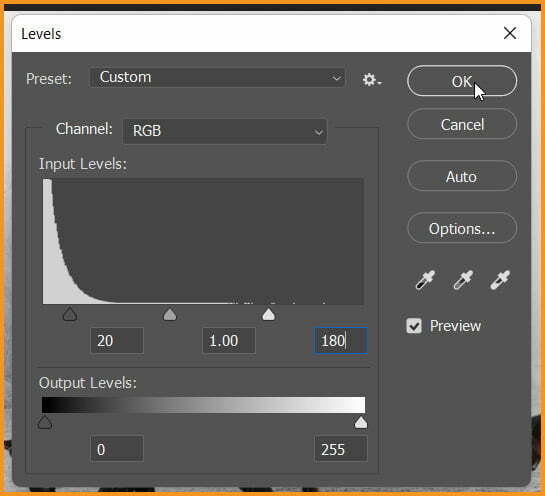
I will use Levels to reduce the amount of snow as well as brighten the remaining snow at the same time. To reduce the amount of snow, I will drag the Black slider towards right. I will keep draging it until the dark areas become darker and then eventually disappear.
Similarly, I will drag the White slider towards the left to brighten the snow.
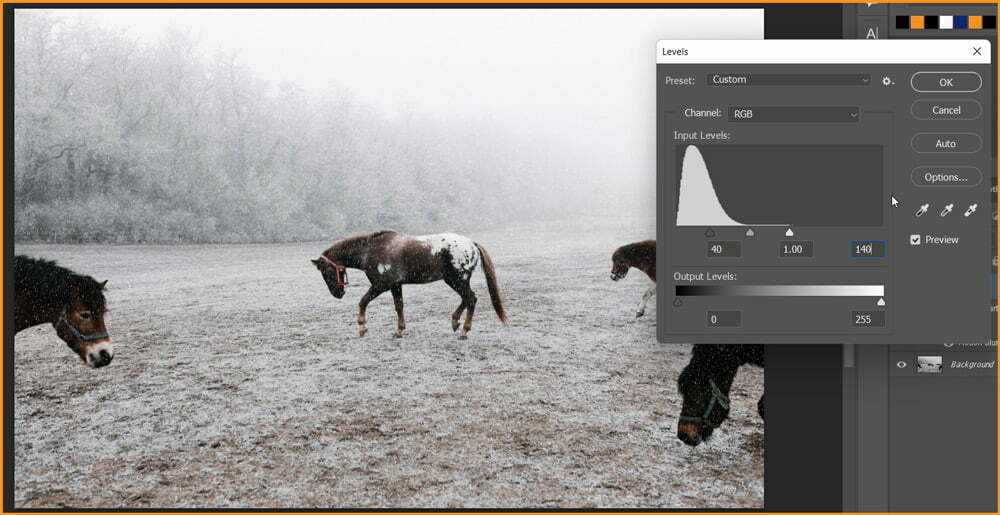
I have applied Image Adjustment as a smart filter too. So, I can edit it later anytime.
- Duplicate the Snow Fall layer.
I will duplicate the Snow Fall layer using shortcut CTRL + J
We need to duplicate this layer because we need to create some depth by creating some bigger snowflakes.
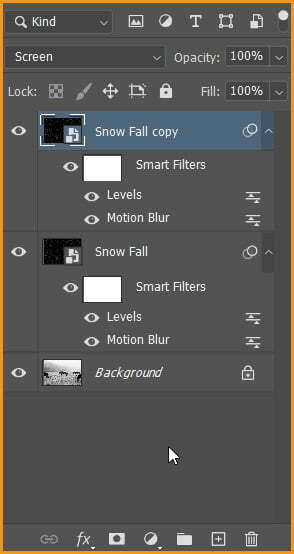
- Rotate the Snow Fall copy layer to 180 degrees
Go to Edit > Transform > Rotate 180 degree
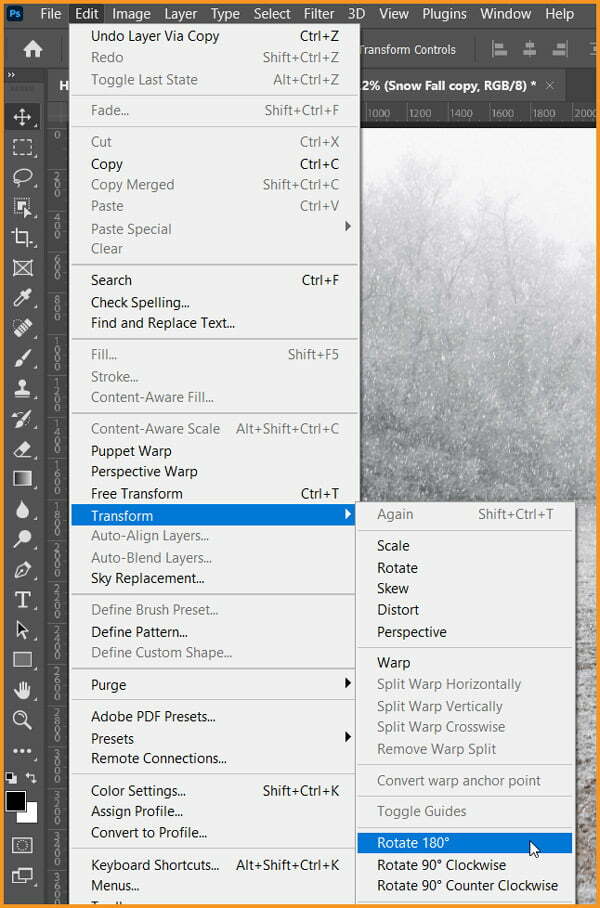

Duplicating and rotating the layer has increased the total number of snow flakes in the image.
- Now, apply Crystallize Filter
I will apply Crystallize filter to make these extra snowflakes bigger in size. Crystallize filter breaks an image into little cells of color.
Go to Filter > Pixelate > Crystallize… with cell size value of 20 in this case.
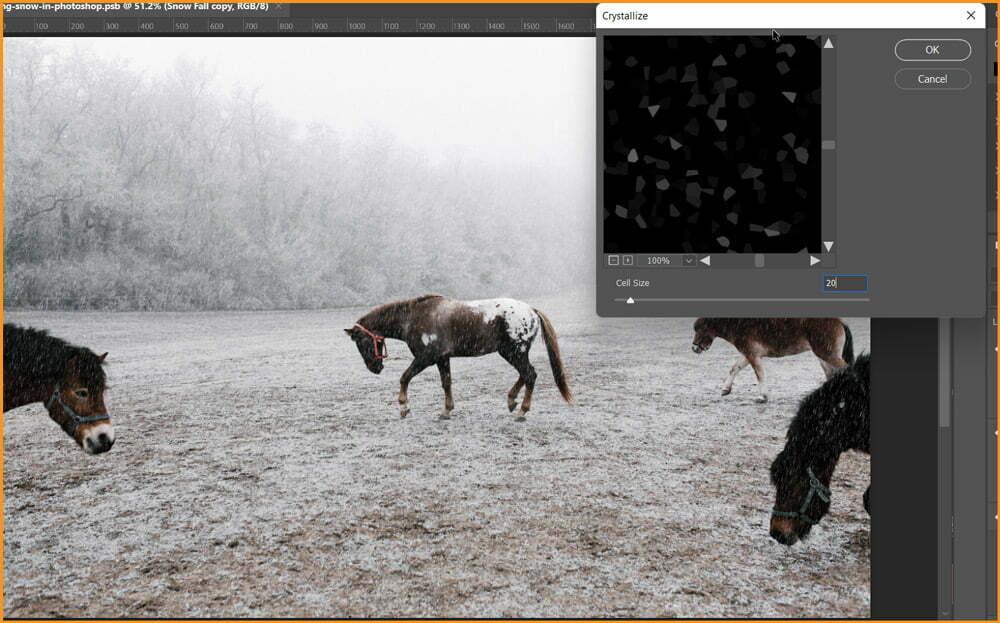
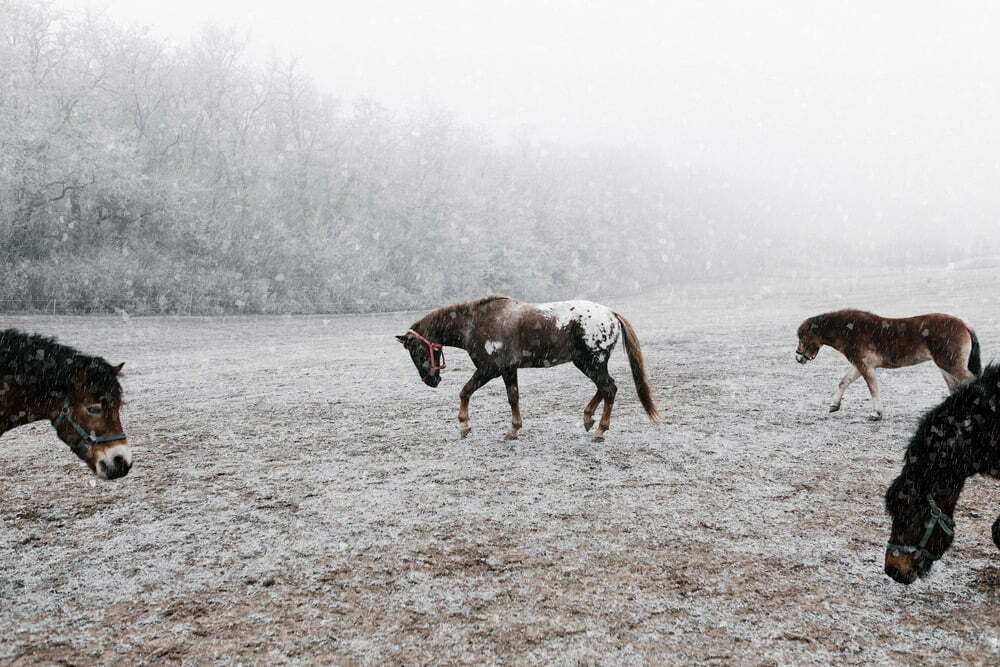
New flake size is now larger than previous ones.
- Apply motion blur again.
Adding motion blur to large flakes with same angle but distance of 20.
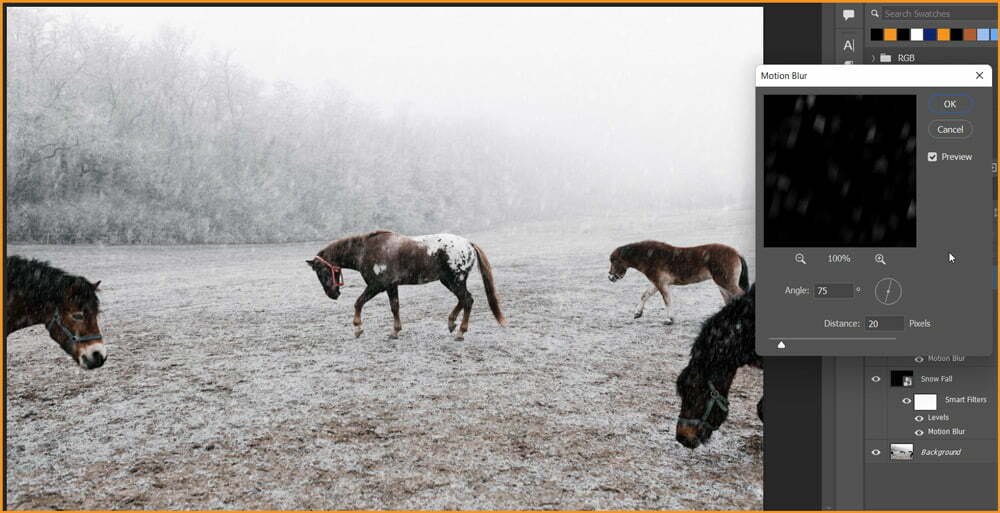
- Now, to finalize the whole effect, I will again apply Levels adjustment.
Final Result
The effect may not clear in this optimised view. You can download the PSB file here (more than 1GB size).






Wow! Such an amazing and helpful post this is. I really really love it. I hope that you continue to do your work like this in the future also.