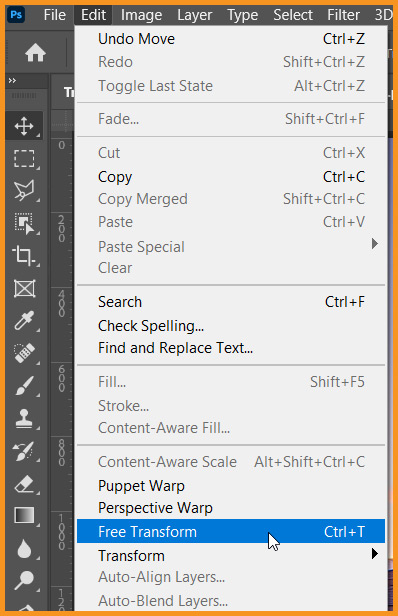
In this Photoshop Lesson, we’ll learn about ‘Free Transform’, ‘Transform command in Photoshop‘. Free Transform and Transform commands are available under Edit menu in Photoshop.
My name is Lalit Adhikari and we are at LTY. Let’s begin!
Related Topics:
Free Transform
Free Transform command in Photoshop helps to scale and rotate images or text. Since updated in Photoshop 21.0 which was released in November 2019, transforming any layer type by dragging corner handle will scale the layer proportionally by default.

As shown in the image above, it is denoted by a chain icon in option bar of Free Transform in Photoshop. Simply click and break this chain to not letting Photoshop maintain aspect ratio automatically.
Related Topics:
Example
I have chosen following images for this tutorial:
I’ve opened the ‘House’ image in the photoshop then placed the image of man in the document. Removed the background from the man image. It looks like as shown below:

- Go to Edit > Free Transform
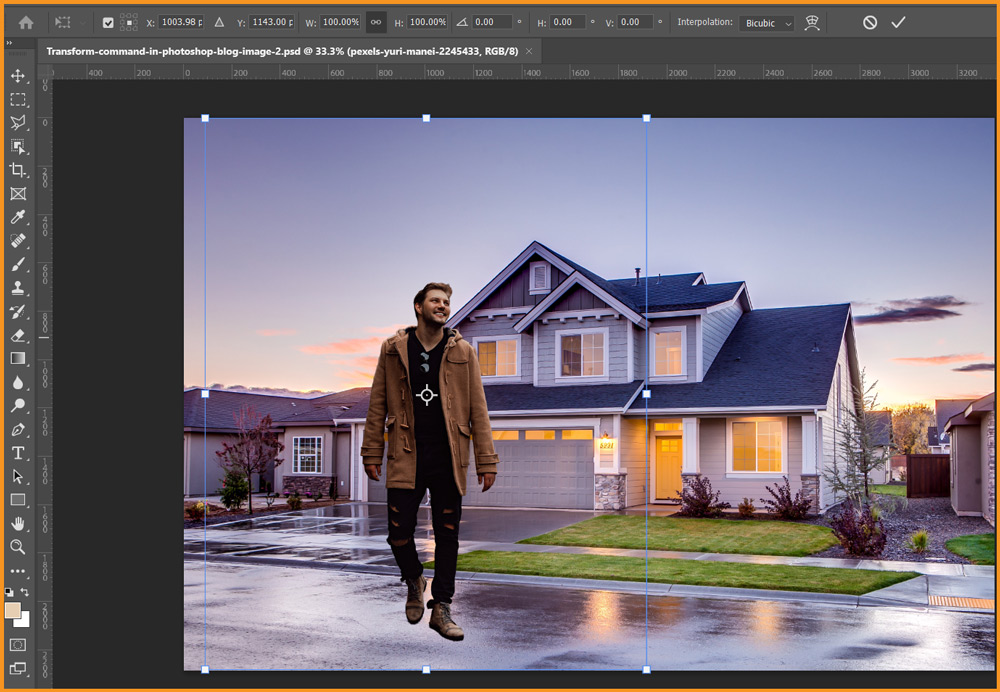
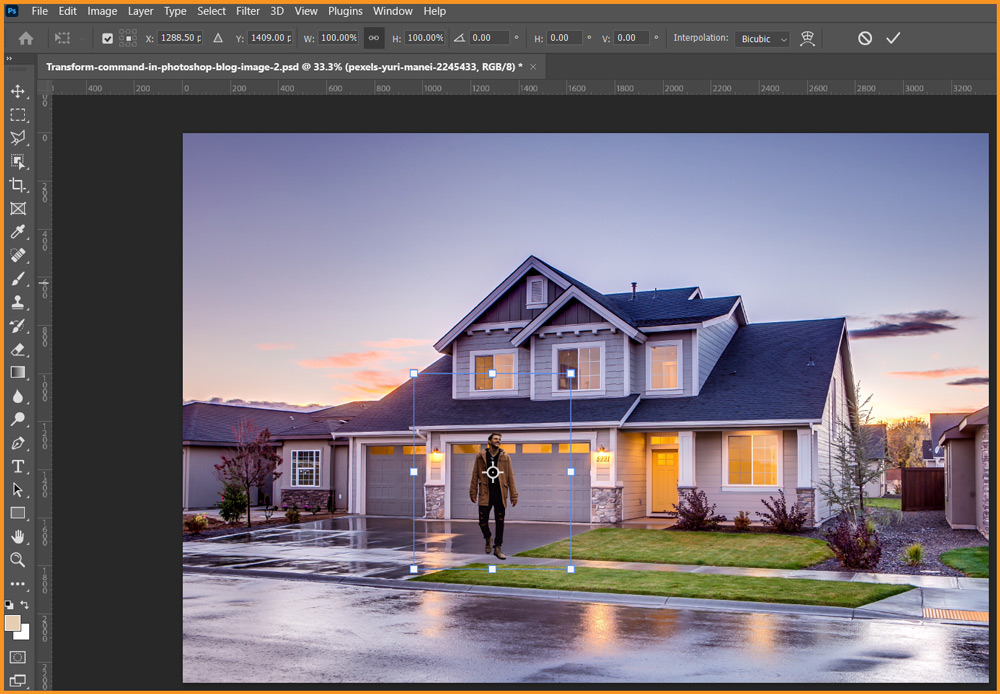
To reduce the size of the man, I’ll click and drag the bounding box from top right corner and move him to the back as shown below.
Related Topics:
Bounding Box of Free Transform
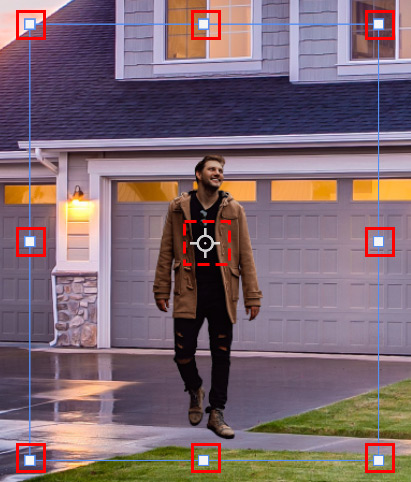
Related Topics:
- Fade Command in Edit menu in Photoshop
- How to enlarge an image in Photoshop
- Photoshop Gold Text Effect
Option bar with Free Transform

Option bar has many useful options with Free Transform. Most of these are self-explanatory.
Reference Point

It is used to define Reference Point for any transformation to be done.
Position

It is used to define the position in X- and Y-axis.
Size

It is used to define the size change in percentage. The center chain icon represents that it maintains aspect ration. We can click on the icon to break the chain.
Rotation

It is used to rotate the image to any numeric value.
Skew

It is used to skew the image to any certain numeric values.
Interpolation
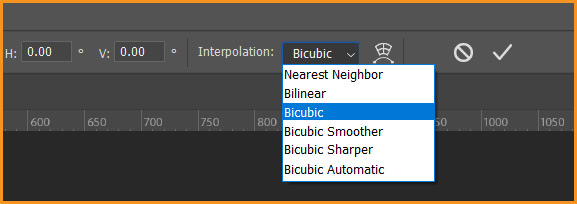
It is used to define the Interpolation method for the process of Transformation. These methods have been defined in detail in our Photoshop Lesson on, ‘How to enlarge an image in Photoshop‘.
Warp mode

This icon is used to switch from Free Transform to Warp modes. As in our current situation, we’ve a layer with layer linked layer mask, it will show us the following error:
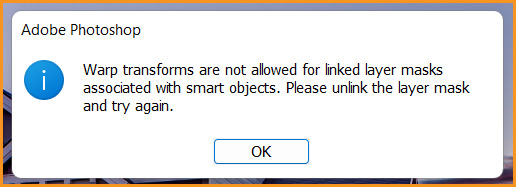
This is due to our linked layer mask to our smart object. I’ll simply convert the whole layer to smart object again. So, the mask will be inside the new smart object. Then I’ll apply warp transform.
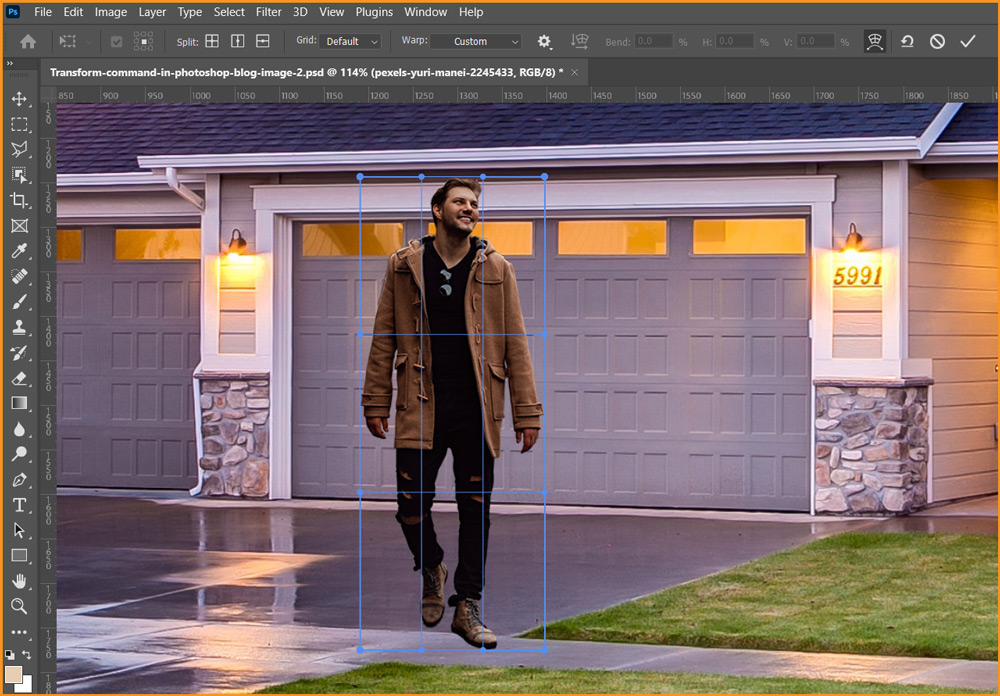
Here, we can drag the anchor points or associated handles for desired results.
Related Topics:
- 5 Type of Masks in Photoshop
- Step by Step guide for Retro 3D Movie Effect in Photoshop
- How to Add Falling Snow in Photoshop
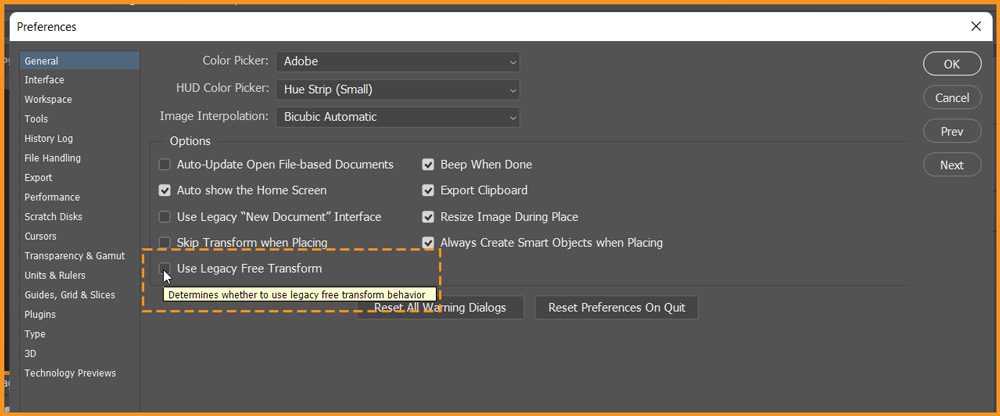
How to switch back to legacy transform behaviour
Go to Edit > Preferences > General
Then select Legacy Free Transform.
Related Topics:
Transform
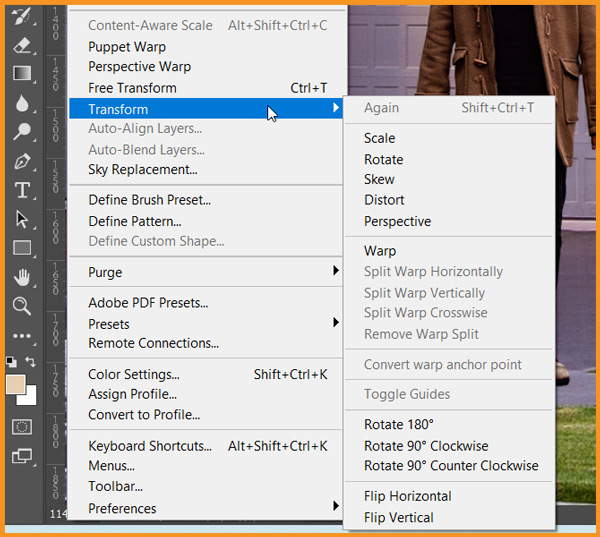
Transform in Photoshop means to scale, shrink, enlarge, skew, distort, rotate or change the perspective of a layer, selection or shape.
We can apply transformations to a selection, an entire layer, multiple layers or a layer mask. We can also apply transformations to a path, a vector shape, a vector mask, a selection border or an alpha channel.
Remember: Transforming affects image quality when we manipulate the pixels. To apply non-destructive transformations to raster images, use Smart Objects.
Transforming a vector shape or path is always non-destructive because we’re only changing the mathematical calculations producing the object.
Related Topics:
Submenu under Transform
- Scale: Scaling refers to enlarging or reducing an item relative to its reference point. Reference point is the fixed point around which transformations are performed. We can scale horizontally, vertically or both horizontally as well as vertically.
- Rotate: Turns an item around a reference point. By default, this point is at the center of the object; however, we can move it to another location which could be outside the item.
- Skew: It is slanting of an item vertically and horizontally.
- Distort: It is used to stretch an item in all directions.
- Perspective: It is used to apply one-point perspective to an item.
- Warp: It is used to manipulate the shape of an item.
- Rotate 180, Rotate 90 CW, Rotate 90 CCW: It rotates the item by the specified number of degrees, either clockwise or counter-clockwise.
- Flip: It is used to flip the item vertically or horizontally.
Related Topics:
- Feather in Photoshop
- Dual light effect
- Photoshop Channels
- Window menu in Photoshop
- View menu in Photoshop

