In this Photoshop Lesson, we’ll learn about ‘Sky Replacement command in Photoshop‘. Sky Replacement command is available under Edit menu in Photoshop.
My name is Lalit Adhikari and we are at LTY. Let’s begin!
Related Topics:
Introduction
In case of outdoor photography, photographers have to plan a lot of things, study weather apps, track sun movement and get at the location early to get the best light.
But sometimes, no matter how much we plan, we are not at the right place, at the right time, for the right light. As a result, the sky in our frame may appear to be blank and boring.
In this Photoshop Lesson, we will learn how to use the Sky Replacement feature in Photoshop. This could also be used while creating a composition in Photoshop for Manipulation or Matte Painting.
Sky Replacement feature was introduced in October 2020 in version 22.0. Then it was updated in August 2021 in version 22.5.
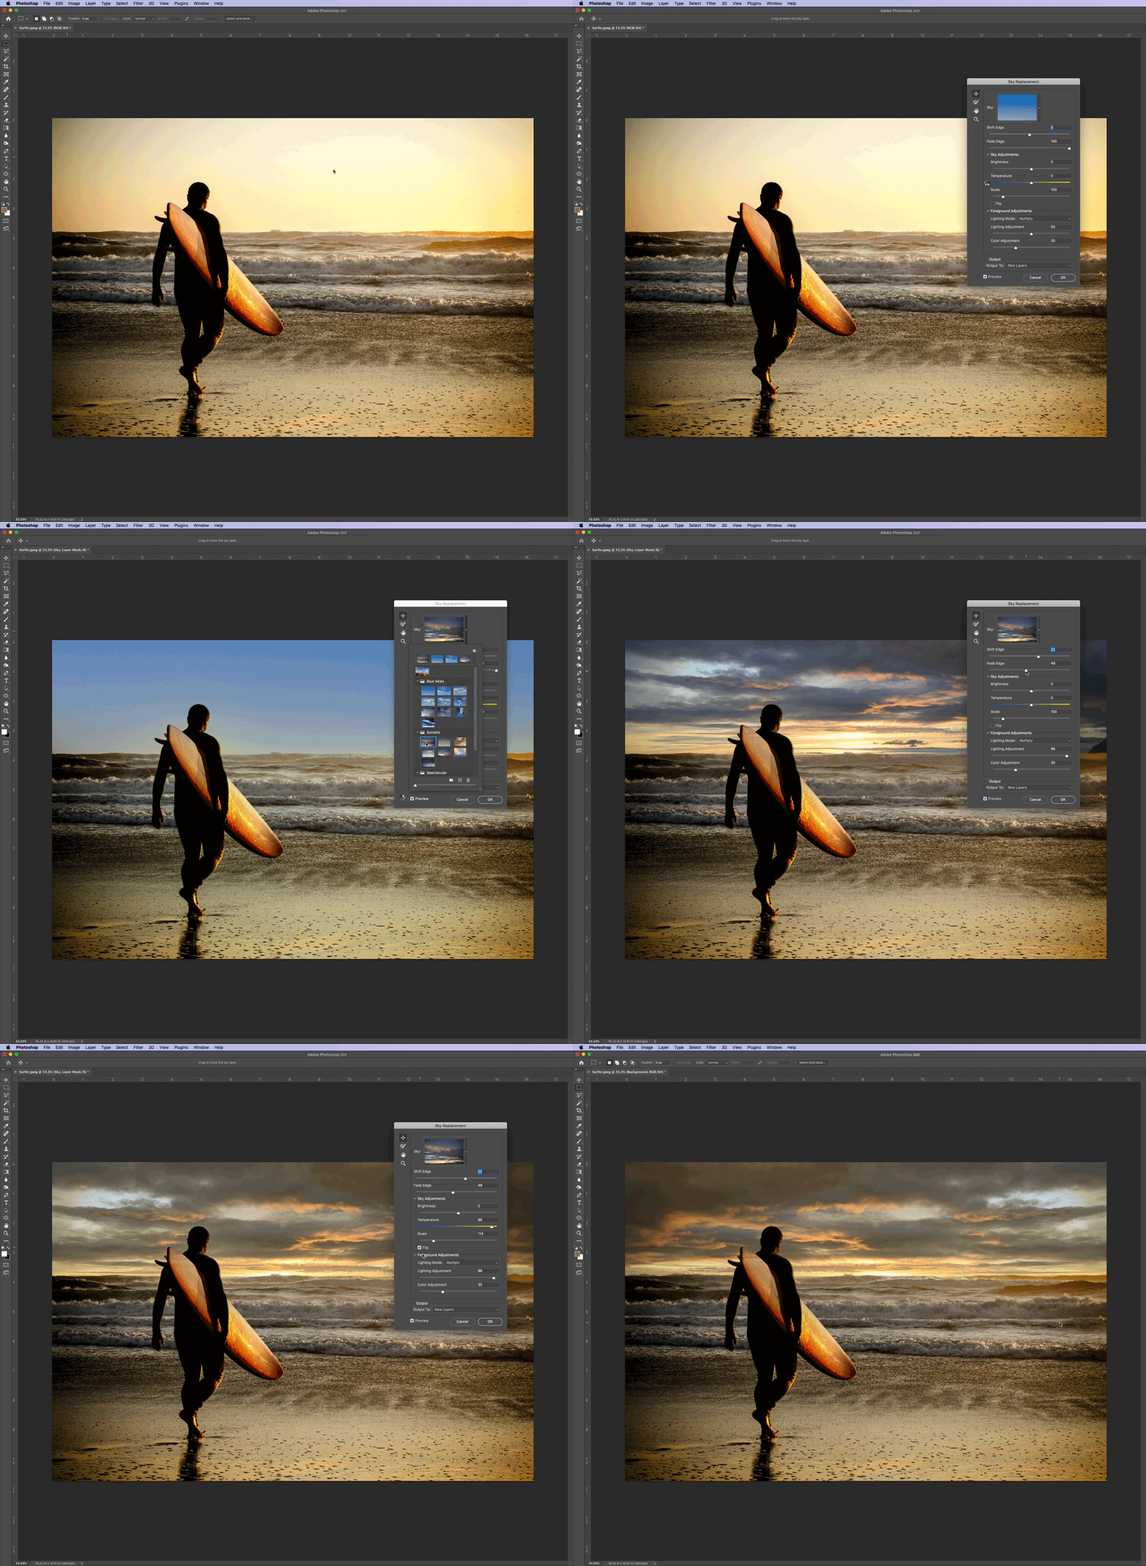
A before and after comparison for Sky Replacement feature.

Related Topics:
When we should Replace Sky
If we are creating a Manipulation or Matte Paint or an artistic photograph then we’ve no reason to not to replace sky to make our composition better.
When we should not to use Sky Replacement
In certain photography genres like Photojournalism and Travel Photography, the authentic experiences are valued more. So, it’s recommended not to replace sky in cases where authentic experiences matter.
Related Topics:
How to use Sky Replacement in Photoshop
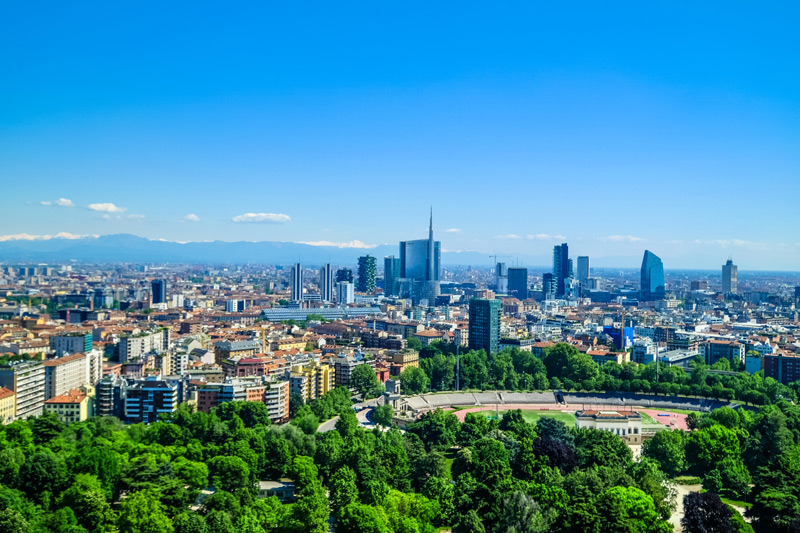
For this tutorial, I’ve chosen the following image.
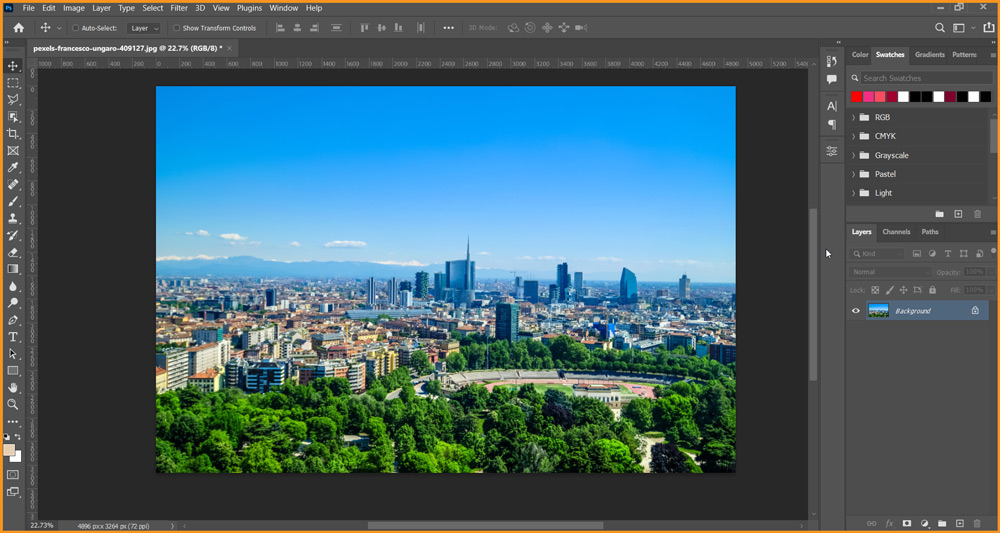
- Open image in Photoshop.
- Go to Edit > Sky Replacement…
If this option is muted (grayed out) please select the layer in the Layer Panel and try again.
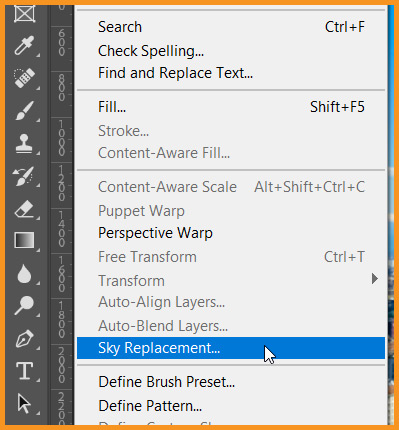
- Sky Replacement Panel will appear
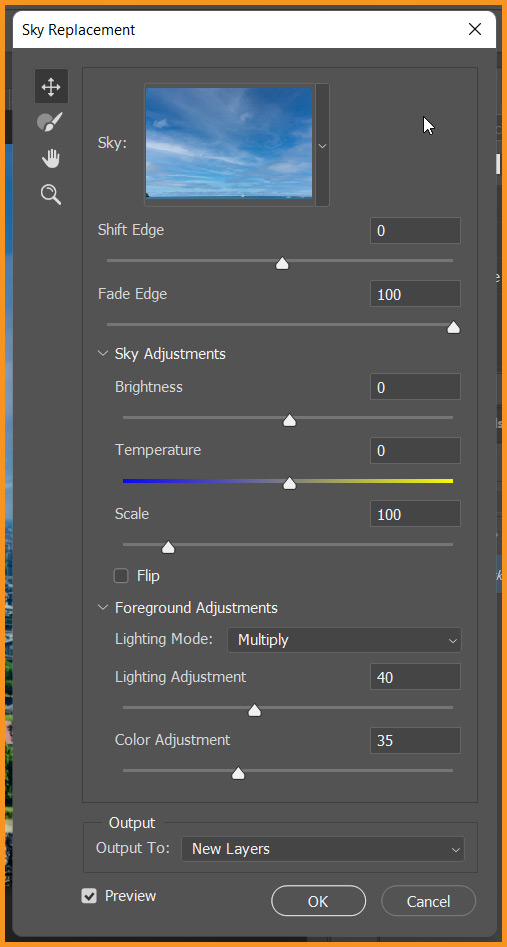
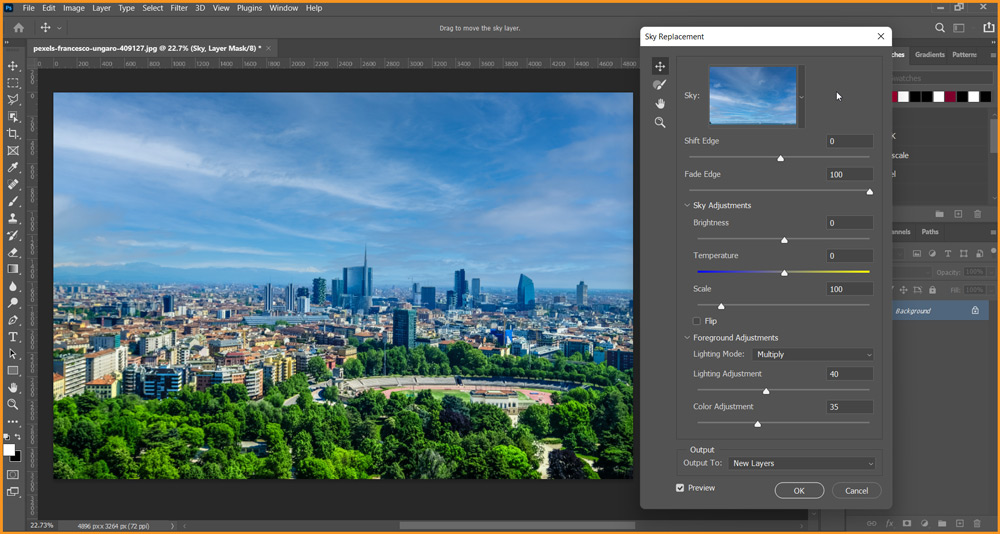
By default, a new sky will be applied to our image with preview option checked in the Sky Replacement Panel.
Related Topics:
Sky Replacement Panel
Through our Sky Replacement Panel we can change and modify settings for Sky Replacement feature.
Sky
Photoshop provides us with a library of Sky images to choose. They are organized under three folders named as Blue Skies, Spectacular and Sunsets.
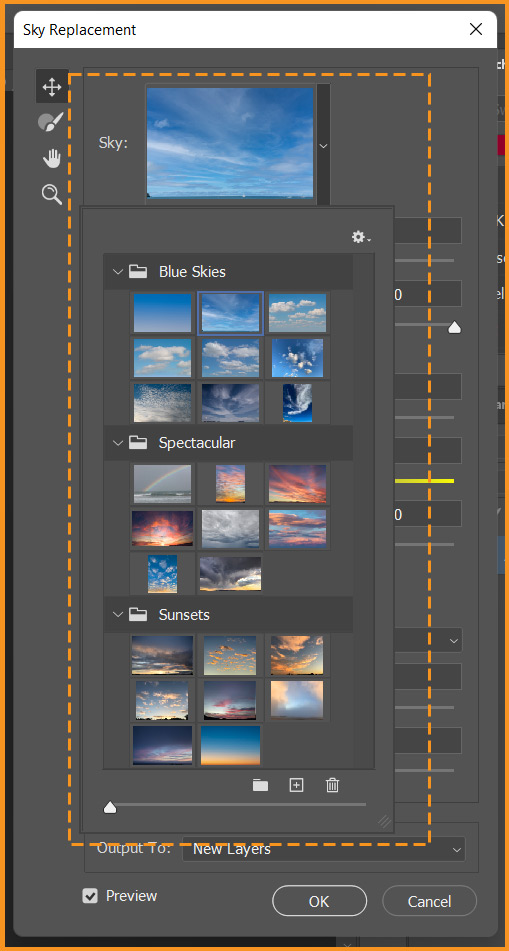
As we click on the Skies, the preview will automatically get updated.
Also, pay attention to the light and shadow direction in the image. We should try to match the sun placement in the new sky with the direction of light in our image.
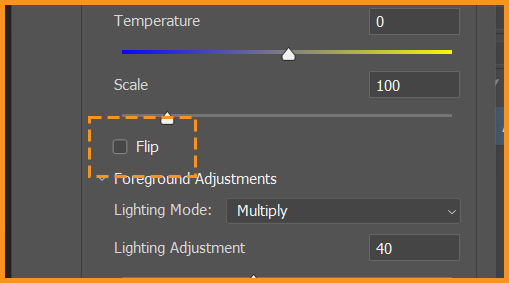
There’s also an option to flip the sky, if needed, as shown below.
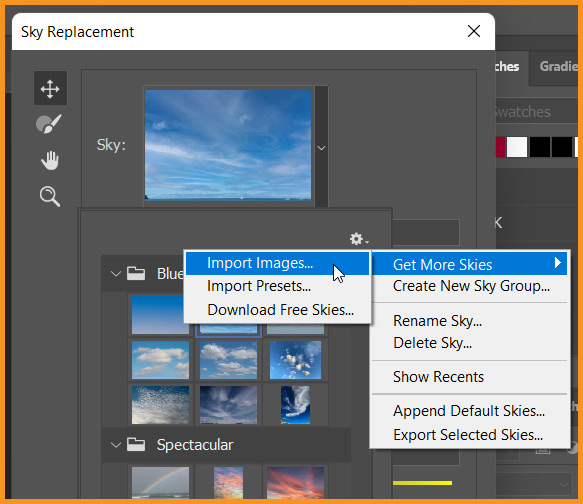
- To place our own image as sky we’ve to click on the settings icon then Import Images under Get More Skies option as shown below.
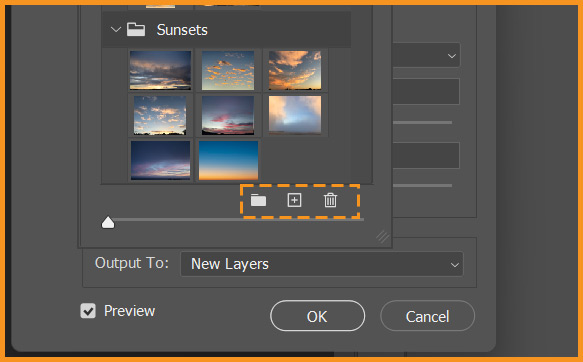
- We can also create a new folder and add new image outside of all the folders and Delete any of the available or imported sky from the folders using the buttons at the bottom of the Sky Panel.
Related Topics:
- Fade Command in Edit menu in Photoshop
- How to enlarge an image in Photoshop
- Photoshop Gold Text Effect
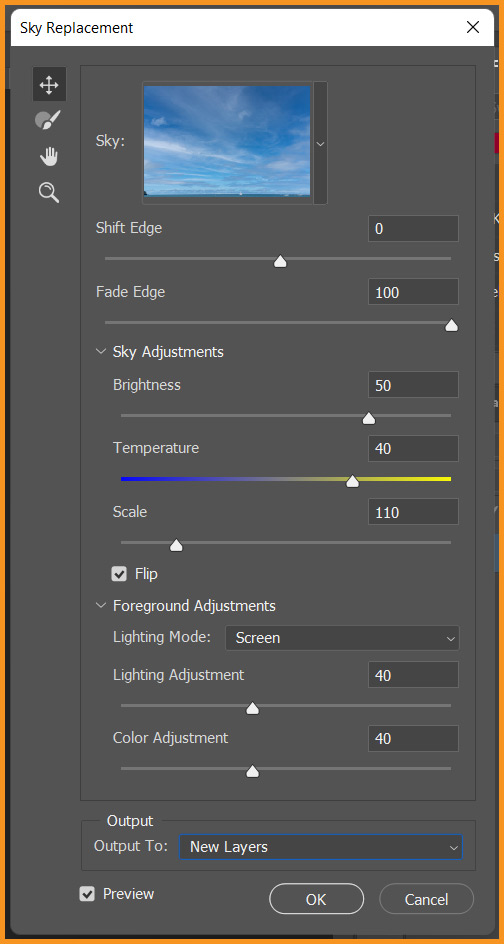
The Sky Replacement workspace also have following options:
- Shift Edge: It determines where the border between the sky and the original image begins.
- Fade Edge: It sets the amount of fading or feathering from the sky image to the original photo along the edges
- Brightness: It adjusts the brightness of the sky.
- Temperature: It adjusts the temperature of the sky warmer or cooler.
- Scale: It resizes the sky image.
- Flip: As already discussed, it flips the sky image horizontally.
- Lighting mode: It determines the blending mode used for lighting adjustments.
- Foreground Lighting: It is used to set the contrast for foreground; a setting of zero will not make any adjustments.
- Edge Lighting: It is a slider to control the lighting adjustments applied to the object edges in your sky images; a setting of zero will not make any adjustments.
- Color Adjustment: It is a opacity slider that determines how strongly the foreground is harmonized with the sky colors – a setting of zero will not make any adjustments.
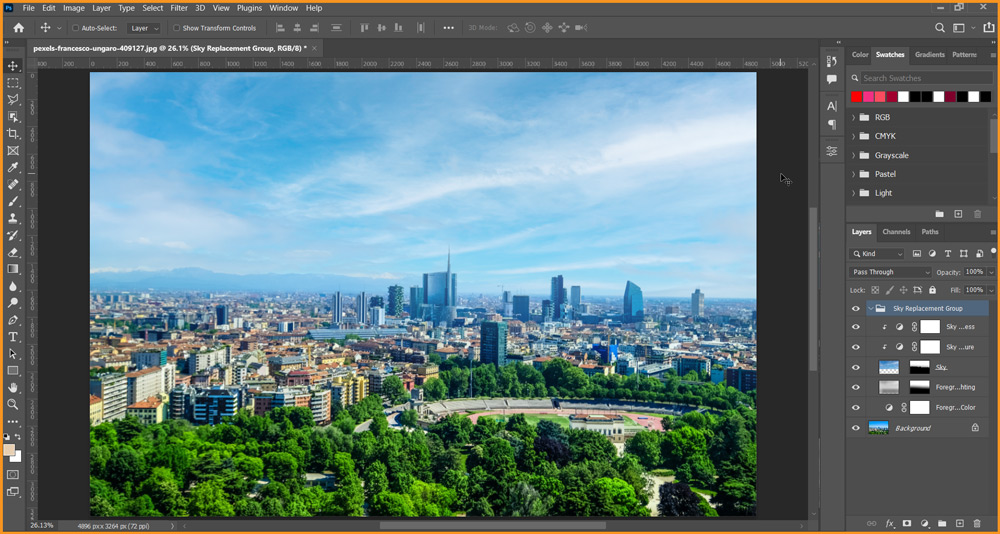
- Output: This allows you to select whether the changes to the image are placed on New Layers (named Sky Replacement Group) or a Duplicate Layer (single flattened layer).
For this tutorial image, I’ve chosen the following values:
The final output in the Photoshop interface appears as shown below.
Related Topics:
- 5 Type of Masks in Photoshop
- Step by Step guide for Retro 3D Movie Effect in Photoshop
- How to Add Falling Snow in Photoshop
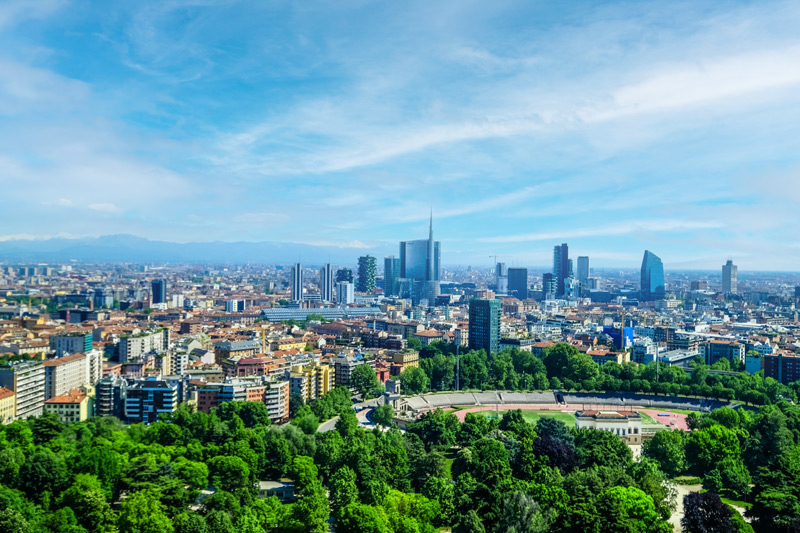
Final result
Related Topics:


