In this Photoshop Lesson, we’ll learn about ‘Puppet Warp in Photoshop‘. Puppet Warp command is found under Edit menu in Photoshop.
My name is Lalit Adhikari and we are at LTY. Let’s begin!
Related Topics:
What is Puppet Warp
Puppet Warp, as defined by Adobe, provides a visual mesh that lets us drastically distort specific image areas while leaving other areas intact.
Puppet Warp’s applications range from subtle image retouching (such as shaping hair) to total transformations (such as repositioning arms or legs).
Related Topics:
How to apply Puppet Warp
Puppet Warp could be used on image layers, layer and vector masks. To non-destructively distort images, we should use Smart Objects.
- In the layers panel, select the layer or mask.
- Go to Edit > Puppet Warp

Related Topics:
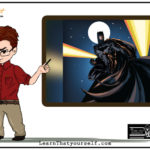
Tutorial Images
I’ve selected following two images randomly, just to show the working of Puppet Warp.
Puppet Warp Options
The following different settings can be adjusted for the Puppet Warp from the option bar.

- Mode: This option determines the stretchiness or elasticity of the mesh created.
- Density: This option determines the spacing of mesh points. If we’ve fewer points, it gives us less precise control. While having more points increases precision but requires more processing time.
- Expansion: This option expands or contracts the edge of the mesh.
- Show Mesh: If needed, we can deselect this option to show only adjustment pins, making our adjustments easier to notice.
Related Topics:
- Photoshop Gold Text Effect
- 5 Type of Masks in Photoshop
- Step by Step guide for Retro 3D Movie Effect in Photoshop
Applying Puppet Warp
I’ve created a document of size 1920 by 1080 pixels. After that I’ve placed the background image and Spider man PNG above it as shown below along with four guide lines.

Go to Edit > Puppet Warp

I’ve placed few pins at the following points as shown below.

Related Topics:
Mode

As already discussed, Mode determines the elasticity of our mesh. The three types of mode in Puppet Warp are Rigid, Normal and Distort.
- By default, it’s set to Normal where we can easily manipulate the position and pose of the subject. Distortion of Head with Mode set to Normal.

- Rigid: It has lesser elasticity than Normal. Although it wouldn’t feel as much of difference here.

- Distort: In this mode, the perspective and scale is changed around the pinned area.

Related Topics:
Density

It can have one of three values Fewer Points, Normal and More Points. These are self-explanatory by their names.

Related Topics:
Expansion

Expansion is used to have some extra space outside the pixels of the layer. In this case, I’ve used 10 pixel value for easy visibility. This value could also be placed in negative for contraction.

Related Topics:
Show Mesh
Show Mesh check box is a toggle to turn the mesh on or off. We’ve seen above it’s effect with this option checked. Below I’ve shown it’s effect with it turned off.

Related Topics:
Pin Depth

It is used in case, we have our subject’s body parts overlapping one another after distorting the image. Using these icons we can bring the pins controlling those parts on top or bottom of the overlap.
Rotate

Whenever we move a pin, other pins surround it will rotate according to adjust the distortion. By default it is set to Auto and if their any rotation, it’s numerical value will be shown in the following box.
In order to manually rotate a pin, select the pin then press and hold Alt key. It’ll show the rotation circle to rotate the selected pin.
Related Topics:
If we right-click on any pin, we will get the following additional options.

Almost all the options, in this menu are self-explanatory.
- Delete Pin: To delete selected pin.
- Set Auto Rotation: If the selected pin’s rotation is not set to Auto. It’ll be set to auto.
- Reset Depth: To reset the selected pin’s depth to it’s original value.
- Bring Forward: To bring the selected pin forward.
- Send Backward: To send the selected pin backward.
- Remove All Pins: To remove all the pins.
- Select All Pins: To select all the pins.
- Hide Mesh: To hide mesh of the Puppet Warp.
Related Topics:
- Eraser tool in Photoshop
- Foreground Color, Background Color, Stroke & Fill
- Blur, Sharpen & Smudge Tool in Photoshop
- Burn, Dodge & Sponge Tool in Photoshop
- How to use Gradient Tool in Photoshop