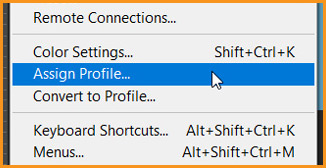
In this Photoshop Lesson, we’ll learn about ‘Assign Profile in Photoshop‘. Assign Profile command is found under Edit menu in Photoshop. I would recommend reading the following lessons before this one:
My name is Lalit Adhikari and we are at LTY. Let’s begin!
Related Topics:
Assign Color Profile
Photoshop always uses currently selected RGB or CMYK working space that you have set up in your color settings as an assumption for what those numbers are associated with an untagged document.

For example: if you’ve opened an image which is in sRGB, it will be assumed that it is in Pro Photo RGB if the image is untagged. And that’s simply because you may have Pro Photo RGB selected in your RGB working spaces in my color settings.

And the assign profile command allows us to override that. It provides a new scale or proper tagging of your document so that you can preview it correctly.
Related Topics:
Don’t Color Manage This Document
Removes the existing profile from the document. Select this option only if you are sure that you do not want to color manage the document.
After removing the profile from a document, the appearance of colors is defined by the application’s working space profile.
Working (Color Model: Working Space)
Assigns the working space profile to the document.
Profile
Here we can select different profile for our use. The application assigns the new profile to the document without converting colors to the profile space. This may dramatically change the appearance of the colors as displayed on monitor.
Related Topics:


